Discovering the Joy of Montessori-Style Learning Through DIY
Ever since my child showed interest in how things work, I knew I wanted to create a hands-on learning tool that was both engaging and educational. Inspired by Montessori principles, I embarked on building an activity board filled with gears and latches, aiming to foster fine motor skills and problem-solving abilities in a fun, tactile way.
What Makes a Montessori-Inspired Activity Board Special?
Designing this project, I realized that the beauty of Montessori tools lies in their simplicity and focus on empowering children to explore independently. Incorporating gears and latches not only makes the board interactive but also encourages logical thinking and patience. I drew from various sources, including expert advice from home decor DIY tips, to ensure my design was both safe and stimulating.
Step 1: Gathering Materials & Planning
My first step was to gather all necessary materials—wooden boards, small gears, latches, screws, and non-toxic paints. I spent time sketching the layout, balancing aesthetics with functionality. I wanted the gears to turn smoothly and the latches to be easy for small hands to manipulate. It was crucial to choose durable, child-safe components that would withstand frequent use.
My Experience with Building the Gears & Latches Section
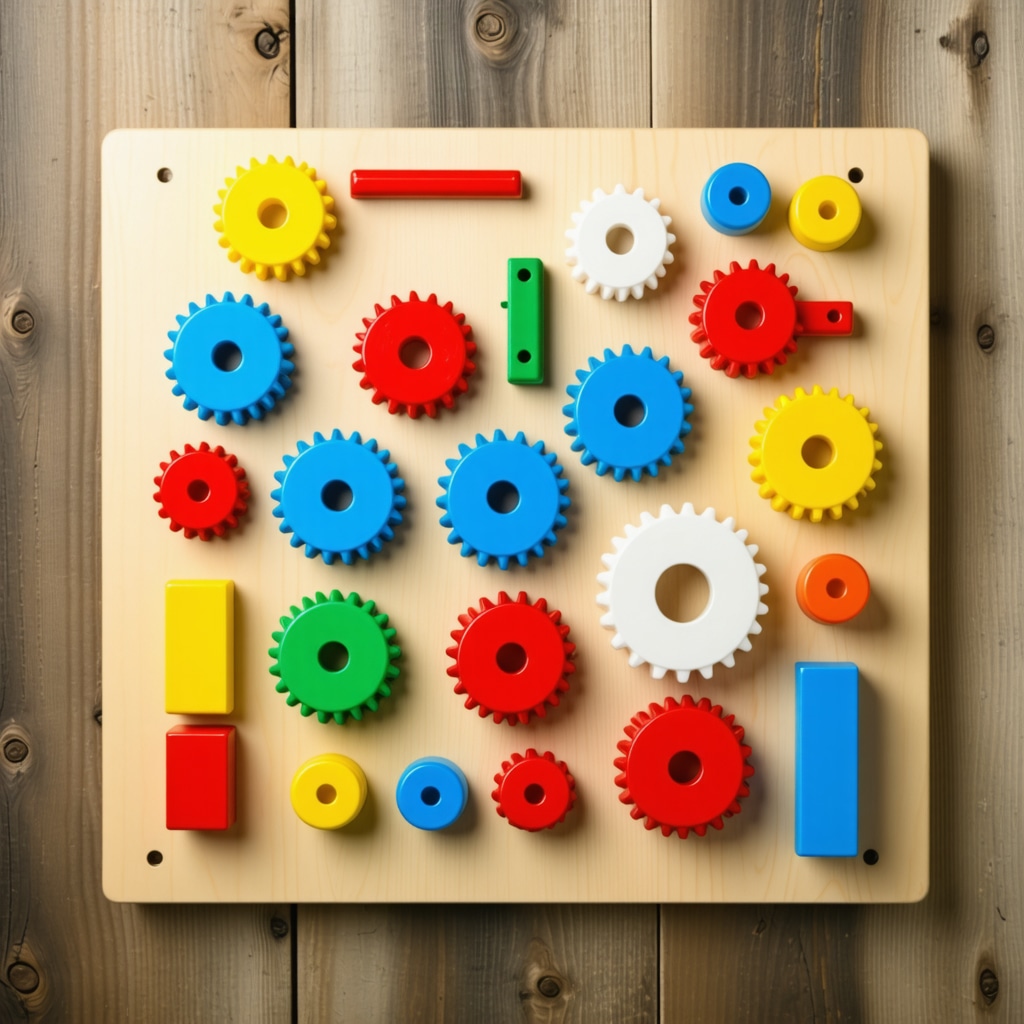
When I started assembling the gears, I encountered a few challenges aligning them perfectly. I found that using a template helped to mark the positions accurately. The gears I used were sourced from a reputable supplier, ensuring they rotated freely without catching. For the latches, I opted for simple, robust designs that I secured firmly onto the board. Watching my child interact with the finished section was incredibly rewarding.
Thinking About Child Development: Why Focus on Fine Motor Skills?
Building this activity board reminded me of the importance of fine motor skills in early childhood. According to child development experts, activities like turning gears and manipulating latches are vital for hand-eye coordination and dexterity. I also read that such DIY projects are excellent for encouraging independent play, which is essential for building confidence. For further insights, I recommend exploring crafts for all ages.
Curious About How to Customize Your Own Montessori Activity Board?
If you’re considering creating a similar project, think about customizing it with colors, themes, or additional sensory elements like textured fabrics or mirrors. Personal touches make the activity board more engaging and tailored to your child’s interests. Plus, it’s a wonderful way to spend quality time together while fostering their curiosity.
Would you like to see more of my DIY journey? Feel free to leave a comment or share your own experiences with Montessori-inspired crafts. For detailed guides on building projects suitable for all skill levels, check out step-by-step DIY guides.
Unveiling the Secrets to a Perfect Montessori DIY Activity Board
Building a Montessori-inspired activity board is more than just a craft—it’s a strategic educational tool that nurtures independence, motor skills, and problem-solving in children. As an experienced DIY enthusiast and early childhood education advocate, I’ve refined my approach to creating these engaging, durable, and safe learning stations. The key lies in thoughtful design, high-quality materials, and understanding developmental needs.
Why Prioritize Educational Value in Your DIY Design?
When designing a Montessori activity board, it’s essential to consider the developmental milestones it supports. Activities like turning gears, opening latch locks, and sorting objects directly enhance fine motor skills, hand-eye coordination, and cognitive resilience. Incorporating sensory elements such as textured fabrics or mirrors can further stimulate curiosity and multisensory learning. For inspiration on integrating creative solutions into your home, explore creative DIY crafts for home decor.
How Do You Ensure Safety and Durability?
Choosing non-toxic paints, child-safe hardware, and sturdy wood is crucial. I recommend sourcing components from reputable suppliers to guarantee smooth rotation and secure attachment. Using templates for precise alignment can prevent frustration and ensure smooth operation of moving parts. Regularly inspecting the finished board for loose components or wear-and-tear prolongs its lifespan and keeps playtime safe. To learn about advanced woodworking techniques, visit step-by-step DIY guides.
Incorporating Personal Touches for Lasting Engagement
Personalization elevates a simple activity board into a cherished family heirloom. Use themes that reflect your child’s interests—be it animals, space, or fairy tales—and add colorful elements or textured fabrics for sensory diversity. Custom labels or pictures can aid recognition and vocabulary development. Think about including additional features such as a small chalkboard or mirror for varied interaction. For more ideas on customizing DIY projects, see home decor DIY tips.
Can Your Design Grow With Your Child’s Development?
Absolutely. Designing modular activity boards allows you to swap out or add new elements as your child grows. For instance, starting with simple latches and progressing to more complex lock systems or puzzle elements keeps the challenge age-appropriate. This adaptability ensures your DIY project remains relevant and stimulating over several years. Curious about expanding your skills? Check out building complex kinetic toys.
Would you like to see a detailed tutorial on crafting specific components like gears or latches? Sharing your ideas or asking for advice in the comments can spark new inspiration. Also, consider exploring crafts for all ages for more engaging projects that complement your Montessori board.
Refining the Craft: The Art of Personal Touches and Advanced Techniques
Creating a Montessori-inspired activity board is a deeply personal journey that combines craftsmanship with educational intent. As I delved deeper into refining my designs, I realized that paying attention to the smallest details can significantly enhance a child’s engagement and learning experience. For instance, incorporating textured fabrics or subtle color variations can stimulate tactile and visual senses simultaneously, fostering multisensory learning. This approach aligns with research suggesting that multisensory activities bolster neural connections, aiding in better retention and understanding (source: creative DIY crafts for home decor).
Moreover, mastering advanced techniques such as precise hardware placement and secure fastening ensures the longevity and safety of the activity board. Using templates for complex lock systems or intricate gear arrangements can elevate the project from basic to professional-grade craftsmanship. This level of detail requires patience and a keen eye for symmetry, but the payoff is a durable, child-friendly piece that stands the test of time and vigorous play.
The Power of Personalization: Beyond Basic Themes
Personalization is where my creative vision truly comes alive. By customizing the board with themes that resonate with a child’s passions—be it space exploration, fairy tales, or animals—I have observed increased curiosity and repeated engagement. Adding elements like personalized labels, photos, or even small chalkboards can turn the activity board into a dynamic learning station that evolves with the child’s developmental stages.
For example, integrating a small mirror or sensory textures can introduce new sensory experiences that stimulate curiosity. The challenge lies in balancing aesthetic appeal with functionality, ensuring each element is accessible and safe. To achieve this, I often experiment with different materials and placements, constantly seeking the perfect harmony between form and function.
Question for the Curious: How Do You Ensure the Design Grows With Your Child?
This question has been central to my DIY journey. Modular designs allow for adaptability, enabling me to swap out or add new components as my child’s skills and interests develop. Starting with simple latches and gradually introducing more complex lock mechanisms keeps the challenge appropriate and engaging over years. This approach requires foresight and planning, but it transforms a static project into a lifelong educational tool.
If you’re eager to expand your skills or customize your project further, exploring advanced woodworking techniques or upcycling materials can offer exciting possibilities. For instance, transforming old wooden pieces into new, functional parts not only adds a rustic charm but also promotes sustainability—a core value in many DIY projects. You can find inspiration and detailed tutorials for such techniques on sites like step-by-step DIY guides.
Would you like to share your own experiences or ask questions about creating Montessori-inspired tools? Engaging with a community of fellow DIY enthusiasts can inspire new ideas and provide support. Feel free to leave comments or reach out through contact pages like Contact Us.
How Can Deep Customization Elevate Your Montessori DIY Projects?
Venturing beyond basic assembly, integrating advanced customization techniques transforms an ordinary activity board into a bespoke educational masterpiece. Personalization through thematic elements—such as space exploration, nature, or storytelling—can dramatically increase a child’s curiosity and investment in their learning environment. Incorporating textured fabrics, mirrors, or sensory overlays not only stimulates tactile and visual senses but also aligns with multisensory learning principles advocated by experts like Dr. Angeline Lillard, who emphasizes the importance of sensory-rich environments for cognitive development (source).
To truly elevate your project, master techniques such as precise hardware placement, secure fastening, and seamless integration of diverse materials. Using templates for complex gear arrangements or lock mechanisms ensures consistency and safety, while experimenting with upcycled or eco-friendly materials adds a layer of sustainability and uniqueness. These practices demand patience and a refined eye for detail, but they result in durable, engaging educational tools that can evolve with your child’s development.
What Are the Best Strategies to Make Your Montessori Activity Board Modular and Growth-Responsive?
Designing modular components is essential for creating a versatile learning station that adapts to a child’s growth. Implementing interchangeable elements—such as removable latches, adjustable puzzle pieces, or expandable gear systems—allows the activity board to stay challenging and relevant over years. Employing clever attachment methods like Velcro strips, magnetic connectors, or sliding tracks facilitates easy updates and customization. This approach not only maximizes the longevity of your DIY investment but also nurtures ongoing cognitive and motor development.
For inspiration and detailed guidance on building adaptable, high-quality Montessori tools, explore comprehensive DIY guides. Engaging with a community of enthusiasts can provide invaluable insights, feedback, and innovative ideas to refine your craft and ensure your project remains both functional and inspiring.
Why Is the Integration of Advanced Materials Critical for Safety and Durability?
Using high-grade, child-safe materials is paramount, especially when incorporating complex mechanical parts. Selecting non-toxic, eco-friendly paints, robust hardware, and sustainably sourced wood ensures the activity board withstands vigorous play while maintaining safety standards. Mastering techniques such as reinforced joints, strategic hardware placement, and proper sealing prevents wear and accidental detachment, which could pose risks. Regular inspections and maintenance—like tightening loose screws or replacing worn fabrics—are vital for long-term safety and functionality.
Deepening your understanding of advanced woodworking and finishing techniques, such as French polishing or natural sealing, can enhance the aesthetic appeal and lifespan of your project. Resources like advanced woodworking tutorials can guide you through these sophisticated processes, elevating your craftsmanship to professional standards.
How Can Personal Touches Foster a Lasting Connection Between Child and Learning Tools?
Personalization infuses your DIY activity board with unique character and emotional resonance. Custom labels, hand-painted illustrations, or photographs that reflect your child’s interests create a sense of ownership and curiosity. Incorporating sensory elements such as textured fabrics, mirrors, or small chalkboards provides multisensory engagement, which has been shown to bolster neural connections and enhance learning outcomes (source).
Experimenting with these details involves a delicate balance between aesthetics and safety; meticulous planning and testing are essential. By continuously evolving the design—adding new features or themes—you foster a dynamic learning environment that adapts to your child’s developmental milestones, making the activity board a treasured family heirloom and educational companion.
Would you like to delve deeper into advanced customization strategies or share your innovations? Engage with a community of passionate DIYers through comments or dedicated forums. For comprehensive tutorials on complex components like gear systems or lock mechanisms, visit detailed assembly guides. Your journey in creating meaningful, durable, and personalized Montessori tools is only just beginning—embrace the challenge and enjoy the rewarding process of craftsmanship and learning.
Things I Wish I Knew Earlier (or You Might Find Surprising)
Mastering Patience
One of the most unexpected lessons was how much patience building and customizing the activity board demanded. Initially, I underestimated the intricacies involved in aligning gears and securely attaching latches. It taught me that crafting educational tools isn’t just about the end result but appreciating the process and honing a meticulous mindset.
The Power of Personalization
Involving my child in the design process turned the project into a joyful collaboration. I realized that personal touches, like themed decorations or favorite colors, significantly boost engagement and emotional connection. It’s a reminder that DIY isn’t just functional—it’s heartfelt.
Safety First — Always
While I was eager to include complex mechanical parts, I learned the importance of prioritizing safety and durability above all. Choosing non-toxic paints, child-safe hardware, and testing each element thoroughly ensures the activity board remains a safe, long-lasting play companion.
Modularity Matters
Flexibility in Design
Designing modular components, such as removable latches or adjustable gear systems, allows the activity board to grow with my child’s skills. This adaptability kept the project relevant and engaging for years, making it a worthwhile investment of time and effort.
The Joy of Learning Through Doing
Building this DIY project reaffirmed my belief that hands-on creation fosters deeper understanding and appreciation for child development principles. Watching my child explore and learn from their personalized Montessori-inspired tool is truly rewarding.
Resources I’ve Come to Trust Over Time
- Montessori Parents: This website offers invaluable insights into Montessori principles and practical activities, helping me align my DIY projects with proven educational strategies.
- Woodworking for Beginners: An excellent resource for mastering the technical skills needed to create durable, safe wooden components for the activity board.
- Creative DIY Crafts: This platform inspires my creative ideas, especially for customizing and adding sensory elements that enhance engagement.
Parting Thoughts from My Perspective
Creating a Montessori-inspired activity board through DIY has been a transformative experience. It’s a perfect blend of craftsmanship, educational purpose, and personal touch that enriches my child’s learning environment. If you’re considering embarking on a similar journey, remember that patience, safety, and personalization are your best allies. I hope my story inspires you to craft something meaningful and fun for the little ones in your life. Feel free to share your experiences or ask questions—I’d love to hear your thoughts!