My Personal Journey into Solar Food Dehydration
It all started when I was looking for sustainable ways to preserve my garden harvests. I wanted an eco-friendly and cost-effective method, which led me to explore solar food dehydrators. After some research and a few experiments, I decided to build my own using upcycled parts. Sharing my experience might inspire you to try a similar project!
Gathering Upcycled Components for My Solar Dehydrator
The first step was sourcing materials. I scoured local thrift stores and salvage yards for old windows, scrap wood, and electronic components. I also repurposed a discarded solar panel I found online. Upcycling not only saved money but also added a personal touch to my project. I recommend checking out home improvement tips for more ideas on repurposing materials.
Designing a Simple and Effective Solar Dehydrator
My goal was a straightforward design that could be assembled with minimal tools. I built a wooden frame to hold the glass panels, creating a greenhouse-like effect. The solar panel powered a small fan I installed to circulate air. I also added a reflective surface to maximize sunlight exposure. This setup is perfect for beginners interested in DIY solar projects.
Step-by-Step: Building the Dehydrator
I started by constructing the frame, then attaching the upcycled glass panels to create a sealed chamber. Inside, I placed racks made from recycled wire mesh. The solar panel was connected to the fan, which I mounted on the back of the unit. I sealed all edges with weatherproof tape to prevent air leaks. It was a rewarding process that taught me a lot about DIY solar technology.
How Effective Is a DIY Solar Food Dehydrator?
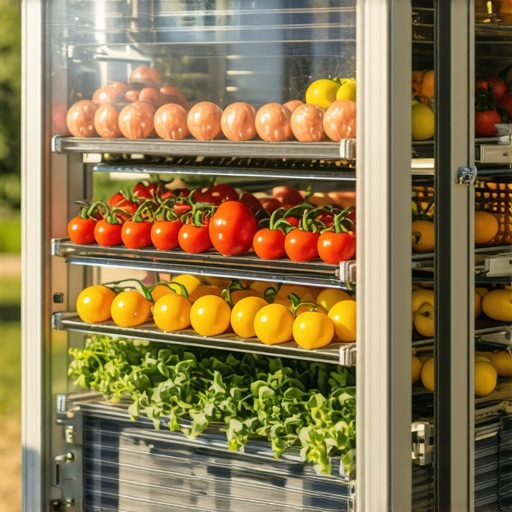
After a few weekends of testing, I found that my dehydrator could dry apples, herbs, and even tomatoes efficiently. The key was ensuring good airflow and maximizing sunlight. This project not only reduced my energy consumption but also allowed me to preserve my produce naturally. According to experts, solar dehydration is an excellent sustainable food preservation method.
What Are the Challenges and Limitations?
Of course, DIY projects have their hurdles. Weather variability can affect drying times, and the setup requires some maintenance. However, the benefits outweigh the inconveniences for me. I advise keeping an eye on weather patterns and ensuring your solar panel is clean and unobstructed.
If you’re curious about other eco-friendly DIY projects, I recommend exploring smart solutions for modern living. Feel free to share your own experiences or ask questions in the comments below—I love hearing about fellow DIY enthusiasts’ adventures!
Unlocking the Full Potential of Solar Food Dehydration
As an experienced DIY enthusiast, I’ve learned that optimizing solar food dehydrators involves more than just assembling the basic setup. To truly harness the sun’s power, consider integrating adjustable vents and reflective surfaces that can be repositioned based on weather conditions and sunlight angles. This flexibility allows for consistent drying results, even during variable weather patterns, and extends the usability of your dehydrator across seasons.
Enhancing Efficiency with Advanced Design Features
One crucial aspect often overlooked is insulation. Adding a layer of natural insulators, such as straw or recycled denim, beneath the wooden frame can maintain internal temperatures during cloudy days. Moreover, utilizing high-quality, UV-resistant glass panels can significantly improve durability and sunlight transmission, ensuring your dehydrator remains effective over the years. For guidance on complex DIY structures, I recommend examining building geodesic domes as they share similar principles of structural integrity and solar efficiency.
Optimizing Airflow and Temperature Control
Achieving ideal airflow is key to even dehydration. Installing oscillating or adjustable fans powered by small solar panels can regulate airflow, preventing mold and spoilage. An advanced technique involves creating a passive airflow system using chimney effects—hot air naturally rises and exits through vents, pulling in fresh air from below. This method reduces dependency on electrical components and enhances energy independence. For detailed DIY guidance, explore mechanical DIY projects that can inspire innovative airflow solutions.
Addressing Common Challenges with Innovative Solutions
Weather unpredictability remains a primary obstacle. To mitigate this, design your dehydrator with a retractable cover or rain shield. Additionally, incorporating a simple monitoring system—such as a temperature and humidity sensor connected to a solar-powered display—can alert you when conditions are suboptimal, allowing for timely adjustments. This approach echoes expert advice found in advanced troubleshooting techniques, emphasizing proactive maintenance and control.
What Are the Practical Steps to Scale Up a Solar Dehydration System for Larger Batches?
Scaling your solar dehydration setup involves careful planning of space, airflow, and sunlight exposure. Modular designs—using stackable trays or extendable frames—allow for increased capacity without sacrificing efficiency. Positioning multiple units in a sun-tracking array can maximize exposure and drying speed. As with any complex DIY project, consulting comprehensive guides like step-by-step DIY instructions ensures success at every stage.
If you’re passionate about eco-friendly projects or want to share your own solar dehydration innovations, I invite you to comment below or explore related DIY ideas at home improvement tips. Let’s continue pushing the boundaries of sustainable living through expert craftsmanship!
Refining My Solar Dehydration Technique: A Deep Dive into Optimization
Over the years, I’ve realized that the key to truly harnessing the sun’s power lies in nuanced adjustments rather than just basic assembly. One of my personal revelations was the importance of seasonal adaptability. During summer, I can afford to keep the vents more open, allowing maximum airflow, but in winter, I found that partially closing vents and adding reflective insulations like recycled Mylar sheets significantly improved drying efficiency. These small modifications, inspired by expert insights, have transformed my dehydrator into a more reliable tool year-round.
Personal Challenges and How I Overcame Them
Weather unpredictability remains a constant challenge. I once faced a week of cloudy skies, which threatened my dried herbs and fruits. Instead of abandoning my process, I experimented with insulating the dehydrator’s chamber using natural materials like straw and recycled denim. This kept the internal temperature stable enough to finish drying. The experience underscored how resilience and creative problem-solving are vital in DIY projects. If you’re interested in sustainable insulation methods, exploring natural insulation techniques can be incredibly rewarding.
Deeper Insights on Airflow and Energy Independence
One advanced technique I adopted was passive airflow using chimney effects. By designing a vertical vent at the back of the dehydrator, hot air naturally rises and exits, pulling in cooler air from below. This method reduces dependency on electrical fans, aligning perfectly with my goal of energy independence. Incorporating adjustable vents allows me to fine-tune airflow based on weather conditions, which is especially useful during shoulder seasons. For those interested in mechanical DIY solutions, I recommend reviewing mechanical design guides for inspiration.
Strategies for Scaling Up and Ensuring Consistency
Scaling my system involved modular designs—stackable trays and extendable frames that can be added or removed based on batch size. Positioning multiple units with sun-tracking mounts maximized sunlight exposure, significantly speeding up dehydration times. I also integrated simple monitoring sensors, powered by small solar panels, to track internal temperature and humidity. These sensors alert me when conditions drift from ideal, allowing preemptive adjustments. Such innovations echo advanced troubleshooting advice, emphasizing proactive maintenance and control, which I found invaluable for large-scale projects.
What’s the Most Nuanced Aspect of DIY Solar Dehydration That You’ve Mastered?
For me, it’s the delicate balance between insulation, airflow, and sunlight. Achieving an optimal environment means continuously fine-tuning these factors, much like an artisan perfects a craft. Learning to read the subtle cues—like slight temperature fluctuations or changes in airflow—has deepened my understanding of solar kinetics. It’s a rewarding ongoing journey, and I encourage you to experiment with these parameters to discover what works best in your local climate. If you want to explore more advanced DIY innovations, check out smart solutions for modern living. I’d love to hear about your own experiences—share your insights or questions below, and let’s continue this adventure together!
Refining Insulation Strategies for Year-Round Efficiency
One of the subtle yet impactful advancements I’ve discovered involves enhancing insulation within the dehydrator chamber. Natural insulating materials like recycled cellulose or sheep’s wool can be layered beneath the base, providing superior thermal retention without compromising eco-friendliness. Such improvements ensure consistent dehydration during colder months, extending the utility of your solar setup. Incorporating these materials requires minimal effort but yields significant gains in performance, especially when combined with reflective surfaces that direct sunlight more effectively.
Integrating Smart Monitoring for Precision Control
As my expertise deepened, I recognized the importance of precise environmental control. I integrated a solar-powered sensor system that monitors internal temperature and humidity levels, transmitting data wirelessly to a display or smartphone app. This innovation allows real-time adjustments, such as opening vents or toggling fans, optimizing drying conditions dynamically. Implementing such smart solutions, inspired by IoT principles, elevates the traditional solar dehydrator into a sophisticated, adaptive system—demonstrating how modern technology can elevate sustainable DIY projects.
How Can I Scale My Solar Dehydration System for Large Batches?
Scaling involves more than increasing the number of trays; it requires strategic planning of spatial arrangement and sunlight access. Modular, extendable frames enable you to add or remove units based on demand, maintaining high efficiency. Positioning multiple dehydrators with sun-tracking mounts can maximize exposure, reducing drying times significantly. Additionally, designing a central airflow channel that serves multiple units ensures uniform dehydration across larger batches. For comprehensive guidance, exploring detailed DIY instructions like step-by-step DIY guides can be invaluable.
Enhancing Durability with Advanced Materials and Techniques
Long-term durability is crucial for a sustainable setup. I experimented with UV-resistant, tempered glass panels that resist weathering and provide clearer sunlight transmission. Reinforcing joints with natural resins or eco-friendly sealants prevents leaks and maintains internal conditions. Applying a protective coating derived from plant-based oils can further shield wooden components from moisture and UV damage. These refinements, rooted in natural building methods, ensure your dehydrator remains functional and efficient through changing seasons and years of use.
What Are the Nuances of Achieving Perfect Airflow in Large-Scale Systems?
Mastering airflow involves understanding passive and active systems. I found that creating a chimney effect with adjustable vents at different heights allows for controlled hot air escape and fresh air intake, maintaining optimal internal conditions. Oscillating solar-powered fans can be synchronized with environmental sensors for automated regulation. Fine-tuning these parameters ensures even dehydration, preventing mold or spoilage. For mechanical innovation inspiration, reviewing advanced mechanical techniques provides valuable insights into passive airflow solutions.
Engaging with the Community for Continuous Innovation
Sharing experiences and troubleshooting with fellow DIY enthusiasts fosters continual improvement. I participate in online forums and local workshops, exchanging ideas on materials, design tweaks, and seasonal adjustments. Documenting my projects through detailed logs and videos has garnered helpful feedback, leading to innovative modifications like hybrid passive-active airflow systems. If you’re passionate about sustainable living, I encourage you to explore collaborative platforms and contribute your insights, as this collective knowledge accelerates progress and inspires new breakthroughs in solar dehydration technology.
Things I Wish I Knew Earlier (or You Might Find Surprising)
Mastering Seasonal Adjustments
One thing I learned the hard way was how much seasonal changes affect dehydration efficiency. In summer, I could open vents wide and get quick drying, but winter required insulating and adjusting airflow. It’s like tuning a musical instrument—you need to listen to the environment and adapt.
The Power of Reflective Surfaces
Using recycled Mylar sheets or aluminum foil behind the dehydrator significantly boosted sunlight reflection. I was amazed at how much extra heat and light this simple tweak added, especially on cloudy days. It’s a game-changer for optimizing solar exposure.
Insulation Makes All the Difference
Adding natural insulators like straw or recycled denim beneath the chamber kept internal temperatures stable during colder months. This small change extended my dehydrator’s usability beyond summer, making it a true year-round tool.
Passive Airflow Is a Hidden Gem
Designing chimney vents that use hot air to rise and pull in fresh air created a passive airflow system. It reduced my dependence on electric fans and made my setup more energy-efficient. It’s fascinating how natural physics can do so much work.
Monitoring Is Key
Installing simple solar-powered sensors to track temperature and humidity helped me fine-tune conditions in real-time. Now, I can intervene early if things drift off course, saving my herbs and fruits from spoilage.
Resources I’ve Come to Trust Over Time
- DIYKutak’s Step-by-Step Guides: Their comprehensive instructions for building solar dehydrators and other DIY projects have been invaluable, especially for beginners like me. I always recommend starting here to ensure a solid foundation.
- Instructables: A treasure trove of user-submitted projects that offer innovative ideas and troubleshooting tips. It’s inspiring to see how others solve common problems with creative solutions.
- Green Energy Times: For understanding the science behind solar heating and sustainable energy, this publication provides reliable insights and recent innovations. It’s helped me deepen my appreciation for eco-friendly tech.
Parting Thoughts from My Perspective
Exploring DIY solar food dehydration has been an eye-opening journey. The most valuable lesson I’ve learned is how small adjustments—like insulation, reflective surfaces, and passive airflow—can dramatically improve efficiency and reliability. This project not only saves energy but also connects me more deeply with my food preservation and sustainable living goals. If you’re curious to try it, don’t be afraid to experiment and adapt as you learn. I’d love to hear your experiences or answer any questions, so feel free to drop a comment below. Sharing these stories helps us all grow and innovate together in the realm of sustainable DIY projects.