My First Encounter with Custom Wood Frames: A Personal Story
It all started when I wanted to showcase a beloved photograph in a way that truly reflected my style. I realized that building a custom wood frame was the perfect solution. As someone who appreciates craftsmanship, I decided to dive into this project, eager to learn and create something unique.
Why Building Your Own Wooden Frame Can Be a Game-Changer
Crafting a custom wood frame not only offers a personalized touch but also allows you to choose materials and designs that complement your artwork perfectly. Through my experience, I discovered that DIY framing is a rewarding process that enhances both the aesthetic and sentimental value of your photos and art pieces. Plus, it’s more affordable than purchasing pre-made frames from stores.
Gathering Materials and Tools for a Seamless Assembly
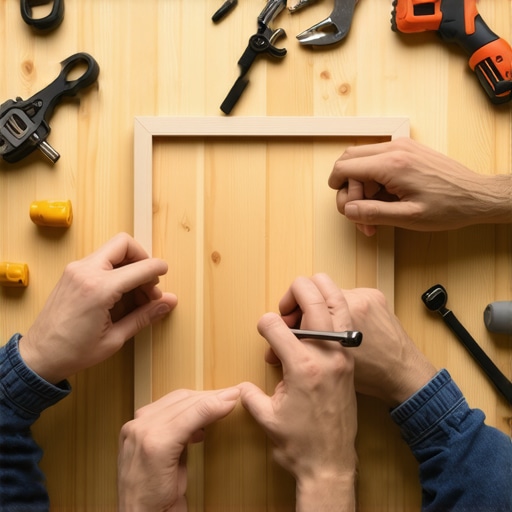
My first step was to select quality wood—pine, oak, or cedar are popular options. I also gathered a saw, clamps, a wood glue, a sanding block, and finishing supplies like stain or paint. For detailed guidance, I referred to comprehensive tutorials like DIY guides for all skill levels. These resources helped me understand the importance of precise measurements and proper techniques.
Step-by-Step: Assembling a Custom Wood Frame
How do I ensure my corners are perfectly joined?
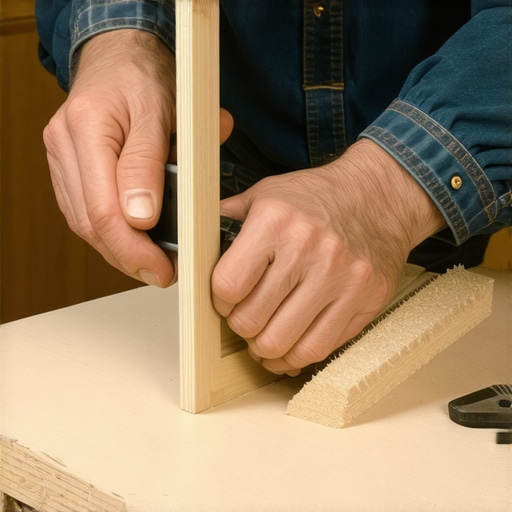
Achieving perfect mitered corners is crucial for a professional look. I used a miter saw to cut the corners at 45 degrees, then applied wood glue and clamps to secure them. Sanding the joints afterward eliminated any rough edges, resulting in a seamless finish. This process, though meticulous, made a significant difference in the overall appearance.
Next, I glued the frame pieces together and allowed them to set. Once dry, I sanded the entire frame to smooth out any imperfections. Finishing with stain or paint added a refined touch that matched my decor. I learned that patience and attention to detail are key to creating a frame that looks store-bought but feels handmade.
Reflections and Tips for Aspiring DIY Framers
Throughout this journey, I realized that customizing your own frame is not only practical but also deeply satisfying. It allows you to match your artwork’s personality and your home’s aesthetic perfectly. If you’re interested in exploring other creative projects, I recommend checking out DIY home decor ideas for inspiration.
What’s the most challenging part of building a custom wood frame, and how can I overcome it?
The most challenging part for me was ensuring the corners were perfectly mitered. Using a quality miter saw and practicing precise measurements made a huge difference. Patience and practice are essential—don’t rush the process. Watching tutorials and experimenting with scrap wood helped me improve my skills and confidence.
If you’re ready to start your own project, remember that every step teaches you valuable skills. Feel free to share your experiences or ask questions in the comments below. And for further inspiration, explore creative DIY home decor ideas.
Beyond Basic Miter Cuts: Advanced Techniques for Flawless Corners
While cutting 45-degree angles is the foundation of a good DIY frame, achieving truly seamless corners often requires additional finesse. As an experienced DIY enthusiast, I recommend using a **precision miter box with a micro-adjustment feature** for better accuracy. This tool allows micro-tuning cuts, ensuring your corners align perfectly without gaps. Additionally, employing **clamp blocks designed for frame assembly** can hold the corners at exactly 90 degrees during gluing, preventing skewed joints.
How Can I Reinforce Frame Joints for Durability?
To enhance the longevity of your custom frame, especially if it will hold valuable artwork, consider reinforcing the joints with **corner brads or nails** after glue has set. Small finishing nails driven into the corners add mechanical strength without compromising aesthetics. For a more professional touch, I use **reinforcing spline joints**—small strips of wood inserted into grooves cut into the mitered corners—that provide extra stability and a seamless appearance. This technique is particularly effective when working with heavier hardwoods like oak or cedar, which are prone to warping over time.
Choosing the Right Finish: Stain, Paint, or Clear Coat?
Finishing your frame isn’t just about color—it’s about protecting and enhancing the wood’s natural beauty. I often opt for a **clear polyurethane or varnish** to preserve the wood grain and provide a durable surface. If I want a pop of color, a **high-quality stain** paired with a protective topcoat ensures longevity and vibrancy. For a matte or satin finish that minimizes glare, I prefer water-based products, which are easier to work with and environmentally friendly. Remember, applying multiple thin coats with light sanding in between yields the best results.
What Are the Common Pitfalls and How Can Experts Avoid Them?
A common mistake in DIY framing is rushing the drying process of glue or finish, leading to crooked joints or smudges. As an expert, I always recommend giving each step ample time—clamps should stay in place for at least 30 minutes, and finishing coats should dry fully before handling. Additionally, measuring twice and cutting once is a mantra that prevents costly errors. When working with reclaimed or uneven wood, plan for some adjustments and test cuts to adapt your technique accordingly. These nuances are what elevate a good DIY project to an expert-level craft.
Explore Further: Can You Build a Fully Custom Frame with Unique Shapes or Materials?
Absolutely. For those looking to push their DIY skills further, experimenting with **curved or arched frames**, or incorporating **mixed materials like metal or acrylic accents**, can create stunning pieces. Advanced techniques like **mitered joints with inlay inlays** or **metal corner brackets** can add both strength and aesthetic appeal. If you’re interested in integrating tech elements, such as **LED lighting within the frame**, resources like creative DIY ideas can offer inspiration and guidance.
Have you faced any challenges in your DIY framing projects? Share your experiences or ask for tips in the comments below. For more in-depth tutorials on custom woodworking techniques, visit DIY guides for all skill levels.
Perfecting the Art of Frame Corners: A Personal Reflection on Advanced Techniques
Over time, I have come to realize that achieving truly seamless mitered corners in custom wood framing is both an art and a science. While the basics like using a quality miter saw and measuring meticulously are essential, I found that integrating advanced tools such as a precision miter box with micro-adjustment significantly elevates the quality of my work. These tools allow for tiny, precise adjustments that make the difference between a good fit and a perfect one, especially when working with hardwoods like oak or cedar.
How Can I Ensure My Joints Are Both Precise and Durable?
Beyond cutting accuracy, reinforcement plays a vital role. I often reinforce my joints with corner splines—small strips of wood inserted into precisely cut grooves—adding stability and a refined aesthetic. According to woodworking expert DiyKutak, these splines distribute stress evenly and help prevent warping over time. For added strength, I sometimes use corner brads or nails after glue has set, which provides mechanical reinforcement without compromising the seamless look.
Reinforcing Joints for Longevity and Aesthetic Excellence
Durability is as important as visual perfection. In my experience, combining glue and mechanical fasteners creates a resilient joint. When working with heavier woods, I opt for reinforcing techniques like dowels or even metal corner brackets hidden within the frame, which can be especially beneficial if the frame needs to support weight or withstand environmental changes. I have also experimented with advanced joinery methods that further enhance joint integrity while maintaining a clean appearance.
Finishing Touches: Protecting and Enhancing Your Frame
Choosing the right finish is crucial. I prefer clear polyurethane or varnish to highlight the natural beauty of the wood while providing a durable protective layer. For a richer look, staining followed by a topcoat can add vibrancy and depth. Applying thin coats with light sanding in between ensures a smooth, professional finish. Interestingly, I learned that some finishes, like eco-friendly earth-based paints, not only protect the wood but also align with my commitment to sustainable craftsmanship.
What Are Some Common Pitfalls in Advanced Wood Framing, and How Do I Avoid Them?
One of the most common mistakes I’ve encountered is rushing the drying process, which can lead to misaligned joints or weak bonds. I always give my glue ample time—at least 30 minutes under clamps—and avoid handling the frame until fully cured. Measuring multiple times before cutting is another tried-and-true tip that saves me from costly errors. Additionally, working with reclaimed or uneven wood requires careful planning and test cuts; I often make small prototype joints first to refine my technique. The key is patience and a willingness to learn from each project, which ultimately results in a flawless finished product.
Exploring Beyond the Basics: Creating Unique and Artistic Frames
If you’re eager to push your DIY skills further, experimenting with curved or arched frames or incorporating mixed materials like metal or acrylic can produce stunning, one-of-a-kind pieces. Advanced joinery techniques, such as mitered joints with inlays or metal corner brackets, add both strength and aesthetic appeal. For tech-savvy creators, integrating LED lighting within the frame is an exciting avenue. The possibilities are endless when you combine craftsmanship with creativity.
Have you experimented with advanced framing techniques or faced challenges in your projects? I invite you to share your experiences or ask questions in the comments below. For more inspiration and detailed tutorials, explore comprehensive DIY guides that cater to all skill levels, ensuring your journey in custom woodworking is both rewarding and enjoyable.

Elevating Your Craft: Mastering Complex Miter Joints and Inlay Designs
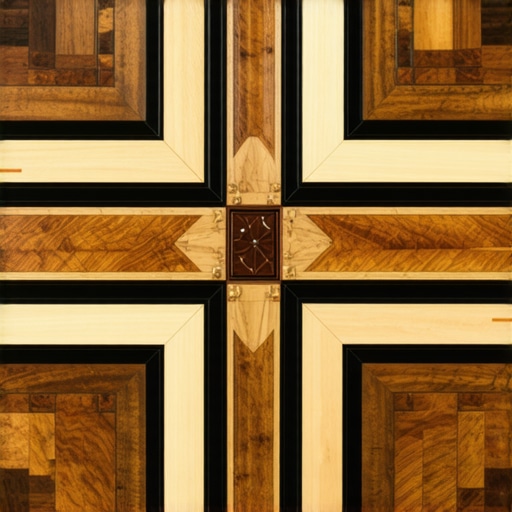
As I delved deeper into custom woodworking, I discovered that working with complex miter joints and intricate inlay designs could significantly enhance the aesthetic appeal and structural integrity of my frames. Utilizing specialized tools like a trammel arm for curved cuts and a precision router with inlay templates allowed me to achieve seamless curves and precise inlays, elevating my craftsmanship to an expert level. According to woodworking authority DiyKutak, mastering these techniques requires patience and attention to detail, but the results are truly rewarding.
How Do I Ensure the Stability of Multi-Material and Inlay-Decorated Frames?
Incorporating diverse materials like metal accents or contrasting woods introduces challenges related to stability and expansion. I reinforce the joints with hidden metal brackets and employ interlocking spline joints to distribute stress evenly. When working with inlays, I ensure proper adhesion and alignment by meticulously testing materials and using advanced template-guided routing techniques. These measures prevent warping and maintain the frame’s pristine appearance over time, especially in humid environments.
What Are the Best Finishing Strategies for Multi-Texture and Multi-Material Frames?
Finishing such complex pieces demands nuanced approaches. I prefer a layered finishing process—starting with a stain that highlights the wood grain, followed by a protective clear coat, and accentuated with metallic or textured inlays using specialized paints or patinas. Applying thin, even coats with high-quality spray finishes ensures a smooth, durable surface. The key is to balance aesthetics with protection, especially for heirloom-quality frames that are meant to last generations.
How Can I Incorporate Light Elements or Modern Tech into Traditional Wooden Frames?
Integrating LEDs or smart lighting systems into handcrafted frames opens new creative horizons. I embed micro-LED strips within the frame’s back cavity, concealed behind decorative inlays, for a subtle glow that enhances artwork without overpowering it. Using smart home automation solutions, I can control lighting effects via mobile apps or voice commands, making the frame both functional and artistic. This fusion of tradition and innovation exemplifies how professional craftsmanship can evolve with technology, creating unique pieces that serve both aesthetic and practical purposes.
Would You Like to Elevate Your DIY Skills? Join Me in Exploring Advanced Framing Techniques
If you’re passionate about pushing your DIY woodworking to new heights, I encourage you to experiment with these advanced methods. From complex joints to integrated tech features, each project teaches valuable skills and opens doors to creative possibilities. For comprehensive guidance tailored to all skill levels, I recommend reviewing these step-by-step DIY guides. Share your experiences or ask for personalized tips—I love connecting with fellow enthusiasts eager to master the art of bespoke framing. Let’s continue to craft, innovate, and inspire together!

Things I Wish I Knew Earlier (or You Might Find Surprising)
Patience Is Key
When I first started building custom wood frames, I underestimated how crucial patience is. Rushing through measurements or gluing can lead to misaligned corners, which are tough to fix later. Taking my time, especially during drying and finishing, truly made a difference in the final look.
The Power of Proper Tools
Investing in quality tools, like a precision miter box and a good saw, transformed my projects. I used to struggle with uneven cuts, but with the right equipment, achieving perfect angles became much easier and more satisfying.
Understanding Wood Types
Not all woods are created equal. I learned that choosing the right wood—like oak for durability or pine for affordability—affects not only the appearance but also the longevity of the frame. A little research beforehand saves a lot of frustration later.
Finishing Matters
Applying thin coats of stain or finish and sanding lightly in between layers resulted in a professional-looking surface. I was amazed how much a good finish enhances the natural beauty of the wood.
Small Details Make a Big Difference
Paying attention to details like perfect miters and smooth sanding can elevate your project from good to great. These small steps, though time-consuming, truly pay off in the end.
Don’t Be Afraid to Experiment
Trying different woods, finishes, or reinforcements like splines or corner brackets taught me a lot. Each project was a learning experience, and embracing experimentation made the process enjoyable and rewarding.
Resources I’ve Come to Trust Over Time
- DIY Guides for All Skill Levels: This resource provided clear, step-by-step instructions that helped me build my confidence in woodworking projects. I recommend it to anyone starting out.
- Wood Magazine: The articles and tutorials on this site deepen my understanding of different wood types and finishing techniques.
- Fine Woodworking: For advanced techniques and inspiration, this magazine is a treasure trove of expert advice and beautiful project ideas.
- YouTube Channels like Woodworking for Mere Mortals: Visual demonstrations helped me grasp complex techniques that are hard to explain in text.
Parting Thoughts from My Perspective
Building a custom wood frame has been a journey of patience, learning, and creativity. The satisfaction of creating something personalized and durable is unmatched. Whether you’re a beginner or looking to refine your skills, remember that every project is a step forward. If this resonated with you, I’d love to hear your thoughts or experiences. Feel free to share your stories or ask questions in the comments below. Happy crafting, and may your next project be both fun and fulfilling!

