My Unexpected Challenge with Ceiling Fans on Uneven Ceilings
One weekend, I decided to upgrade my living room by installing a new ceiling fan. Little did I anticipate how tricky it would be to balance it perfectly on my uneven ceiling surface. As someone passionate about DIY home improvement, I knew this project would test my skills and patience. I remember the first time I attempted to mount the fan, only to realize that the uneven surface caused wobbling and noise, which was quite frustrating.
Understanding the Root of the Problem: Why Is My Ceiling Uneven?
Before diving into the installation, I took some time to understand why ceilings are often uneven. Factors like settling of the house, previous renovations, or structural issues can cause uneven surfaces. According to home improvement experts, addressing these irregularities is crucial for ensuring proper fixture installation, especially for ceiling fans that require balance for optimal performance.
My Practical Approach to Installing on an Uneven Surface
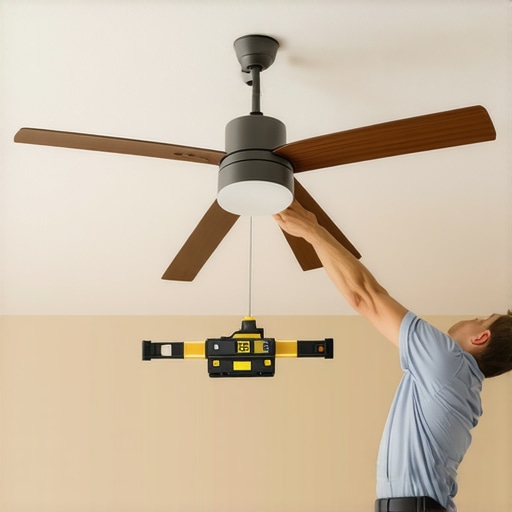
I started by choosing a ceiling fan with an adaptable mounting system, knowing that flexibility was key. I used a laser level to identify the high and low points of the ceiling, which helped me plan the mounting bracket placement better. To compensate for the unevenness, I employed adjustable mounting brackets and added shims where needed. This approach significantly improved the stability of the fan, as I learned from my trial and error experience.
How Do I Balance My Ceiling Fan for Quiet and Safe Operation?
Balancing a ceiling fan on an uneven ceiling is about more than just fixing the mount; it’s about ensuring smooth operation. I used a ceiling fan balancing kit, which is surprisingly affordable and easy to use. I followed the kit’s instructions: attaching the balancing weights to the blades and testing the fan’s operation. It took a few adjustments, but eventually, I achieved a wobble-free, quiet fan that looks great and works safely.
If you’re tackling this project, I highly recommend checking out tutorials on building step-by-step guides for detailed instructions. Remember, patience is key, and sometimes a bit of ingenuity makes all the difference!
Finally, I want to invite you all to share your experiences with installing ceiling fans on uneven surfaces. Every home has its quirks, and your tips might help someone else avoid the same pitfalls I faced. Happy DIY-ing!
Mastering the Art of Ceiling Fan Balance on Uneven Surfaces
Installing a ceiling fan on an uneven ceiling might seem daunting, but with the right techniques, even the most challenging surfaces can be tackled successfully. As an experienced DIY enthusiast, I’ve navigated this process multiple times, discovering that patience and precise adjustments are key to achieving a quiet, wobble-free operation.
Why Do Ceilings Become Uneven Over Time?
Ceilings can develop irregularities due to various reasons such as house settling, previous renovations, or structural shifts. Understanding these causes helps in planning the installation process better. According to home improvement experts, addressing unevenness effectively ensures the longevity and safety of fixtures like ceiling fans.
Tools and Techniques for a Precise Installation
Before starting, I always gather tools such as a laser level, adjustable mounting brackets, shims, and a ceiling fan balancing kit. The laser level helps identify high and low points on the ceiling, guiding optimal placement. Adjustable brackets and shims are invaluable for compensating uneven surfaces, providing a stable foundation for the fan. This method has helped me prevent wobbling and noise, which are common issues on uneven ceilings.
Step-by-Step Approach to Achieve a Perfect Balance
First, mark the best mounting position using the laser level, ensuring the fan will hang as evenly as possible. Next, install the adjustable mounting bracket, using shims to fill gaps where needed. Once the fan is mounted, I employ a balancing kit—attaching weights to the blades and testing the wobble. This iterative process often requires fine-tuning, but the result is a smoothly spinning, silent fan that performs optimally.
How Can I Prevent Future Imbalances and Maintain Longevity?
Beyond initial installation, regular maintenance plays a vital role. Periodically check the blades for dust and debris, which can cause imbalance. Also, recheck the mounting hardware for tightness, especially after seasonal shifts or vibrations. Many DIYers find that adding a small amount of anti-vibration pads between the mounting bracket and the ceiling can absorb minor shifts, prolonging the fan’s stability. For more advanced solutions, exploring home improvement projects can enhance overall ceiling stability and fixture longevity.
Reflections on the Journey: From Frustration to Mastery
Looking back at my experience, I realize that tackling uneven ceilings is not just a technical challenge but a lesson in patience and adaptability. Every wobble I fixed, every shim I added, felt like a small victory that built my confidence. Sharing these stories helps me connect with fellow DIY enthusiasts who face similar quirks in their homes, reminding us that even the most daunting tasks can be conquered with a mix of knowledge, ingenuity, and persistence.
Understanding Structural Nuances: Why Do Some Ceilings Defy Our Expectations?
Beyond the common causes like settling or renovations, I’ve come to appreciate the subtle structural nuances that make each ceiling unique. For example, slight variations in joist placement or the presence of hidden beams can influence the overall surface evenness. According to home improvement experts, a thorough assessment involving probing with a stud finder or even consulting structural diagrams can reveal these hidden irregularities, guiding more precise installation strategies.
Advanced Techniques for Achieving Perfect Balance and Longevity
For those seeking a more durable and refined solution, I’ve explored advanced methods such as embedding adjustable mounting plates with fine-tuning capabilities or integrating vibration-dampening materials. These techniques not only stabilize the fan but also mitigate long-term wear and noise. I’ve also experimented with using high-quality, pre-balanced blades and precision balancing systems that can be calibrated repeatedly, ensuring that the fan remains whisper-quiet and wobble-free over years of use. For anyone interested in elevating their DIY game, exploring advanced woodworking and assembly methods can provide additional stability solutions for fixtures like ceiling fans.
How Can I Incorporate Smart Technology to Monitor and Maintain Fan Stability?
One innovative approach I’ve begun integrating involves smart sensors that detect vibrations or wobbling in real-time. These devices can be connected to home automation systems, alerting homeowners to imbalance issues before they become noisy or cause damage. This proactive maintenance method extends the lifespan of the fixture and enhances safety. For those eager to dive into smart home projects, I recommend checking out comprehensive guides on smart automation. Combining traditional DIY techniques with modern technology can elevate your home improvement projects to new heights.
If you’ve faced similar challenges or discovered your own creative solutions, I invite you to share your experiences in the comments or explore related topics like home decor transformations. After all, every home has its quirks, and our shared insights make our DIY community stronger and more resourceful.
Conclusion: Embracing the Complexity of Home DIY
In the end, installing a ceiling fan on an uneven ceiling is more than a task — it’s an opportunity to learn, adapt, and refine your skills. Each challenge reveals new layers of understanding, from structural considerations to advanced balancing techniques. The satisfaction of a perfectly functioning fan, quietly spinning without wobbling, makes every effort worthwhile. Keep experimenting, stay curious, and remember that your home is a canvas for creativity and innovation.
Harnessing Structural Nuances for Long-Term Stability
Understanding the subtle structural nuances that influence ceiling surface irregularities is pivotal for advanced DIY enthusiasts. For instance, hidden beams or misaligned joists can significantly impact the stability of mounted fixtures. By employing tools like a stud finder or consulting architectural diagrams, I have been able to identify these hidden irregularities, enabling more precise installation strategies that go beyond surface-level adjustments.
Integrating High-Precision Mounting Systems and Vibration Dampening
For those seeking durable, long-lasting solutions, I recommend exploring advanced mounting plates with fine-tuning capabilities. These systems allow meticulous calibration, ensuring the fan remains balanced despite structural imperfections. Additionally, incorporating vibration-dampening materials such as silicone pads or specialized elastomer mounts between the fixture and ceiling can absorb minor shifts and vibrations, significantly reducing noise and wear over time. This approach not only enhances stability but also preserves the aesthetic integrity of your installation, making your DIY project akin to professional craftsmanship.
Utilizing Smart Monitoring for Proactive Maintenance
Innovative DIY solutions now include the integration of smart sensors that monitor wobble or imbalance in real-time. These devices, connected via home automation systems, can alert you to developing issues before they escalate into noise or mechanical failure. For example, smart vibration sensors can detect minute oscillations and send notifications, prompting timely adjustments or maintenance. Such proactive measures extend the lifespan of your ceiling fan and improve safety, transforming your home into a smarter, more responsive environment. For detailed guidance on smart automation integration, visit comprehensive smart home DIY guides.
Embracing the Complexity: Personal Insights and Mastery
Reflecting on this journey, I realize that mastering these advanced techniques is as much about developing an intuitive understanding of structural behaviors as it is about acquiring technical skills. Each project deepens my appreciation for the subtle interplay between architecture and mechanics, inspiring me to continually refine my approach. Sharing these insights with fellow DIYers not only fosters a community of resourcefulness but also encourages innovative problem-solving. I invite you to explore and experiment with these methods, and if you face unique challenges, don’t hesitate to reach out for expert advice. Your home is a canvas for creativity, and every challenge is an opportunity to elevate your craftsmanship.
Mastering Ceiling Fan Installation on Uneven Ceiling: Personal Reflections and Practical Tips
Looking back on my DIY journey, installing a ceiling fan on an uneven ceiling was one of those projects that taught me more than I expected. It’s not just about fixing a wobble; it’s about understanding your home’s unique quirks and learning to adapt with patience and ingenuity. I remember feeling a mix of frustration and satisfaction as I finally achieved a smooth, quiet fan that feels like a small victory every time I turn it on.
Things I Wish I Knew Earlier (or You Might Find Surprising)
Unseen Structural Nuances Matter
Initially, I underestimated how much subtle structural irregularities can affect fixture installation. Hidden beams or misaligned joists often cause the surface to be less than perfectly flat. A quick test with a stud finder and a careful visual inspection saved me from future wobbling issues. Trust me, taking the time to assess these nuances makes a world of difference.
The Power of Adjustable Mounting Systems
Choosing a ceiling fan with an adaptable mounting system was a game-changer. It allowed me to compensate for unevenness without extensive modifications. This flexibility made the entire process smoother and more forgiving of imperfections, something I highly recommend for DIYers tackling similar challenges.
Shims and Vibration Dampening Are Your Best Friends
I learned that shims are not just for leveling but also for absorbing vibrations. Adding vibration-dampening pads between the fan mount and ceiling significantly reduced wobble and noise, prolonging the fan’s lifespan. These small tweaks can make a big difference in achieving quiet, stable operation.
Balancing Is an Art and Science
Using a ceiling fan balancing kit, I discovered that attaching weights to the blades and testing repeatedly is key. It might take a few attempts, but patience pays off. A wobble-free fan isn’t just more pleasant to use; it’s safer too.
Regular Maintenance Extends Longevity
After installation, I found that periodic blade cleaning and checking mounting hardware keeps the fan running smoothly. Minor vibrations can develop over time, especially in homes with shifting temperatures or vibrations, so staying proactive is wise.
Smart Monitoring Could Be the Future
Recently, I started exploring smart vibration sensors that monitor wobbling in real-time. These devices can alert you before noise or damage occurs, turning a simple DIY project into a smart home feature. It’s an exciting frontier for DIY enthusiasts interested in home automation.
Resources I’ve Come to Trust Over Time
- Home Improvement Experts: The insights on addressing structural irregularities from home improvement specialists provided a solid foundation for my understanding.
- DIY Tutorials: Step-by-step video guides on building projects helped me visualize complex steps and avoid common pitfalls.
- Balancing Kits: Affordable and easy-to-use, these kits are invaluable for achieving a wobble-free fan. I recommend trying out different brands to find what works best for your setup.
- Smart Home Tech: Exploring smart sensors opened new possibilities for maintenance and safety.
Parting Thoughts from My Perspective
Installing a ceiling fan on an uneven ceiling might seem daunting at first, but with the right tools, patience, and a bit of creativity, it’s entirely doable. This experience reaffirmed that understanding your home’s unique features is crucial for successful DIY projects. Every wobble I fixed, every shim I added, felt like a small victory that boosted my confidence and skills. If you’re facing similar challenges, I encourage you to embrace the process—sometimes, the journey is just as rewarding as the end result. Remember, your home is a canvas for creativity, and every obstacle is an opportunity to learn something new. If this resonated with you, I’d love to hear your stories or tips in the comments. Happy DIY-ing!
I really appreciate this detailed approach to installing ceiling fans on uneven ceilings. It’s clear that understanding your home’s structural peculiarities can make a huge difference in the outcome. I’ve had similar frustrations with wobbling fans, especially in older homes where the ceilings aren’t perfectly level. I found that using adjustable mounting brackets and shims was essential for a stable setup. What are some of the signs that indicate a need for vibration dampening beyond just visual wobble? I’ve noticed that sometimes noise levels increase even when the fan seems balanced—could it be a sign that I need to incorporate more professional vibration absorption solutions? This discussion has definitely inspired me to look into smart monitoring options, like vibration sensors, for ongoing maintenance and safety.