My Journey with Leather Repairs: A Personal Touch
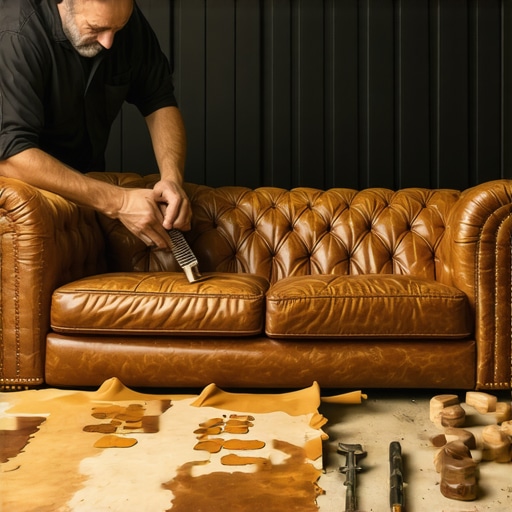
Recently, I found myself staring at a beloved leather sofa that had seen better days. A few years ago, I invested in a beautiful vintage leather armchair, but time and everyday wear had taken a toll. Instead of replacing it, I decided to roll up my sleeves and learn how to restore damaged leather upholstery myself. This experience turned into a rewarding project, blending patience with practical techniques I want to share with fellow DIY enthusiasts.
Understanding Leather’s Nature: Why Restoration Matters
Leather, being a natural material, ages with use, developing cracks, fading, or scratches. Recognizing the type of damage was my first step. I learned that surface scratches can often be fixed, but deep cracks might require more intensive treatment. I turned to expert resources, such as professional restoration techniques, to guide my approach. Trustworthiness in DIY projects is crucial, especially with valuable furniture.
Step-by-Step Techniques I Used to Bring My Leather Back to Life
Can I really fix deep scratches and cracks myself?
Absolutely! The key is to use the right products and patience. I started with cleaning the surface thoroughly using a mild leather cleaner, which removed dirt and oils that could hinder adhesion. Then, I applied a leather filler with a palette knife to fill in cracks and scratches. Once dried, I gently sanded the area for a smooth finish. To match the original color, I used a high-quality leather dye, blending shades gradually for a natural look. Sealants and conditioners followed, which moisturized the leather and restored its suppleness.
Throughout the process, I was careful to follow manufacturer instructions, ensuring a professional result. Remember, restoring leather isn’t just about fixing appearance; it’s about preserving its durability and character.
What Do I Wish I Knew Before Starting?
If I had known earlier how crucial proper cleaning and choosing the right products are, my results would have been even better. Also, patience is vital—rushing can lead to uneven finishes. I recommend practicing on a hidden area first to gauge how the leather reacts. For those interested in more advanced techniques, exploring specialized restoration methods can be beneficial.
Share Your Leather Restoration Stories
Have you ever tackled a leather furniture project? I’d love to hear your experiences or tips. Feel free to leave a comment below or explore more creative solutions for your home at this resource. Remember, with the right knowledge and a bit of patience, restoring damaged leather can be a satisfying and cost-effective DIY adventure.
Mastering Leather Repair: Techniques That Stand the Test of Time
When it comes to restoring leather furniture, understanding the nuances of the material is crucial. As an experienced DIY enthusiast, I’ve learned that each crack or scratch tells a story, and with the right approach, you can bring your piece back to life. This involves more than just surface fixes; it’s about preserving the leather’s integrity and character for years to come.
Assessing Damage: What Are the Deepest Challenges?
Deep cracks and severe fading may seem daunting, but they’re often manageable with advanced restoration techniques. For instance, using a high-quality leather filler, such as those recommended by professional restoration experts, allows you to fill in imperfections seamlessly. It’s essential to match the filler color closely with the original leather, which can sometimes require custom blending of dyes.
Layering and Finishing: The Art of Seamless Repair
Once the filler dries, the next step involves smoothing the surface with fine-grit sandpaper, ensuring an even finish. This step is vital—it prevents the repair from standing out and maintains the leather’s natural texture. Applying a leather dye in thin, controlled layers allows for a natural look, especially when blending shades gradually. Sealants and conditioners, like those found at home decor DIY resources, help lock in color and restore suppleness, making your furniture look vibrant and well-maintained.
Can Leather Be Restored Without Professional Tools?
Absolutely. Many DIYers underestimate the power of quality products and patience. For instance, exploring advanced techniques in digital fabric design can inspire creative approaches to leather dyeing and finishing. The key is to use tools like fine brushes, soft cloths, and even sponge applicators for precise work. Over time, mastering these techniques can elevate your DIY leather projects from basic repairs to professional-grade restorations.
What’s the Most Overlooked Step in Leather Restoration?
Many DIYers overlook the importance of proper cleaning before starting repairs. A thorough cleaning removes oils, dirt, and old conditioners that can impede adhesion and color matching. Using a specialized leather cleaner ensures the surface is prepared optimally. Additionally, practicing on hidden areas first can help you gauge how the leather reacts to dyes and fillers, minimizing mistakes on visible parts. If you’re interested in exploring more advanced restoration methods, resources like specialized restoration techniques can provide valuable insights.
Join the Conversation: Share Your Restoration Successes
Have you tackled a leather repair project? I invite you to share your experiences, challenges, or tips in the comments below. Sometimes, the best advice comes from fellow DIY enthusiasts who have faced similar hurdles. And if you’re eager to expand your skills, check out more creative solutions at this inspiring resource. Remember, patience, proper tools, and a keen eye for detail are your best allies in transforming worn leather into a stunning centerpiece of your home.
Deepening the Craft: Embracing the Nuances of Leather Repair
As I ventured further into the world of leather restoration, I realized that each project is a unique puzzle, demanding not just the right tools but also an intuitive understanding of the leather’s story. The subtle differences in grain, age, and previous treatments influence how I approach repairs, making every successful restoration a personal triumph. For instance, when working on vintage pieces, I often find that a combination of gentle cleaning with natural solutions and layered dyeing techniques produces the most authentic results. This process requires patience and an eye for detail, encouraging me to develop a more refined touch over time.
Addressing Complex Damage: When Surface Fixes Aren’t Enough
Deep cracks, severe fading, and structural weaknesses challenge even seasoned DIYers. I discovered that integrating advanced techniques like using a leather adhesion primer before applying fillers can significantly improve durability. Moreover, employing heat-setting methods to activate specific dyes allows for better color penetration and matching, especially on aged or heavily worn leather. Expert resources, such as professional restoration guides, have been invaluable in mastering these sophisticated approaches. The key is patience—allowing each layer to cure thoroughly and assessing the repair under different lighting conditions ensures a seamless finish.

Understanding the leather’s unique characteristics and applying advanced techniques can transform a worn piece into a restored masterpiece, preserving its character while enhancing its longevity.
The Art of Seamless Blending and Finishing
One of the most satisfying aspects of advanced leather repair is achieving a flawless transition between the repaired area and the original surface. I learned that using micro-fine brushes and controlled dye application in thin layers helps prevent visible boundaries. Additionally, employing a transparent leather sealant not only protects the dye but also imparts a natural sheen that mimics the original finish. This meticulous process transforms a basic repair into a work of art, elevating the entire piece beyond mere restoration. Exploring home decor DIY resources has inspired me to incorporate these techniques into my projects creatively.
Sharing the Journey: Inviting Fellow Enthusiasts to Reflect and Learn
Every leather repair I undertake enriches my understanding and appreciation for this versatile material. I invite you, dear reader, to share your own experiences with complex restoration projects. Perhaps you’ve discovered innovative methods or faced unexpected challenges—your stories can inspire others to deepen their skills. Feel free to comment below or visit this community hub for more ideas. Remember, mastery in DIY leather restoration is a continuous journey, where each project unveils new insights and techniques that bring your craftsmanship to the next level.
Exploring the Intricacies of Leather Aging and Preservation
As I delved deeper into leather restoration, I realized that understanding the aging process of leather is paramount. Each crack, fade, or discoloration narrates a story of time and usage. Recognizing these subtleties enables a more nuanced approach, ensuring that restoration efforts respect the piece’s history while enhancing its durability. For example, aged leather often develops a patina that can be preserved or even accentuated through specialized techniques, as detailed in expert guides like those from professional restoration resources. This deep appreciation for leather’s natural evolution informs my restorative process, blending preservation with renewal.
Utilizing Advanced Fillers and Color-Matching for Seamless Repairs
When confronting deep cracks or severe fading, I discovered that employing high-quality leather adhesives combined with precision color-matching dyes can produce astonishing results. The process involves applying a leather adhesion primer to secure fillers and prevent future deterioration. Subsequently, I meticulously blend dyes, sometimes creating custom shades to match the original leather tone. Techniques borrowed from restoration experts have shown me that patience and layered application are essential for achieving a flaw-free finish. This method not only restores appearance but also fortifies the leather against future wear.
Refining Finishing Touches: Micro-Detailing and Protective Coatings
Post-repair, the finishing stage becomes crucial. I employ micro-fine brushes to apply transparent sealants, which serve to lock in dyes and provide a subtle sheen that mimics the leather’s original luster. Additionally, conditioning treatments infused with natural oils replenish moisture and suppleness, extending the life of the piece. For those interested in elevating their craft, exploring home decor DIY resources can inspire innovative finishing techniques that blend aesthetics with preservation.
Addressing Complex Damage: When Surface Repairs Aren’t Sufficient
Deep structural damage requires a strategic approach. I have found that employing leather adhesion primers before filler application significantly enhances durability. Moreover, heat-activated dyes allow for better color penetration, especially on heavily worn or aged leather. This sophisticated technique, detailed in professional guides, involves carefully controlling temperature to achieve uniform dye absorption. The result is a resilient, seamlessly repaired surface that preserves the leather’s integrity and character.
What are the most effective methods for restoring heavily damaged vintage leather furniture?
In my experience, combining advanced filling techniques with heat-activated dyes and protective sealants produces the most authentic and durable restorations. Practicing on hidden sections first minimizes errors and helps refine color matching. Additionally, integrating natural restoration remedies, such as beeswax-based conditioners, can complement synthetic products for a holistic approach. For a comprehensive guide, I recommend exploring detailed tutorials on digital design innovations that inspire creative dyeing solutions.
If you’re eager to elevate your leather repair skills and tackle complex projects with confidence, I invite you to share your experiences or ask questions. Your insights can inspire others and deepen the collective knowledge of our DIY community. Engaging with specialized resources and practicing patience are the keys to mastering this sophisticated craft, transforming worn pieces into timeless treasures.
Things I Wish I Knew Earlier (or You Might Find Surprising)
The Power of Patience
One of the biggest lessons I learned is that patience truly makes a difference. Rushing through the repair process often leads to uneven finishes or missed details. Taking the time to let each layer dry and cure results in a much more professional look, transforming worn leather into something that feels almost new.
Cleaning is Crucial
Before diving into repairs, a thorough cleaning can never be overstated. I used to underestimate how much dirt and oils can interfere with dye adhesion and filler bonding. Now, I always start with a high-quality leather cleaner, which sets a solid foundation for successful restoration.
Matching Colors Can Be an Art
Achieving a seamless color match was initially daunting. I found that blending dyes gradually and testing on hidden areas helps create the most natural look. Sometimes, a little custom mixing makes all the difference in preserving the piece’s character.
Tools Make a Difference
Investing in the right tools, like fine brushes and soft cloths, elevates the quality of your work. DIY projects become much more satisfying when you have the proper equipment, and it’s worth the initial investment.
Don’t Be Afraid to Practice
Practicing on less visible sections before working on the main piece can save you from costly mistakes. It’s a great way to get comfortable with products and techniques without risking the appearance of your valuable furniture.
Respect the Leather’s Story
Every scratch or crack has a story. Embracing the leather’s natural aging process, rather than trying to erase it completely, allows you to preserve its unique charm while restoring its integrity.
Resources I’ve Come to Trust Over Time
- Professional Restoration Guides: Sites like restoration experts have provided invaluable step-by-step techniques, especially for complex damages. I recommend them for anyone serious about leather repair.
- High-Quality Leather Dyes: Brands with good reviews have helped me achieve better color matching. Trustworthy suppliers often have extensive color options and tutorials.
- Leather Conditioners and Sealants: Natural oils and protective coatings from reputable brands keep the leather supple and protected for years to come. These are essential for long-lasting results.
Parting Thoughts from My Perspective
Restoring leather is more than just fixing surface imperfections; it’s about respecting the material’s history and character. With patience, the right tools, and a willingness to learn, you can turn worn, damaged pieces into stunning, durable furniture that tells a story. I encourage you to embrace the process, experiment with techniques, and most importantly, enjoy the journey of bringing your beloved leather items back to life. If this resonated with you, I’d love to hear your thoughts or see your projects. Feel free to share your experiences in the comments or explore more creative DIY solutions at this resource.