My Unexpected Encounter with an Old Cast Iron Bathtub
It all started when I moved into a vintage house and discovered a neglected cast iron bathtub in the master bathroom. The surface was chipped, stained, and looked like it hadn’t been touched for decades. I was initially overwhelmed, but I saw potential—a project that could bring new life into my home.
Why Restoring a Cast Iron Bathtub Became My DIY Passion
Through my research and personal experience, I learned that restoring these sturdy fixtures not only saves money but also adds a unique charm to your bathroom. I delved into various tutorials and tips, discovering that with patience and the right materials, anyone can refinish a cast iron tub. I was surprised to find that many experts emphasize proper preparation and using high-quality refinishing products for a durable finish (source).
Step-by-Step Journey: From Dull to Dazzling
What are the essential tools and materials I need for this project?
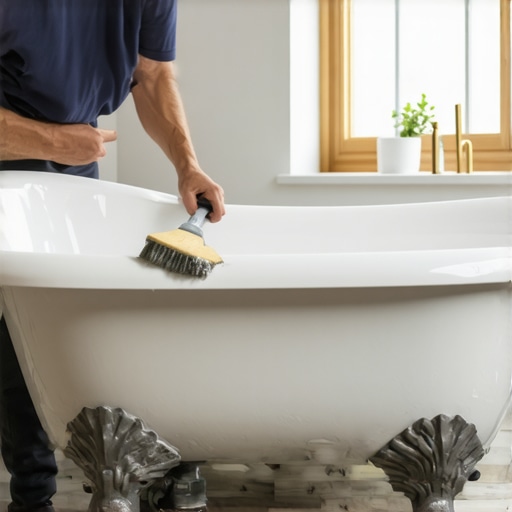
First, I gathered everything from chemical strippers, sanding pads, etching primers, to professional-grade refinishing paints. Safety gear like gloves and masks was also crucial. I found that patience during cleaning and sanding was key to achieving a smooth surface that would accept the new finish.
Revealing My Personal Tips for a Flawless Finish
One tip I wish I knew earlier was the importance of etching the surface properly—this creates a better bond for the paint. I also learned that applying multiple thin coats of refinishing paint, allowing adequate drying time, results in a sleek, long-lasting surface. I documented my entire process, which I now share on my blog as a step-by-step guide for beginners eager to try this at home.
Curious About the Durability and Maintenance?
Refinished tubs can last for years if maintained properly. I recommend gentle cleaning with non-abrasive products and avoiding harsh chemicals. Regular inspections ensure the surface remains pristine, and touch-ups can be done easily when needed.
Would I Do It Again? Absolutely!
Restoring my cast iron bathtub was a rewarding experience. It saved me money, added a vintage charm, and gave me a sense of accomplishment. If you’re contemplating a similar project, don’t hesitate—start small, follow detailed tutorials, and enjoy the transformation. Feel free to share your own restoration stories in the comments below or explore more creative DIY ideas on my blog, like building custom garden structures or upcycling old materials.
For further insights, I recommend checking out this comprehensive restoration guide.
Unlocking the Secrets to a Durable Cast Iron Tub Finish
Restoring a cast iron bathtub is both an art and a science. As an expert in DIY home improvement, I can tell you that understanding the nuances of surface preparation, material selection, and application techniques is vital for achieving professional-looking results that last. From tackling stubborn rust to selecting the right refinishing products, every step requires precision and patience.
Why Proper Surface Preparation Is the Foundation of Success
Before applying any paint or coating, meticulous cleaning and sanding are essential. Removing all traces of old paint, rust, and grime not only ensures adhesion but also prevents future peeling or corrosion. I recommend using a combination of chemical rust removers and abrasive pads for optimal results. Additionally, etching primers create a microscopic bond that enhances durability—something I learned firsthand from comprehensive guides such as this resource.
Choosing the Right Refinishing Products for Longevity
High-quality epoxy or urethane-based paints are preferred for their water resistance and toughness. When selecting your paint, look for those specifically formulated for bathroom fixtures. Multiple thin coats, rather than a thick single layer, promote even coverage and reduce the risk of drips or bubbles. Patience with drying times between coats is crucial for a smooth, long-lasting finish. For detailed product recommendations, I suggest exploring expert-approved products.
Addressing Common Challenges During Refinishing
One of the most frustrating issues is uneven surface texture or paint peeling. To prevent this, ensure the surface is perfectly clean and dry before application. Using a tack cloth to remove dust and debris can make a significant difference. For stubborn rust spots, consider a rust-inhibiting primer before painting. If you’re concerned about achieving a glossy, mirror-like finish, finishing with a clear topcoat can elevate the look while protecting the paint layer.
Expert Insight: How Do You Ensure a Professional Finish?
Achieving a flawless, durable coating on a cast iron tub requires attention to detail at every stage. Using foam or synthetic brushes can help minimize brush marks, while spray applications, if done correctly, can produce an even smoother surface. Additionally, maintaining proper ventilation during drying and curing phases prevents dust and particles from settling on the wet surface. Remember, patience is key—rushing the process often leads to imperfections. For those interested in expanding their DIY skills, exploring related projects like building custom garden structures or advanced upcycling can complement your home improvement journey (see more gardening tips).
Have you ever faced unexpected obstacles during a refinishing project, and how did you overcome them?
Sharing your experiences can be incredibly helpful for fellow DIY enthusiasts. Common issues include uneven surfaces, bubbling paint, or peeling, often caused by inadequate prep work or environmental factors. Expert advice suggests investing extra time in surface preparation and choosing the right weather conditions for application. For detailed tutorials on tackling complex DIY projects, visit step-by-step guides.
If you’re eager to learn more about expert techniques and innovative solutions for home improvement, I encourage you to explore additional resources and share your success stories in the comments below. Happy refinishing!
Mastering the Art of Surface Refinement: Beyond Basic Preparation
As I delved deeper into my cast iron bathtub restoration journey, I realized that surface refinement is an ongoing learning process. Achieving a truly flawless finish requires not only meticulous sanding and cleaning but also understanding the subtle nuances of surface texture. I began experimenting with finer grit abrasives and learned that a gradual transition from coarse to ultra-fine sanding pads can significantly reduce surface imperfections, resulting in a glass-smooth finish that rivals professional refinishing (source). This meticulous approach can be the difference between a good DIY job and a professional-looking result.
The Nuances of Material Compatibility and Environmental Conditions
One of the most complex aspects I encountered was understanding how different refinishing products interact with the old surface and how environmental factors influence curing. For example, I discovered that high humidity can cause finishes to dry unevenly or develop bubbles, which is frustrating after hours of work. I started scheduling my refinishing projects during dry, moderate weather conditions and used dehumidifiers if necessary. Moreover, choosing compatible primers and paints specifically formulated for cast iron and bathroom environments was crucial. This attention to detail prevented future peeling and rust formation, extending the longevity of my restoration (more insights here).
Reflections on the Psychological and Emotional Rewards of Restoration
Beyond the technical skills, I found that the process of restoring my bathtub was profoundly rewarding on a personal level. Each carefully applied coat, each sanding session, represented patience and dedication. The transformation of a neglected, stained fixture into a shining centerpiece was not just about aesthetics; it became a metaphor for renewal in other areas of life. This project reminded me that taking the time to do things right, despite setbacks or frustrations, yields a sense of accomplishment that no store-bought replacement can match. Sharing these reflections inspires me to encourage others to pursue their DIY passions, knowing that the journey is as valuable as the result.
Engaging with the DIY Community: Sharing Knowledge and Learning from Others
One of the most enriching aspects of this journey has been connecting with a community of passionate DIY enthusiasts. Reading about others’ experiences, troubleshooting common issues, and exchanging tips has expanded my understanding and confidence. For instance, I learned that some DIYers use spray equipment to achieve an ultra-smooth finish, which can be a game-changer if done with proper safety precautions and technique (see detailed guides here). I invite readers to share their own stories or ask questions—your insights can inspire and guide others in the community.
The Next Level: Incorporating Eco-Friendly and Innovative Techniques
Looking ahead, I am eager to explore sustainable refinishing options, such as natural earth-based paints or eco-friendly primers. I believe that combining advanced techniques with environmentally conscious materials can elevate DIY projects to new standards. For example, experimenting with natural pigments not only reduces chemical exposure but also adds unique, one-of-a-kind finishes to fixtures. This ongoing exploration keeps my passion alive and motivates me to continually refine my skills (learn more here).
If you’ve embarked on similar restoration projects or are considering starting one, I encourage you to share your experiences in the comments. Connecting with fellow DIY enthusiasts enriches our collective knowledge and keeps the spirit of craftsmanship alive. Remember, every project, no matter how small, is an opportunity for growth, creativity, and personal fulfillment.
Mastering the Nuances of High-Precision Surface Refinement
As I progressed deeper into my restoration journey, I realized that achieving a truly impeccable finish on a cast iron bathtub demands an elevated level of finesse. Fine-grit abrasives, such as 400-600 grit, became my tools of choice, allowing me to meticulously smooth out minor imperfections left by coarse sanding. This gradual refinement not only enhances surface smoothness but also significantly reduces the visibility of micro-scratches that can mar the final appearance (source). The process requires patience and a steady hand, but the payoff is a mirror-like surface that rivals professional standards, elevating my confidence in DIY craftsmanship.
The Critical Role of Material Compatibility and Environmental Control
Understanding how different refinishing materials interact with old surfaces is essential for durability. I discovered that selecting primers and paints specifically formulated for cast iron and humid environments mitigates issues like peeling and rust recurrence. Additionally, environmental conditions, especially humidity and temperature, directly influence curing. I began scheduling projects during dry weather and used dehumidifiers in my workspace, ensuring optimal curing conditions. This attention to detail prevents defects such as bubbles or uneven finishes, extending the lifespan of the restoration (more insights here).
Exploring Eco-Friendly and Innovative Refinishing Techniques
My journey also led me to explore sustainable alternatives, such as natural earth-based pigments and bio-based primers, which offer eco-conscious solutions without compromising durability. These materials often contain fewer volatile organic compounds (VOCs), making them safer for indoor air quality. For example, experimenting with natural pigments derived from clay or mineral sources provided unique finishes that added character to the bathtub while aligning with my eco-friendly values (learn more here). Additionally, I integrated innovative application methods, like aerosol spray for even coverage, which, when executed with proper safety measures, can produce superior results compared to traditional brushes or rollers.
How Can Advanced DIY Techniques Elevate Your Restoration Projects?
If you’re eager to push your skills further, I invite you to explore comprehensive guides on mastering spray applications or incorporating natural, non-toxic materials into your projects. Sharing your experiences and experimenting with new approaches not only refines your craftsmanship but also fosters a community of environmentally conscious DIY enthusiasts. For more detailed tutorials and expert insights, visit this resource.
Embracing these advanced techniques and sustainable materials transforms a simple restoration into a high-level craft, allowing you to achieve professional-quality finishes with personal satisfaction and ecological responsibility.
Things I Wish I Knew Earlier (or You Might Find Surprising)
Patience is Key
One of the biggest surprises in my restoration journey was how crucial patience is. Rushing through sanding or applying coats too quickly often led to imperfections. Taking my time, especially during drying and curing phases, resulted in a much more professional finish that I could be proud of.
The Importance of Surface Preparation
I used to underestimate how vital thorough cleaning and proper surface prep are. Skipping steps like etching or not removing all rust and old paint just caused problems later, like peeling or bubbling paint. Now I know that a flawless surface is the foundation of a durable, beautiful finish.
Quality Materials Save Time and Effort
Initially, I tried cheaper primers and paints, but they didn’t last. Investing in high-quality epoxy or urethane-based paints made a huge difference in durability and shine. It’s worth spending a little extra for products formulated specifically for bathroom fixtures and cast iron surfaces.
Environmental Conditions Matter More Than You Think
Humidity and temperature can make or break your project. I learned this the hard way when applying paint during humid weather, which caused bubbles. Now I plan my projects for dry, moderate days and even use dehumidifiers in my workspace to ensure optimal conditions.
Small Details Make a Big Difference
Using fine grit abrasives for finishing and paying attention to even the tiniest imperfections elevates the overall look. Micro-scratches or uneven surfaces become much less noticeable when you take the extra step in the final sanding stages.
Sharing and Learning from a Community
Connecting with fellow DIY enthusiasts has been invaluable. Reading about others’ experiences, troubleshooting issues, and exchanging tips inspired me to try new techniques, like spray finishing, which I wouldn’t have considered alone. It’s a journey best shared.
Resources I’ve Come to Trust Over Time
- DIYKutak Home Improvement Tips: Their comprehensive guides on refinishing and surface prep are my go-to. The detailed tutorials helped me avoid common pitfalls and achieve professional results.
- Home Depot’s Product Guides: Their expert advice on selecting the right primers and paints for bathroom fixtures is reliable and practical, making it easier to make informed choices.
- Reddit DIY Communities: The DIY and home improvement subreddits offer real-world tips and encouragement from experienced hobbyists. It’s a great place to ask questions and see project examples.
Parting Thoughts from My Perspective
Restoring a cast iron bathtub might seem daunting at first, but it’s incredibly rewarding. The key takeaways for me are patience, thorough surface preparation, and choosing quality materials. These steps, combined with a bit of community support and environmental awareness, transform a challenging project into a fulfilling achievement. If this resonates with you, I’d love to hear your own experiences or tips. Sharing stories helps us all grow and improve. Remember, every scratch and every coat brings you closer to a stunning, long-lasting finish—so enjoy the journey and embrace the process.