My Journey to Creating a Charming Reclaimed Wood Garden Bridge
Last spring, I decided to give my backyard a fresh new look, and one project that truly transformed the space was building a reclaimed wood garden bridge. I remember walking through the local salvage yard, eyeing the weathered planks, and feeling inspired to craft something both beautiful and eco-friendly. That experience sparked my passion for DIY outdoor projects, and today I want to share my personal journey and tips for building your own reclaimed wood garden bridge.
Why Choose Reclaimed Wood for Your Garden Bridge?
Reclaimed wood isn’t just sustainable; it also adds a rustic charm that new lumber often lacks. I found that using salvaged timber from old pallets and barn wood gave my bridge character and a sense of history. Plus, working with reclaimed materials felt great knowing I was reducing waste and giving new life to discarded wood. According to the Environmental Protection Agency, repurposing wood helps cut down on deforestation and pollution, which I deeply appreciate in my DIY projects.
Gathering Your Materials: A Personal Tip
Before diving into construction, I spent some time sourcing quality reclaimed wood. I visited local salvage yards and asked about the history of the wood to ensure it was sturdy enough for outdoor use. I also learned to check for rot, pests, and loose nails—details that made a big difference in the longevity of my bridge. For the hardware, I used stainless steel screws and weatherproof wood glue to withstand the elements.
The Step-by-Step Process: Building My Garden Bridge
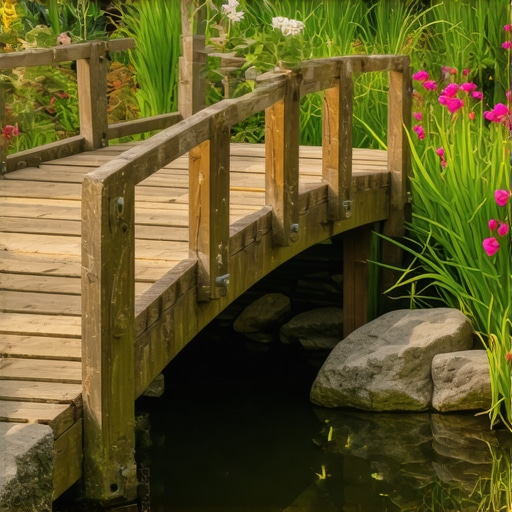
Building the bridge was surprisingly straightforward once I had my materials. I followed a detailed plan from a trusted DIY guide, which you can find at DIY Guides for All Skill Levels. I started by cutting the reclaimed planks to size, then assembled the frame using sturdy joints and brackets. I ensured the base was level and secure, then attached the decking boards. The whole process took a weekend, and the result was a charming, functional feature that now spans my garden pond beautifully.
What Are the Key Tips for a Durable Reclaimed Wood Garden Bridge?
In my experience, sealing the wood with outdoor-grade sealant is crucial. I applied multiple coats to protect against moisture and UV damage. Additionally, elevating the bridge slightly off the ground prevents wood rot, which is common in outdoor structures. If you’re curious about more advanced techniques, exploring topics like eco-friendly finishing or decorative inlays can add a personal touch. For inspiration, check out Creative DIY Home Decor.
How Can I Ensure My Reclaimed Wood Bridge Lasts for Years?
Personally, I found that regular maintenance—like cleaning and reapplying sealant—keeps my garden bridge looking new. Also, choosing the right type of reclaimed wood, such as cedar or Douglas fir, enhances durability. If you’re unsure about the best practices, consulting authoritative sources like DIY Guides can provide valuable insights.
If you’re inspired to build your own reclaimed wood garden bridge, I encourage you to start planning today. It’s a rewarding project that combines sustainability, craftsmanship, and personal creativity. Feel free to share your experiences or ask questions in the comments—I’d love to hear about your DIY journeys!
What Are the Secrets to a Long-Lasting Reclaimed Wood Garden Bridge?
Building a garden bridge from reclaimed wood is not only an eco-conscious choice but also a rewarding project that can beautify your outdoor space for years to come. As an experienced DIY enthusiast, I’ve learned that the longevity of such structures hinges on several nuanced factors beyond basic construction techniques. Proper material selection, meticulous sealing, and strategic placement are essential to withstand the elements and preserve its rustic charm.
One of the most critical considerations is choosing the right type of reclaimed wood. Woods like cedar, redwood, and Douglas fir are naturally resistant to rot and pests, making them ideal for outdoor projects. These species possess inherent durability, which can be further enhanced through specific treatments. For example, applying eco-friendly preservatives designed for outdoor use can bolster resistance without compromising environmental integrity.
Sealing the wood with high-quality, outdoor-grade sealant is paramount. I recommend multiple coats of a penetrating, UV-resistant sealant, which creates a barrier against moisture, sun damage, and temperature fluctuations. Reapplying sealant every couple of years can significantly extend the lifespan of your bridge, especially in climates with heavy rainfall or intense sunlight. For detailed guidance on eco-friendly finishes, exploring DIY Eco-Friendly Finishes can be invaluable.
Strategic placement also plays a vital role. Elevating the structure slightly above ground level using gravel or concrete footings minimizes direct contact with soil and standing water, reducing the risk of wood rot. Additionally, orienting your bridge to avoid prolonged exposure to prevailing winds and harsh sunlight can help maintain its integrity over time.
Incorporating regular maintenance routines, such as cleaning debris, inspecting for signs of wear, and reapplying protective coatings, keeps the wood in optimal condition. A proactive approach allows you to catch minor issues before they develop into major problems—saving time and money in the long run.
How Can I Incorporate Advanced Techniques to Maximize Durability?
For those interested in pushing the boundaries of DIY craftsmanship, exploring advanced techniques like eco-friendly inlays or decorative sealant patterns can add both aesthetic appeal and enhanced protection. Inlays made from metal or composite materials can provide additional structural support, while decorative sealants can reflect UV rays more effectively. Moreover, integrating natural repellents like tung oil or beeswax can complement synthetic sealants and offer a more sustainable finishing option.
Consulting authoritative sources such as DIY Guides provides in-depth insights into material treatments and construction best practices. These resources can help you refine your approach and ensure your project withstands the test of time and weather.
If you’re considering embarking on your own reclaimed wood garden bridge project, I encourage you to share your ideas or ask questions in the comments. Exploring new techniques and sharing experiences can enrich your DIY journey and lead to even more durable, beautiful outdoor creations.
Enhancing My Reclaimed Wood Garden Bridge: Personal Reflections and Advanced Strategies
Over the years, as I’ve maintained my reclaimed wood garden bridge, I’ve discovered that true durability isn’t just about initial construction but also about understanding the nuanced, often overlooked factors that influence long-term resilience. My journey has led me to explore advanced preservation methods and material choices that can elevate a simple DIY project into a lasting outdoor feature.
Why Material Selection Remains the Cornerstone of Longevity
While cedar and Douglas fir remain my favorites due to their natural resistance, I’ve come to appreciate how treatment options can further enhance their lifespan. For instance, eco-friendly preservatives like borates not only protect against pests but also penetrate deeply, providing a more comprehensive safeguard than surface sealants alone. My experience confirms that selecting the right wood species combined with sustainable treatments is a game-changer in outdoor DIY projects.
Applying Multi-Layered Sealing Techniques: My Personal Approach
Sealing is an art as much as it is a science. I’ve found that multiple coats of a penetrating, UV-resistant sealant, allowed to cure thoroughly between applications, create a formidable barrier against moisture and sun damage. Reapplying every couple of years, especially in harsher climates, keeps the wood looking fresh and intact. For those interested in eco-conscious options, exploring natural oils like tung or linseed can offer a beautiful, sustainable finish that also enriches the wood’s appearance.
Strategic Placement and Structural Design: Beyond the Basics
Elevating the structure remains essential, but I’ve added my own twist—integrating natural drainage channels beneath the bridge to divert water runoff. This small detail significantly reduces wood contact with standing water, thereby minimizing rot. Additionally, I’ve experimented with curved designs that better distribute stresses and add aesthetic appeal, proving that thoughtful engineering can dramatically extend a structure’s lifespan.
Refined Maintenance Rituals and Their Impact
Beyond annual inspections, I’ve adopted a more holistic approach—regularly cleaning debris, inspecting for minor cracks, and reapplying protective coatings. This proactive routine allows me to address issues before they escalate, saving both time and money. Moreover, I’ve started documenting the condition of my bridge through photographs, which helps me track changes over time and plan maintenance more effectively.
Exploring Cutting-Edge Techniques: A Personal Experimentation
For those eager to push their DIY skills further, exploring advanced techniques like embedding natural repellents or decorative inlays can add both protection and personality. For example, integrating copper strips along the edges not only enhances aesthetic appeal but also provides a natural pest deterrent. Consulting detailed guides, such as those found at DIY Guides, has inspired me to experiment with these enhancements.
What are the nuanced considerations that can truly transform a garden bridge from good to exceptional in durability?
Understanding the microclimate of your garden, the specific wood species’ properties, and the long-term effects of environmental exposure can inform smarter choices. For instance, in humid regions, selecting woods with higher natural resistance or investing in additional sealant layers can make a significant difference. Additionally, incorporating natural repellents like beeswax or tung oil can offer sustainable, effective protection while maintaining an eco-friendly ethos. Sharing your own experiences or asking questions in the comments can open doors to new ideas—perhaps I’ll learn something new myself!
Harnessing Microclimate Insights to Amplify Your Garden Bridge’s Durability
Understanding the microclimate of your garden is pivotal in tailoring preservation strategies that extend your reclaimed wood bridge’s lifespan. In my experience, factors such as humidity levels, prevailing winds, and sunlight exposure can significantly influence how your materials age. For instance, in humid environments, selecting naturally resistant woods like cedar or applying deep-penetrating preservatives, such as borates, can mitigate the risks of rot and pest infestation. A study published in Wood Science and Technology highlights how microclimate-aware treatments can enhance durability, underscoring the importance of tailored solutions.
Integrating Eco-Friendly Preservatives for Sustainable Longevity
Eco-conscious preservation isn’t just a trend; it’s a necessity for sustainable DIY projects. I’ve experimented with natural oils like tung or linseed, which penetrate deeply and provide UV protection while maintaining environmental integrity. These oils, when applied in multiple thin coats, form a breathable barrier that wards off moisture and sun damage. Additionally, incorporating copper strips along the edges of the bridge serves a dual purpose—adding visual appeal and acting as a natural pest deterrent, as copper’s antimicrobial properties repel certain pests and fungi. For a comprehensive guide on eco-friendly finishes, exploring DIY Eco-Friendly Finishes offers valuable insights.
Advanced Structural Design for Enhanced Water Management
Beyond basic elevation, innovative water management strategies can dramatically preserve your bridge’s integrity. I’ve designed natural drainage channels beneath the structure, directing water away from vulnerable joints. This small yet impactful modification minimizes water retention and soil contact, which are primary culprits of wood decay. Moreover, employing curved structural elements distributes stress more evenly, reducing the risk of cracks or warping over time. Such thoughtful engineering—rooted in principles of sustainable design—can transform a simple garden feature into a resilient masterpiece. You might find inspiration in detailed tutorials on building guides for all skill levels.
Can Natural Replenishing Techniques Extend Your Bridge’s Life?
Absolutely. Regularly replenishing protective coatings with natural repellents like beeswax or tung oil not only sustains the aesthetic appeal but also fortifies the wood against environmental stressors. I’ve noticed that reapplying these finishes every few years, especially after harsh winters or rainy seasons, keeps the wood looking vibrant and prevents minor deterioration from escalating. Additionally, introducing natural repellents like cedar oil can offer ongoing pest resistance. Engaging with advanced techniques through resources like DIY Guides can open new avenues for durable, eco-friendly preservation.
If you’re passionate about elevating your DIY craft, I invite you to share your insights and experiences. Together, we can refine techniques that ensure our outdoor projects remain both beautiful and resilient across seasons.
Things I Wish I Knew Earlier (or You Might Find Surprising)
Layered Sealing is Key
Initially, I underestimated how crucial multiple coats of eco-friendly sealant are. My first attempt was just one layer, and I noticed the wood faded faster than I expected. Now, I always apply several thin coats, allowing each to cure fully — it makes a noticeable difference in longevity.
Choosing the Right Wood Species Matters
I used reclaimed pine at first, but it didn’t hold up well in my humid climate. Switching to cedar or Douglas fir, which are naturally resistant, improved my bridge’s lifespan significantly. It’s a lesson I wish I’d learned sooner, emphasizing the importance of material selection.
Elevation Prevents Rot
Placing my bridge directly on the ground led to quicker deterioration. Elevating it slightly with gravel or concrete footings keeps moisture away, a simple trick that added years to its life — a tip I recommend to anyone building outdoors.
Regular Maintenance Pays Off
Cleaning debris, inspecting for cracks, and reapplying sealant every couple of years keeps the wood in prime condition. This proactive approach helps prevent small issues from growing into costly repairs, making maintenance an investment in durability.
Microclimate Awareness Can Save Your Project
Understanding my garden’s microclimate informed my choices, like positioning the bridge away from prevailing winds and excessive sun. Tailoring your approach based on microclimate factors can dramatically extend the life of your reclaimed wood structure.
Natural Replenishing Techniques Are Worth the Effort
Reapplying natural oils like tung or linseed every few years has kept my bridge vibrant and protected. These eco-friendly finishes, combined with strategic placement, create a resilient outdoor feature that ages gracefully.
Resources I’ve Come to Trust Over Time
- DIY Guides for All Skill Levels: This comprehensive resource helped me understand the step-by-step process of building and maintaining outdoor structures. It’s trustworthy and beginner-friendly, making complex techniques accessible.
- Creative DIY Home Decor: For decorative touches and finishing ideas, this site offers innovative solutions that add personality while enhancing durability.
- Eco-Friendly Finishes: Exploring sustainable sealing and finishing options through this resource expanded my understanding of eco-conscious preservation methods, which are vital for outdoor projects.
- DIY Guides on microclimate adaptation: These insights helped me optimize the placement of my garden bridge, ensuring it withstands local environmental challenges effectively.
Parting Thoughts from My Perspective
Building a reclaimed wood garden bridge has been one of my most rewarding DIY projects. The key takeaways are that material choice, layered sealing, strategic placement, and ongoing maintenance are essential for durability. Embracing eco-friendly preservation techniques not only benefits the environment but also ensures your outdoor features stand the test of time. If you’re considering such a project, I encourage you to start planning now—each step offers a chance to learn and create something truly special. If this resonated with you, I’d love to hear your thoughts or experiences. Feel free to share in the comments or explore more DIY ideas on home decor projects.