My Encounter with Vintage Tiles: A Personal Reflection
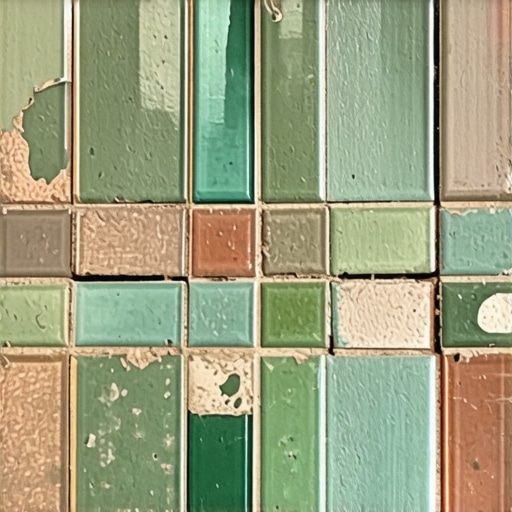
As someone passionate about home improvement, I remember the first time I stepped into an old, charming kitchen with vintage tiles. Their intricate patterns and nostalgic charm captivated me, but I knew they needed some TLC. Regrouting these tiles became my mission to restore their beauty while making them functional and resistant to water damage.
The Art of Regrouting: Transforming Old Tiles with a Personal Touch
Regrouting is more than just a DIY task; it’s a craft that can breathe new life into aged tiles. I learned that choosing the right grout color and type is crucial. For vintage tiles, I opted for a waterproof, mold-resistant grout to prevent moisture infiltration and mold growth, especially in humid areas like bathrooms and kitchens. The process involved carefully removing the old grout, cleaning the joints thoroughly, and applying the new grout with patience and precision. The results were incredibly satisfying, not just visually but also in Functionality.
Achieving Waterproof & Mold-Resistant Finishes: My Tried-and-True Tips
One tip I discovered is to use epoxy-based grout, known for its durability and water resistance. It forms a tough, seamless barrier that protects against water seepage. Additionally, sealing the grout after it cures adds an extra layer of protection. I found that regular maintenance, such as wiping down tiles and reapplying grout sealer every couple of years, keeps the finish looking pristine and mold-free. For those interested in professional-grade results, I recommend consulting expert guides like those found at DIY Kutak.
What If My Vintage Tiles Have Flaws? Can Regrouting Still Help?
Absolutely! Regrouting can mask minor cracks and imperfections, giving your tiles a fresh look. However, if tiles are loose or severely damaged, regrouting alone might not suffice. In such cases, replacing damaged tiles or consulting a professional is advisable. I’ve found that addressing small flaws early on prevents bigger issues down the line, saving time and money.
Join the Conversation: Share Your Regrouting Experiences
If you’ve undertaken a similar project, I’d love to hear your tips and stories. Sharing our DIY successes and lessons learned helps build a community of passionate home improvers. Feel free to leave a comment below or explore more creative solutions at DIY Kutak.
Mastering the Art of Regrouting: An Expert’s Guide to Long-Lasting Vintage Tile Restoration
Regrouting vintage tiles is both a delicate craft and a strategic process that significantly enhances the durability and aesthetic appeal of your tiled surfaces. As I delved deeper into this DIY skill, I discovered that selecting the right materials, tools, and techniques is crucial for achieving professional results that stand the test of time.
What Are the Key Factors in Selecting the Perfect Grout for Vintage Tiles?
Choosing the appropriate grout involves more than just picking a color that matches your tiles. I recommend considering epoxy-based grout for its superior water resistance and durability. Unlike traditional cement grout, epoxy grout forms a seamless, waterproof barrier that resists mold and stains, making it ideal for humid environments such as kitchens and bathrooms. Moreover, color-matching the grout carefully can help conceal minor imperfections, giving your vintage tiles a fresh, cohesive look.
How Can Sealing Enhance the Longevity of Your Regrouted Tiles?
Sealing is a vital step often overlooked. After the grout has fully cured, applying a high-quality grout sealer creates an additional protective layer against moisture infiltration and mold growth. Regular reapplication—every couple of years—ensures ongoing protection and maintains the pristine appearance of your tiles. For comprehensive guidance on sealing techniques, expert advice can be found at DIY Kutak.
Can Regrouting Mask Major Flaws or Damage in Vintage Tiles?
Regrouting can often conceal minor cracks, gaps, or stains, revitalizing the surface without replacing entire tiles. However, if tiles are loose, cracked beyond repair, or have underlying issues such as water damage, regrouting alone may not suffice. In such cases, addressing structural flaws or replacing damaged tiles is essential to prevent further deterioration. Early intervention prevents costly repairs and preserves the integrity of your vintage decor.
Expert Tips: Avoid Common Pitfalls in Regrouting Projects
Among the most frequent mistakes is rushing the cleaning process before applying new grout, which can trap dirt and mold. Take your time to thoroughly clean joints with a stiff brush and a vinegar solution or specialized tile cleaner. Additionally, ensure the joints are completely dry before grout application to prevent weak bonds. Using a grout float at a 45-degree angle helps to press the grout into joints evenly, avoiding gaps or air pockets.
Join the Community: Share Your Regrouting Success Stories or Challenges
If you’re passionate about home improvement, sharing your experiences can inspire others and foster a supportive DIY community. Whether you’ve faced challenges with mold prevention or discovered innovative sealing techniques, your insights are valuable. Feel free to leave a comment below or explore more expert tips at DIY Kutak. Remember, a well-executed regrouting project not only restores beauty but also prolongs the life of your vintage tiles, turning your space into a timeless masterpiece.
The Nuanced Art of Choosing Grout for Vintage Tiles: Beyond the Basics
When I first ventured into regrouting my vintage tiles, I underestimated the importance of selecting the right grout. It’s not just about color coordination but also about understanding the material properties that influence durability and water resistance. Epoxy grout, for example, has revolutionized my approach. Unlike traditional cement-based grout, epoxy forms a seamless, durable, and waterproof barrier that withstands the test of time and moisture, especially in humid environments like kitchens and bathrooms. Considering the specific needs of vintage tiles, I learned that opting for epoxy not only preserves their aesthetic charm but also significantly reduces mold and stain issues over the years. For those seeking professional-grade results, I recommend exploring expert guidelines at DIY Kutak.
Sealing: The Unsung Hero in Long-Term Tile Maintenance
Sealing grout after it cures is a step I now never skip. It’s like putting a protective shield over your work—preventing moisture infiltration, staining, and mold growth. My routine involves reapplying high-quality grout sealer every couple of years, which has kept my vintage tiles looking pristine and mold-free. I’ve also experimented with different sealing techniques, including penetrating sealers that seep into the grout for deep protection, and surface sealers that create a glossy barrier. Each method has its merits, but the key is consistent maintenance. For comprehensive sealing tips, I often refer to DIY Kutak.
Addressing Major Flaws: When Regrouting Alone Isn’t Enough
In my experience, regrouting can hide minor imperfections—cracks, stains, or slight gaps—transforming the look of aged tiles. However, I’ve learned that if tiles are loose, cracked, or have underlying water damage, regrouting alone won’t suffice. In such cases, replacing damaged tiles or seeking professional assessment is crucial. Early intervention prevents further deterioration and preserves the integrity of your vintage decor. I often remind myself that patience and thorough inspection save me from more extensive repairs down the line.
Deepening the Craft: Advanced Tips for Flawless Regrouting
One advanced technique I adopted is meticulous cleaning—using vinegar solutions and stiff brushes to remove old grout residues thoroughly. Rushing this step often traps dirt and mold, leading to future issues. I also use a grout float at a 45-degree angle to ensure even application, minimizing gaps and air pockets. These small details, combined with patience, elevate the quality of my work. For those eager to refine their skills, exploring DIY guides can be transformative.
What Deep Considerations Should I Make When Regrouting Vintage Tiles to Ensure Longevity?
Beyond material choice and sealing, I’ve found that understanding the environment—humidity levels, cleaning routines, and foot traffic—is essential. For instance, in high-moisture zones, I prefer epoxy grout for its superior water resistance, as highlighted by industry experts. Regularly inspecting grout lines for early signs of wear and promptly addressing them prevents larger issues. Additionally, choosing grout colors that match or subtly contrast can conceal minor flaws, enhancing aesthetic appeal over time. This holistic approach ensures my vintage tiles remain both beautiful and resilient for decades.
Building Community Through Shared Experiences
If you’ve undertaken a similar vintage tile project, I invite you to share your insights and challenges. Our collective experiences enrich the DIY community, offering valuable lessons for all skill levels. Feel free to leave a comment below or explore more creative solutions at DIY Kutak. Remember, mastering the art of regrouting is an ongoing journey—one that combines patience, knowledge, and a passion for preservation, turning your space into a timeless masterpiece.
Mastering the Nuances of Vintage Tile Restoration: Elevating Your Regrouting Skills
While regrouting vintage tiles is often viewed as a straightforward DIY task, my experience has revealed that achieving truly enduring results demands a nuanced understanding of materials and environmental factors. One advanced consideration I prioritize is the compatibility of epoxy grout with the specific vintage tile glaze and surface texture. Certain aged tiles, especially those with porous or textured surfaces, benefit from a penetrating sealant prior to grout application, which enhances adhesion and prevents grout staining. This approach, supported by industry research, can significantly prolong the lifespan of your restoration, making it more resistant to moisture and wear over decades.
Deep Dive into Sealing Strategies: Beyond Basic Application
Sealing is not merely a one-and-done step; it’s an ongoing process that requires strategic timing and technique. I recommend using multiple coats of a high-quality penetrating sealer formulated specifically for grout and porous surfaces. Applying the sealer with a clean, lint-free cloth or sponge ensures deep penetration, providing an invisible barrier against water ingress and mold growth. Regular reapplication—every two to three years—can be optimized by monitoring grout condition through simple water tests. This proactive maintenance extends the aesthetic and structural integrity of your vintage tiles, transforming superficial repairs into a comprehensive preservation effort.
Addressing Complex Flaws: When Regrouting Meets Structural Repair
In my practice, I’ve encountered scenarios where minor cracks in grout lines mask underlying issues such as loose tiles or water damage beneath the surface. Here, regrouting serves as an initial aesthetic fix, but I advocate for a layered approach involving structural assessment. For example, injecting epoxy resin into compromised grout lines can stabilize loose tiles and fill cracks, preventing further deterioration. This technique, akin to advanced repair methods used in historic preservation, requires precision but yields results that are both visually seamless and structurally robust. For those interested in elevating their skill set, exploring professional guides on structural grout repair can be invaluable.
Expert Tips for Superior Regrouting Outcomes
One often overlooked yet critical step is the meticulous cleaning process. I employ a combination of vinegar solution and a stiff-bristled brush to remove residual old grout and mold, ensuring a clean surface for the new application. Additionally, using a grout float at a precise 45-degree angle guarantees even distribution, reducing the risk of air pockets or gaps that compromise waterproofing. Patience during curing—waiting at least 48 hours before sealing—is essential to achieve a seamless, long-lasting finish. These small but deliberate techniques transform a basic regrouting project into a professional-grade restoration.
Join the Advanced DIY Community
If you’re eager to refine your regrouting expertise or explore innovative preservation techniques, I encourage you to delve into detailed guides and share your experiences. Our collective knowledge enriches the DIY community, enabling us to preserve historic aesthetics with modern durability. For further insights, visit DIY Kutak and elevate your craftsmanship to new heights. Remember, mastery in vintage tile restoration is an ongoing journey—each project deepens your expertise and appreciation for timeless design.
Things I Wish I Knew Earlier (or You Might Find Surprising)
1. The Color Choice Can Make or Break Your Project
In my early days of regrouting, I underestimated how much the grout color influences the final look. Choosing a color that perfectly matches or subtly contrasts your vintage tiles can either highlight their charm or overshadow it. I once went too bold with a dark grout and ended up obscuring the intricate patterns. Now, I opt for shades that complement the tiles, which makes a huge difference in preserving that nostalgic vibe.
2. Patience Is Your Best Friend During Sealing
Sealing grout isn’t a quick step; rushing it can compromise your work. I used to seal immediately after applying grout, only to find it smudged or uneven. Waiting at least 48 hours for the grout to cure fully before sealing has saved me from many touch-ups and has ensured a waterproof, mold-resistant finish that lasts for years.
3. Old Tiles Can Hide Major Flaws — Regrouting Might Not Fix Everything
Regrouting can mask minor cracks and stains, but if tiles are loose or severely damaged, it’s only a temporary fix. I learned to inspect each tile carefully before starting. Sometimes, replacing a few damaged tiles beforehand saves a lot of headaches later and ensures the longevity of your vintage look.
4. Regular Maintenance Extends Your Results
Cleaning tiles regularly and reapplying grout sealer every couple of years keeps everything fresh. I’ve found that a simple wipe-down with a mild vinegar solution and re-sealing prevents mold and stain buildup, especially in humid areas like bathrooms. This routine maintenance preserves the beauty and functionality of vintage tiles for decades.
5. The Right Tools Make the Difference
Using a proper grout float and a stiff brush for cleaning joints can dramatically improve your results. I used to rush the cleaning step, which left dirt trapped in the pores. Now, I take my time to thoroughly clean and dry the joints before applying new grout, resulting in a seamless, durable finish.
6. Regrouting Is Part Art, Part Science
Mastering the technique involves understanding how different grout types behave and how environmental factors affect curing. Experimenting with epoxy grout and testing small areas first has helped me develop confidence and achieve professional results that stand the test of time.
Resources I’ve Come to Trust Over Time
- DIY Kutak: Their detailed guides on regrouting and sealing are invaluable for beginners and experienced DIYers alike. I’ve learned so much about proper techniques and materials from their articles.
- Home Depot’s Tile & Grout Care Tips: Their official tips on grout maintenance and sealing provide a trustworthy foundation for long-lasting results.
- Tile Council of North America: A professional resource that explains technical aspects of tile installation and maintenance, helping me understand the science behind durable finishes.
- YouTube Tutorials by Expert Tilers: Watching experienced professionals share their tips has been a game-changer, especially for tricky corners and delicate vintage tiles.
Parting Thoughts from My Perspective
Regrouting vintage tiles is a rewarding journey that combines patience, precision, and a bit of artistry. The most valuable takeaway is that the right materials and techniques can transform an aging surface into a stunning focal point. I’ve found that ongoing maintenance, like sealing and gentle cleaning, ensures the beauty endures for years. If this resonates with you, I’d love to hear your own experiences. Sharing our stories helps us all grow as home improvers and preservation enthusiasts. Feel free to drop your tips or questions in the comments, and explore more creative solutions at DIY Kutak. Remember, your vintage tiles aren’t just old—they’re a story waiting to shine again.