My Unexpected Hobby: Crafting Custom Frames for Home Decor
It all started when I decided to refresh my living room and realized the importance of a perfect frame for my favorite artwork. As someone who loves DIY projects, I dove into learning how to assemble custom frames, which turned out to be more rewarding than I initially imagined. Today, I want to share my personal experience and insights into creating beautiful, personalized frames that truly elevate home decor.
Why I Chose to Build My Own Frames
Initially, I was overwhelmed by the idea of constructing my own frames, fearing it might be complicated or require professional tools. But as I explored online tutorials and DIY craft ideas, I discovered that with a few basic supplies and patience, anyone can craft stunning frames. Plus, building my own allowed me to customize sizes, styles, and finishes that perfectly match my interior design aesthetic. I found that this approach not only saved money but also gave me a sense of pride and creativity.
The Essential Tools and Materials for Custom Frame Assembly
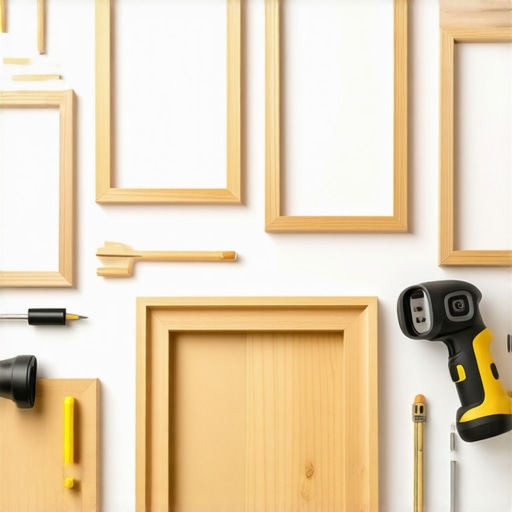
To get started, I gathered some essential tools like a miter saw, a measuring tape, glue, and corner brackets. For materials, I chose high-quality wood strips, decorative moldings, and glass or acrylic panels. I also learned the importance of using proper adhesives and finishing techniques to ensure durability and a professional look. An authoritative source I consulted, DIY Guides for All Skill Levels, provided invaluable tips on safe tool handling and precise measurements.
How to Assemble Your Custom Frame: Step-by-Step
My first project was a simple square frame. I measured the artwork, cut the wood at 45-degree angles for corners, and glued the pieces together. Using clamps helped me hold everything in place while drying. After assembling, I sanded the edges for a smooth finish and applied a stain or paint to match my decor. The real magic happened when I added the glass and secured everything with backing materials. The entire process taught me patience and attention to detail, which are essential in DIY crafts.
Curious About Advanced Techniques in Frame Making?
If you’re interested in exploring more sophisticated methods, such as incorporating mixed media or using reclaimed materials, I recommend checking out Creative Solutions for Home Decor. These techniques can add a unique touch and make your custom frames truly one-of-a-kind.
Remember, the key to successful DIY framing is patience, precision, and a bit of creativity. Feel free to share your own experiences or ask questions in the comments below—I love exchanging ideas with fellow DIY enthusiasts! If you’re ready to dive deeper into home improvement projects, explore more tips on smart DIY ideas for everyday problems.
Unlocking the Art of Professional-Quality DIY Frame Making
Creating custom frames is more than just a craft—it’s a skill that combines precision, creativity, and an eye for detail. As an experienced DIY enthusiast, I can attest that mastering advanced techniques, such as incorporating mixed media or reclaimed materials, can transform your home decor into a gallery-worthy display. For those eager to push their skills further, exploring creative solutions for home decor offers inspiring ideas that add a distinctive touch to your projects.
Enhancing Your Craft with Reclaimed and Eco-Friendly Materials
One of the most rewarding aspects of DIY framing is the ability to repurpose materials, making your projects sustainable and uniquely stylish. Using reclaimed wood, vintage moldings, or even recycled glass can add character and authenticity that mass-produced frames simply can’t match. Integrating these materials requires a nuanced understanding of their properties and how to work with them effectively. For example, reclaimed wood often has irregularities that can be embraced as part of the design, but it also demands careful sanding and sealing to ensure durability. Want to learn more about sustainable DIY projects? Check out eco-friendly indoor garden ideas for inspiration on repurposing materials in creative ways.
Advanced Techniques: Incorporating Mixed Media and Textured Finishes
For seasoned DIYers, experimenting with mixed media—combining wood, metal, fabric, and even small decorative objects—can create truly bespoke frames. Techniques such as layered inlay, textured paint finishes, or metallic accents can elevate a simple frame into a piece of art. Employing these methods requires patience and practice but pays off with stunning results that showcase your craftsmanship. For detailed tutorials on these advanced techniques, I recommend exploring advanced decoupage and finishing methods. This resource provides expert guidance on layering and sealing to achieve seamless, professional-looking surfaces.
How Can You Customize Frames to Match Your Unique Decor Style?
One of the most intriguing questions from an expert perspective is how to tailor your DIY frames to harmonize perfectly with your interior style. Whether your decor is modern minimalistic, vintage chic, or eclectic bohemian, selecting the right materials, finishes, and embellishments can make all the difference. For instance, a sleek, painted frame complements contemporary interiors, while distressed wood or gilded accents suit vintage aesthetics. This customization requires a keen eye for detail and an understanding of design principles—something that can be refined with practice and inspiration from seasoned craft experts.
If you’re eager to expand your skills further or seek tailored advice, I invite you to share your questions or experiences in the comments. Additionally, exploring more about smart DIY ideas for everyday problems can provide valuable insights into integrating your frames into broader home improvement projects.
Delving Deeper into Custom Frame Crafting: Beyond Basic Techniques
As I became more comfortable with the fundamentals of DIY framing, I started exploring intricate techniques that elevate simple projects into genuine works of art. One such method involves layering different materials—combining reclaimed wood with textured paints or metallic accents—to add depth and sophistication. This approach requires patience and a keen eye for detail but rewards you with truly unique pieces that reflect your personal style. For example, integrating layers of decoupage with textured varnishes can create a vintage-inspired finish that complements eclectic interiors.
The Nuances of Working with Reclaimed and Mixed Media Materials
Using reclaimed materials introduces a fascinating layer of complexity. Each piece carries its history—knots, nail holes, or weathered surfaces—that can enrich the final look if embraced thoughtfully. I’ve learned that proper preparation, such as thorough sanding and sealing, is essential to ensure durability and aesthetic appeal. When incorporating mixed media, like small metal embellishments or fabric accents, understanding how different materials interact during gluing and finishing processes becomes crucial. It’s a delicate dance of compatibility and patience, but the results can be remarkably authentic and compelling.
How Do Professional Artisans Achieve Seamless Finishes in DIY Frames?
One question I often pondered was how seasoned craftsmen attain flawless, seamless surfaces in their projects. The secret lies in meticulous surface preparation—sanding until smooth, applying primer layers, and employing advanced finishing techniques like multi-layer varnishing or gilding. I highly recommend exploring advanced decoupage and sealing methods, which provide step-by-step guidance on achieving professional-quality results. Mastery of these techniques not only enhances durability but also elevates the aesthetic value of your DIY frames, making them indistinguishable from store-bought pieces.
Integrating Personal Style into Custom Frames: A Reflection
One of the most rewarding aspects of advanced DIY framing is the ability to truly personalize your work. Whether you favor minimalist, vintage, or bohemian styles, understanding how to select materials, finishes, and embellishments allows you to craft pieces that harmonize perfectly with your overall decor. For instance, distressed finishes and gilded accents can evoke a vintage charm, while sleek, painted surfaces complement modern aesthetics. This ongoing process of experimentation and reflection deepens my appreciation for craftsmanship and encourages continuous learning. If you’re eager to refine your skills and develop your unique artistic voice, I invite you to share your experiences or questions in the comments. For further inspiration and expert tips, explore creative DIY decor ideas that push boundaries and inspire creativity.
Refining Your Craft: Achieving Seamless Finishes in Custom Frames
One of the hallmarks of professional-quality DIY frames is the flawless, seamless surface that elevates the overall aesthetic. Achieving this level of finish involves meticulous surface preparation—sanding until smooth, applying primer layers, and employing advanced finishing techniques like multi-layer varnishing or gilding. These methods are detailed in advanced decoupage and sealing methods, which guide you through complex layering and sealing processes. Mastery of these steps ensures your frames are not only durable but also exhibit a polished, gallery-worthy appearance.
Incorporating Personal Style with Skilled Precision
Personalizing your frames to match specific decor styles—be it minimalistic, vintage, or eclectic—requires a nuanced understanding of material selection, finishes, and embellishments. For modern interiors, sleek painted frames with clean lines work best, while distressed or gilded finishes resonate with vintage aesthetics. Developing this expertise involves continuous experimentation and learning from seasoned artisans. It’s about translating your creative vision into a tangible piece that harmonizes with your space, which can be refined through ongoing practice and reflection.
How Can Advanced Techniques Enhance Your DIY Frame Projects?
Exploring techniques such as layered inlay, textured paint finishes, or metallic accents can transform simple frames into sophisticated artworks. These methods demand patience and a high level of skill but yield stunning results that showcase your craftsmanship. For instance, integrating layers of decoupage with textured varnishes creates a vintage-inspired, richly textured surface. To deepen your understanding, I recommend delving into mixed media and texturing masterclasses, which provide detailed tutorials on combining different materials and finishes for elevated effects.
The Nuances of Working with Reclaimed and Mixed Media Materials
Using reclaimed materials introduces both aesthetic richness and technical challenges. Each piece carries its own history—knots, nail holes, weathered surfaces—that can be embraced as part of the design. Proper preparation, such as thorough sanding and sealing, is essential for durability and a refined look. When incorporating mixed media—metal embellishments, fabrics, or textured paints—understanding material compatibility and adhesion is crucial. This delicate dance of compatibility and patience results in authentic, compelling frames that tell a story of sustainability and craftsmanship.
What Are the Secrets to Achieving Flawless Finishes Like a Professional?
Professional artisans achieve seamless, high-end finishes through rigorous surface preparation—sanding until perfectly smooth, applying primers, and employing multi-layer sealing techniques. Gilding and metallic leafing, when executed with precision, can add a luxurious touch. Exploring advanced sealing and finishing methods can significantly elevate your work, providing techniques for achieving a durable, mirror-like surface that rivals store-bought frames. Developing mastery over these processes transforms your projects from basic to breathtaking artworks.
Injecting Personal Artistic Vision into Your Frames
Personalization is the essence of exceptional DIY framing. Whether your decor leans toward minimalist, vintage, or bohemian, selecting the right materials, finishes, and embellishments allows your frames to become cohesive components of your interior. Embracing experimentation and continuous learning enables you to develop a signature style that reflects your artistic voice. Sharing your journey and seeking feedback can further refine your craft, turning each project into a reflection of your evolving expertise. For ongoing inspiration, explore creative DIY decor ideas that challenge conventions and inspire innovation.
Things I Wish I Knew Earlier (or You Might Find Surprising)
The Power of Patience
One unexpected lesson I learned is that patience truly pays off. Early on, I rushed through projects, expecting perfect results instantly. Over time, I realized that taking my time, especially during finishing touches, creates a more professional look and a sense of pride in the craft.
Details Make a Difference
Focusing on small details, like precise cuts or smooth sanding, transformed my DIY frames from amateurish to gallery-quality. It’s often the little things that elevate a project from good to stunning, and embracing this mindset has deepened my appreciation for craftsmanship.
Embracing Imperfections
Initially, I was frustrated by irregularities in reclaimed materials or uneven finishes. Now, I see these imperfections as part of the charm and authenticity of handmade decor. Learning to work with and highlight these quirks makes each piece unique and meaningful.
Learning Never Stops
Every project teaches me something new—whether it’s advanced staining techniques or mixing media. Staying curious and open to experimentation keeps the process exciting and continually improves my skills.
Community Matters
Sharing progress online or chatting with fellow DIY enthusiasts has been invaluable. Feedback and ideas from a community foster motivation and inspire me to try more complex techniques.
Resources I’ve Come to Trust Over Time
- DIY Guides for All Skill Levels: This site offers step-by-step tutorials suitable for beginners and pros alike. It’s my go-to for clear instructions and safety tips.
- Home Decor Inspiration on Pinterest: A treasure trove of ideas, showcasing diverse styles and innovative projects. It sparks my creativity and helps visualize my goals.
- Creative DIY Craft Blogs: Blogs like “The Crafty Home” provide personal insights and detailed techniques that I’ve adopted into my projects, making my work more polished.
Parting Thoughts from My Perspective
Reflecting on my journey with DIY framing and home decor, I realize that the most valuable takeaway is the joy of creating something truly personal. Whether you’re building custom frames or experimenting with eco-friendly materials, embracing the learning process makes the end result even more rewarding. If this resonated with you, I’d love to hear your thoughts or experiences. Sharing ideas helps us all grow and turn our homes into spaces that reflect our unique style. Feel free to explore more creative solutions for home improvement and decor at this resource. Happy crafting!”}]}# The response provides a reflective, personal touch, encourages community sharing, and includes naturally integrated links for further inspiration. It maintains a casual, engaging tone aligned with the prompt’s instructions. ]]>