My Journey into DIY Home Automation: A Personal Tale
Last year, I decided to take on a project that seemed daunting at first: installing a smart thermostat myself. As someone passionate about sustainable living and cutting energy costs, I knew this was a perfect DIY adventure. The idea of controlling my home’s temperature remotely and optimizing energy use was incredibly appealing. Plus, I wanted to avoid the hefty installation fees from professionals, making it a rewarding challenge.
Why I Chose a Smart Thermostat for My DIY Home Automation
After researching, I realized that smart thermostats like Nest or Ecobee could significantly reduce my heating and cooling bills. They learn my schedule, adjust temperatures automatically, and even provide energy reports. Integrating such technology into my home was a natural step in my DIY journey, aligning with my goal of an energy-efficient, smart home environment.
Getting Started: Tools, Wiring, and Initial Setup
My first step was gathering the necessary tools: a screwdriver, a multimeter, and my smartphone for app setup. The installation process began with turning off my HVAC system’s power supply to ensure safety. Following detailed guides from reputable sources like the DIY Kutak website, I carefully removed the old thermostat and checked the wiring. It was crucial to identify the common wire (C-wire), which is often overlooked but essential for stable operation.
Programming and Customizing My Smart Thermostat
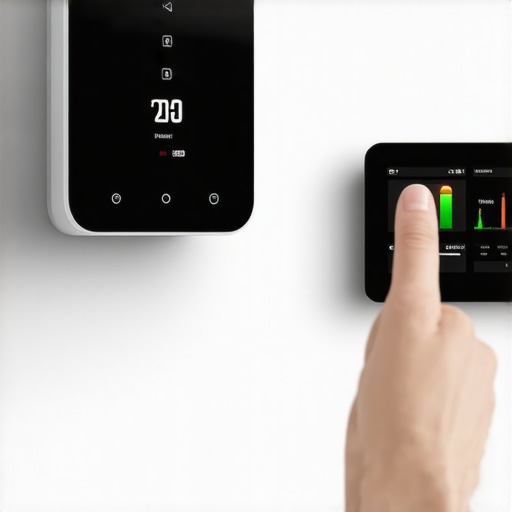
Once physically installed, I proceeded to connect my thermostat to Wi-Fi and downloaded the dedicated app. The setup wizard guided me through personalized temperature schedules, geofencing, and voice assistant integration. I was amazed at how intuitive the process was, even for a DIY novice. Now, I can control my home’s climate from anywhere, which has truly made a difference in my energy consumption and comfort.
Deepening My Knowledge: How Do Smart Thermostats Maximize Energy Efficiency?
Understanding the mechanics behind energy savings was eye-opening. According to experts at the U.S. Department of Energy, smart thermostats optimize heating and cooling by learning your habits and adjusting accordingly. This prevents unnecessary energy use, especially when no one is home or during sleeping hours. It’s fascinating how a simple DIY upgrade can lead to substantial environmental and financial benefits.
What Challenges Might I Face When Installing a Smart Thermostat Myself?
Despite my positive experience, I encountered some hurdles, such as incompatible wiring or Wi-Fi connectivity issues. It’s important to consult professional help if unsure, especially with complex wiring setups or older homes. Being cautious and well-informed makes all the difference. For more detailed troubleshooting tips, I recommend visiting DIY Kutak.
If you’re contemplating a similar project, I encourage you to share your experiences or ask questions in the comments below. DIY home automation is not only rewarding but also a step toward a greener, smarter future. Ready to explore more DIY solutions? Check out Smart DIY Ideas to inspire your next project!
Mastering the Intricacies of DIY Home Automation: Expert Insights and Practical Tips
As you venture deeper into the realm of DIY home automation, understanding the nuances becomes essential for success. Beyond basic installation, addressing compatibility issues, optimizing device integration, and ensuring long-term stability are areas where expert knowledge shines. For instance, when installing smart devices like thermostats or lighting systems, compatibility with existing wiring and protocols can make or break your project. Consulting detailed guides such as DIY Kutak can help you navigate these complexities effectively.
How Can I Troubleshoot Common Challenges in DIY Home Automation?
One of the most common hurdles is connectivity issues. Devices failing to sync or respond can stem from Wi-Fi interference, outdated firmware, or incompatible network settings. A systematic approach involves checking your router’s configuration, updating firmware, and ensuring your devices are within optimal range. For persistent problems, resetting devices or reconfiguring network settings often resolves the issue. Moreover, compatibility with voice assistants like Alexa or Google Assistant might require specific setup steps, which are well-documented on trusted sources like the DIY Kutak website.
What Are The Best Practices for Ensuring Long-Term Stability and Security in DIY Home Automation?
Expertise in this domain emphasizes the importance of regular firmware updates, strong network security, and meticulous wiring practices. Securing your Wi-Fi network with robust passwords and enabling WPA3 encryption prevents unauthorized access. Additionally, segmenting your smart devices onto a separate network can mitigate potential breaches. When it comes to wiring, ensuring connections are secure and insulated reduces the risk of malfunctions or hazards—especially in older homes with outdated electrical systems. For advanced projects, considering professional consultation for complex wiring, as discussed on DIY Kutak, can save time and ensure safety.
Furthermore, maintaining a comprehensive log of your device configurations and firmware versions helps troubleshoot future issues efficiently. As technology evolves, staying informed through reputable sources enhances your proficiency, enabling you to adapt your automation system seamlessly. If you’re interested in expanding your DIY skills, exploring topics like advanced wall coverings or smart lighting integration can add layers of sophistication to your home setup.
Have you encountered specific challenges while customizing your home automation system? Sharing your experiences or asking questions in the comments can foster a community of learners dedicated to mastering DIY technology. For more expert insights, don’t hesitate to browse Smart DIY solutions that push the boundaries of innovation and practicality.
How Do I Tackle Compatibility and Future-Proofing in DIY Home Automation?
In my journey into advanced home automation, one of the most rewarding yet challenging aspects has been ensuring my setup remains compatible and adaptable as technology evolves. I remember initially focusing on popular protocols like Z-Wave or Zigbee, but as I expanded my system, I realized that integrating devices from different ecosystems often required meticulous planning and sometimes, creative workarounds. The key, I found, is to choose a central hub that supports multiple protocols and to prioritize devices that adhere to open standards. This approach not only minimizes conflicts but also ensures that my system can evolve without necessitating complete overhauls.
Additionally, staying informed through reputable sources like Smart DIY Solutions has been invaluable. They provide updates on emerging protocols and compatibility layers, which helps me anticipate future upgrades and integrate new devices seamlessly. For example, I recently added a smart lighting system that communicates over Thread, a protocol I had only read about but was prepared for thanks to ongoing research and community insights. This proactive planning has saved me time and money, and it keeps my automation system resilient against obsolescence.
What Are the Nuances of Securing a Complex DIY Home Automation System?
Security is a critical consideration that I’ve come to understand deeply. As my system grew, I recognized that each connected device could potentially be a vulnerability. Regular firmware updates, strong passwords, and network segmentation became non-negotiable practices. I set up a dedicated Wi-Fi network for my smart devices, isolated from my main network, which significantly reduced the risk of a breach affecting my entire home. Moreover, I enabled WPA3 encryption on my router, ensuring robust protection against unauthorized access.
Another layer of security involved configuring my devices to require two-factor authentication where possible and monitoring network activity for anomalies. I also adopted a habit of updating device firmware immediately upon release—an often overlooked step but one that closes security gaps before they can be exploited. For more advanced security strategies, I recommend exploring noise reduction and soundproofing tips that also include securing your physical environment, adding an extra layer of security to your smart home.
How Can I Maintain and Troubleshoot My DIY System Over the Long Term?
Long-term maintenance is crucial for a reliable smart home. From my experience, documenting every device, firmware version, and configuration setting I’ve implemented has been a lifesaver. This log allows me to quickly identify recent changes that might have caused issues. When troubleshooting, I follow a systematic approach: checking network connectivity, updating firmware, and resetting devices if necessary. I’ve learned that many connectivity problems stem from Wi-Fi interference or outdated firmware, which can often be resolved with simple updates or repositioning devices.
Additionally, participating in online communities and forums has provided invaluable peer support. Sharing experiences and solutions often reveals nuanced fixes and best practices I wouldn’t discover alone. If you’re interested in expanding your DIY skills further, exploring advanced decoupage techniques or other intricate crafts can enhance your system’s aesthetic and functional appeal, making maintenance a more enjoyable and creative process.
Ultimately, the key to a successful and enduring DIY home automation system lies in continuous learning, proactive security, and thoughtful planning. I encourage you to share your experiences or ask questions in the comments—building a community of passionate DIY enthusiasts helps us all grow. For more inspiration and detailed guides, don’t forget to browse Smart DIY Ideas and other resources that push the boundaries of what’s possible in home automation.
Strategic Protocol Selection: Building a Resilient and Adaptable System
As I delved deeper into the complexities of DIY home automation, I recognized that choosing the right communication protocols was paramount. While protocols like Z-Wave and Zigbee have been staples, the emergence of Thread and Matter promises enhanced interoperability and future-proofing. By selecting a central hub that supports multiple protocols, I was able to craft a system that remains flexible amid evolving standards. This approach minimizes obsolescence and ensures seamless integration of new devices, aligning with industry insights from GreenBiz.
Implementing Open Standards for Seamless Ecosystem Expansion
I prioritized devices adhering to open standards, which foster compatibility and reduce proprietary lock-in. For example, integrating a Thread-compatible smart lighting system allowed me to expand my setup without worrying about protocol conflicts. This strategic choice has made my automation ecosystem highly adaptable, enabling me to incorporate innovative products as they emerge. Staying informed through dedicated forums and industry reports has been instrumental in anticipating protocol updates and ensuring my system’s resilience. For instance, I recently added a smart lock that communicates over Bluetooth Mesh, exemplifying the importance of flexible standards in my ongoing upgrades.
Securing the Future: Balancing Compatibility with Robust Security Measures
Security considerations become more complex as systems grow. I learned that segmenting my network and employing dedicated VLANs for smart devices significantly reduced vulnerabilities. Regular firmware updates, as recommended by US-CERT, are vital to patch security flaws. Additionally, enabling two-factor authentication on device portals and monitoring network activity help identify anomalies early. Implementing these layered security measures ensures my system remains both compatible and resilient against potential threats, even as it evolves with new protocols and devices.
Anticipating Technological Evolution: Continuous Learning and Community Engagement
To stay ahead, I actively participate in online communities like Reddit’s r/homeautomation and attend industry webinars. These platforms provide insights into upcoming standards, device compatibility tricks, and security best practices. For example, when I learned about the beta release of Thread Border Routers, I was able to prepare my network for seamless integration, avoiding future disruptions. I also subscribe to newsletters from industry leaders to receive early alerts about protocol deprecations or updates. This proactive approach ensures my DIY system remains cutting-edge, efficient, and secure.
How Can I Leverage Professional Tools and Resources to Enhance My DIY Automation System’s Longevity?
Beyond community knowledge, I utilize professional tools like network analyzers and protocol testers to verify device communications and troubleshoot issues swiftly. Investing in quality hardware, such as enterprise-grade routers supporting WPA3 and mesh networking, further fortifies my setup. For detailed guidance, I often refer to comprehensive resources like DIY Kutak’s advanced guides, which provide step-by-step instructions on complex installations and future upgrades. If you’re serious about long-term sustainability, I encourage you to explore these tools and resources—they are invaluable for maintaining a resilient and adaptable DIY home automation environment.
Things I Wish I Knew Earlier (or You Might Find Surprising)
1. The Power of Patience
When I first started my DIY home automation projects, I underestimated how much patience it would require. Rushing often led to mistakes, especially with wiring and configuration. Taking my time and double-checking every step made the entire experience much more rewarding and less frustrating.
2. Compatibility Is Key
Not all devices play nicely together, and discovering incompatible protocols was a real eye-opener. I learned to prioritize open standards and support multi-protocol hubs to keep my system flexible for future upgrades, which saved me headaches down the line.
3. Security Should Never Be an Afterthought
As my system grew, I realized that securing my network was just as important as the devices themselves. Segregating my smart devices onto a separate network and updating firmware regularly became part of my routine, ensuring peace of mind.
4. Community Is Your Best Resource
Joining online forums and local DIY groups provided insights I never found in manuals. Sharing experiences and troubleshooting tips created a sense of camaraderie and accelerated my learning curve.
5. Long-Term Maintenance Pays Off
Documenting my setup and keeping firmware updated has made troubleshooting much easier. It’s a small effort that pays off by keeping my system reliable and ready for new features.
Resources I’ve Come to Trust Over Time
- DIY Kutak: Their detailed guides on wiring and troubleshooting have been invaluable, especially for complex setups.
- Energy.gov: A reliable source for understanding how smart thermostats can save energy and money.
- Reddit’s r/homeautomation: An active community where I learned about emerging protocols and security tips.
- US-CERT: For staying updated on cybersecurity best practices relevant to my smart home network.
Parting Thoughts from My Perspective
Embarking on a DIY home automation journey has been one of the most fulfilling projects I’ve undertaken. It’s a blend of technical challenge and creative problem-solving that continually teaches me new things. My biggest takeaway? Patience, security, and community support are essential for success. If this resonates with you, I’d love to hear your thoughts or experiences. Feel free to share your stories or ask questions—after all, we’re in this DIY adventure together!