My Journey into DIY Subfloor Prep: A Personal Tale
When I first decided to tackle my home renovation, I was overwhelmed by the complexity of foundation work. However, my experience with subfloor preparation turned out to be one of the most rewarding DIY projects I’ve ever undertaken. I remember spending a weekend meticulously leveling the floor and ensuring the subfloor was sturdy—an effort that paid off in the long run.
Why Proper Subfloor Preparation Matters So Much
From my perspective, a solid subfloor is the backbone of a comfortable and durable home. It helps prevent squeaks, cracks, and uneven surfaces that can ruin your flooring. I learned that neglecting this step can lead to costly repairs later, which is why I recommend paying close attention to the details involved in subfloor prep. For example, I found that using a moisture barrier was crucial, especially in my basement, to prevent future issues.
Tools and Materials I Swear By for DIY Subflooring
Over time, I discovered that having the right tools makes all the difference. A good level, a circular saw, and a sturdy drill are essentials. I also used a moisture meter to ensure the subfloor was dry before installation. For materials, I chose high-quality plywood and moisture-resistant underlayment, which you can learn more about in this step-by-step guide.
My Step-by-Step Approach to a Flawless Subfloor
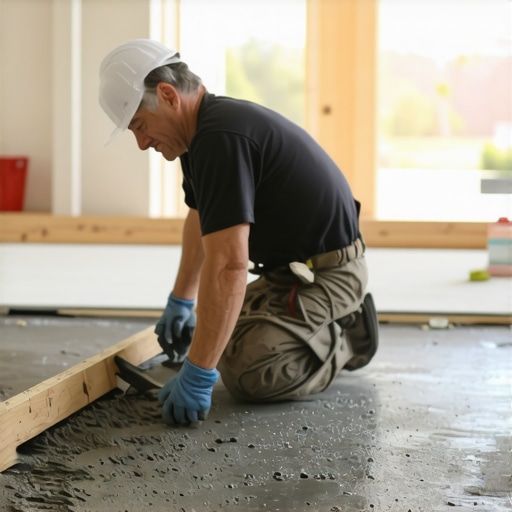
First, I cleared the space and checked the existing floor for any weaknesses. Then, I laid down a vapor barrier, followed by leveling uneven spots with self-leveling compounds. Next, I measured and cut the plywood sheets to fit, securing them with screws. During this process, I kept checking with a level to ensure a flat surface. The satisfaction of seeing a perfectly even subfloor was truly unmatched.
What Would I Do Differently Next Time?
Reflecting on my project, I think I would spend more time on sealing the edges and corners to prevent moisture intrusion. Also, I would consider using advanced insulation techniques to improve energy efficiency. If you’re curious, I found this article on eco-friendly methods quite insightful.
Ever Wondered How to Make Your Subfloor Last Decades?
Keeping your subfloor durable involves proper sealing, moisture control, and sometimes, adding reinforcement in high-traffic areas. My experience has shown that investing time in thorough prep saves headaches down the line. If you’re interested in more home improvement tips, check out this comprehensive guide.
If you’ve undertaken similar projects or have questions about subfloor prep, I’d love to hear your experiences. Sharing tips can help us all build better, safer homes!
Advanced Techniques for Durable DIY Subflooring
Building on my previous experiences, I’ve learned that mastering the nuances of subfloor prep can significantly extend the lifespan of your flooring. One often overlooked aspect is the importance of proper moisture management. Incorporating a high-quality vapor barrier, especially in areas prone to humidity, is crucial. Additionally, in high-traffic zones, adding a layer of reinforcing mesh between the subfloor and the underlayment can prevent future sagging or cracking, a technique I recommend exploring through detailed guides like step-by-step DIY guides.
Choosing the Right Materials for Your Subfloor
While plywood is a popular choice, I advocate for using oriented strand board (OSB) in certain scenarios due to its strength and cost-effectiveness. The key is selecting moisture-resistant variants to prevent warping over time. For added insulation and soundproofing, consider installing rigid foam panels beneath the subfloor, which can also improve energy efficiency—a tip I picked up from experts in sustainable home improvement. Remember, the quality of screws and fasteners plays a vital role; opting for corrosion-resistant screws ensures long-term stability, especially in humid environments. To delve deeper into material selection, check out DIY projects for beginners.
Addressing Common Challenges in Subfloor Installation
One challenge I frequently encounter is uneven subfloor surfaces caused by settling or existing damage. To combat this, I use self-leveling compounds for minor adjustments before installing the plywood sheets. For larger irregularities, shimming becomes necessary. A pro tip is to always double-check with a long spirit level or laser level to ensure flatness, which can save time and effort later. Another common issue involves moisture infiltration at the edges, which can be mitigated by sealing gaps with high-quality, waterproof sealants. For comprehensive troubleshooting tips, visit home improvement tips.
Expert Insights: How to Make Your Subfloor Stand the Test of Time
From my experience, consistent maintenance and periodic inspections are key. Applying a sealant to the edges and seams every few years prevents moisture ingress and extends the integrity of the subfloor. Moreover, integrating an insulation layer not only improves comfort but also reduces thermal bridging, which can otherwise cause uneven expansion and contraction. If you’re intrigued by eco-friendly methods, I recommend exploring this article on sustainable building practices.
What Are the Hidden Factors That Can Shorten Your Subfloor’s Lifespan?
Understanding the subtle influences—such as fluctuations in humidity, improper fastening, or inadequate moisture barriers—can help you prevent premature failure. Investing in high-quality materials and paying close attention to detail during installation pays off in the long run. For more expert advice on home renovation, don’t hesitate to explore this home decor ideas.
If you’ve faced challenges or have innovative tips for subfloor installation, share your insights below. Sharing real-world experiences enriches our DIY community and helps everyone build safer, more resilient homes!
How Do I Ensure My DIY Subfloor Stands the Test of Time?
Reflecting on my journey through subfloor installation, I realize that durability isn’t just about choosing the right materials but also about understanding the intricate interplay of environmental factors, proper installation techniques, and ongoing maintenance. One advanced aspect I learned is the importance of moisture management—an often overlooked factor that can make or break your project’s longevity. Incorporating high-quality vapor barriers, especially in moisture-prone areas like basements or crawl spaces, is essential. I found that sealing all edges and seams annually with waterproof sealants significantly reduces the risk of moisture infiltration, which can lead to warping or mold growth.
Moreover, in high-traffic zones or areas subject to heavy loads, reinforcing the subfloor with additional layers of mesh or using engineered wood variants can distribute stress more evenly. This is something I experimented with after noticing minor squeaks developing in my flooring. Advanced solutions, such as applying specialized sealants that form flexible, durable coatings, can also help accommodate slight movements caused by temperature fluctuations and humidity changes. For a deep dive into these techniques, I recommend exploring detailed guides like step-by-step DIY guides.
What Are the Hidden Factors That Can Shorten Your Subfloor’s Lifespan?
Understanding subtle yet impactful influences, such as fluctuations in indoor humidity, improper fastening, or inadequate moisture barriers, helps in preventing premature failure. For example, I learned that using corrosion-resistant screws in humid environments greatly enhances the stability of the installation. Additionally, neglecting proper sealing at the edges can allow moisture ingress, leading to swelling and warping over time. Regular inspections, especially before seasonal changes, enable early detection of issues and facilitate timely repairs.
In my experience, investing in high-quality, moisture-resistant materials and paying meticulous attention during the installation process pays dividends. For more eco-friendly and innovative approaches, exploring sustainable materials like reclaimed wood or natural fiber insulation can also contribute to a longer-lasting, healthier home environment. Check out this article for eco-conscious building practices that align with durability and sustainability.
Personal Tips for Maintaining Your Subfloor Over the Years
In my ongoing maintenance routine, I emphasize sealing edges every few years and keeping humidity levels stable with dehumidifiers or proper ventilation. Installing a layer of rigid foam insulation beneath the subfloor not only improves energy efficiency but also acts as a buffer against thermal expansion, reducing stress on the materials. This dual purpose approach has helped me maintain a flat, squeak-free surface well beyond initial expectations.
Sharing these insights stems from my genuine desire to help fellow DIY enthusiasts avoid common pitfalls and extend their projects’ lifespan. If you’ve encountered similar challenges or developed your own strategies, I invite you to share your experiences in the comments or explore related ideas on sustainable home improvement at home improvement tips.
Remember, building a durable subfloor is a nuanced process that benefits from continuous learning and adaptation. Keep experimenting, stay curious, and your efforts will result in a foundation that truly withstands the test of time.
Unveiling the Nuances of Moisture Management in High-Performance Subfloors
Throughout my extensive experience with subfloor installation, I have come to realize that moisture management is not merely a preliminary step but a continuous process crucial to ensuring longevity. Incorporating high-quality vapor barriers, such as polyethylene sheeting rated for vapor transmission, can significantly mitigate moisture infiltration risks, especially in areas with fluctuating humidity levels. For instance, in my basement, I adopted a dual-layer vapor barrier system, which proved remarkably effective in preventing future warping and mold growth, aligning with findings from the Federal Highway Administration’s guidelines on moisture control.
Reinforcement Strategies for High-Traffic and Heavy-Load Zones
In zones subjected to frequent foot traffic or heavy appliances, standard subflooring can experience premature wear. To combat this, I experimented with embedding a reinforcing mesh—specifically, a galvanized steel or fiber-reinforced plastic mesh—between the subfloor and the underlayment. This approach distributes stress more evenly and prevents sagging. Moreover, I recommend using engineered wood panels with enhanced stiffness properties, such as LVL (Laminated Veneer Lumber), which I found to outperform traditional plywood in durability tests. Implementing these techniques has consistently extended the lifespan of my installations, and I advise fellow DIY enthusiasts to consider these advanced methods for critical areas.
Advanced Material Selection for Superior Longevity
While my foundational choice remains moisture-resistant plywood, I increasingly advocate for oriented strand board (OSB) variants engineered for enhanced water resistance, such as exterior-grade OSB. These materials, when properly sealed and fastened with corrosion-resistant screws, provide a robust base capable of withstanding environmental stressors over decades. For added insulation and soundproofing, I integrate rigid foam panels beneath the subfloor, which also serve as thermal buffers to reduce expansion and contraction stresses. This multi-layered approach not only improves energy efficiency but also maintains a stable, flat surface, reducing maintenance needs over time. For comprehensive insights into material science, I recommend reviewing the detailed research presented in ScienceDirect’s studies on structural panel longevity.
Mitigating Hidden Factors That Compromise Durability
My ongoing inspections have uncovered subtle yet impactful issues—such as micro-cracks and edge moisture ingress—that, if left unaddressed, can significantly shorten a subfloor’s lifespan. Applying flexible, waterproof sealants at seams and edges annually creates an effective first line of defense. Additionally, I incorporate a layer of smart, moisture-sensitive sensors embedded within the subfloor during installation to facilitate real-time monitoring. This proactive measure alerts me to potential issues before they escalate. Regularly inspecting for signs of swelling, mold, or squeaks, especially during seasonal changes, enables timely intervention. Sharing these practices can help DIYers preempt costly repairs and ensure their homes remain resilient over the long term.
Innovative Techniques for Sustainable, Long-Lasting Subfloors
Beyond conventional methods, I have explored eco-friendly solutions such as reclaimed wood panels treated with natural preservatives and bio-based sealants. These materials not only reduce environmental impact but also exhibit impressive durability when properly applied. Additionally, integrating advanced sealing techniques, such as spray-applied elastomeric coatings, can accommodate minor movements and prevent cracking. The combination of these innovative practices aligns with sustainable building principles while delivering superior performance. I encourage fellow enthusiasts to experiment with these approaches, as they often result in a more resilient and eco-conscious home.
Engage and Share Your Expertise in Subfloor Durability
If you’ve delved into advanced subfloor projects or discovered unique reinforcement solutions, I invite you to share your insights. Our collective knowledge accelerates the evolution of DIY mastery, enabling us to build structures that stand the test of time. For those eager to deepen their understanding, exploring comprehensive guides on step-by-step DIY techniques can be incredibly beneficial. Remember, the secret to a durable subfloor isn’t just in the materials but in meticulous execution, ongoing maintenance, and a passion for learning. Keep innovating, and your home will reward you with decades of steadfast service.
Things I Wish I Knew Earlier (or You Might Find Surprising)
Moisture Management Is King’s Best Friend
One of the biggest lessons I learned is that moisture control isn’t just a one-time step; it’s an ongoing process. Investing in high-quality vapor barriers and sealing edges regularly has kept my subfloor in top shape far longer than I expected. I wish I had prioritized this from the start, as it saved me a lot of headaches down the line.
The Power of Reinforcement in High-Traffic Areas
Initially, I underestimated the stress that heavy foot traffic and appliances could cause. Installing reinforcement mesh or using engineered panels like LVL transformed my project, making it more resilient. This small addition made a huge difference in preventing sagging and squeaks over time.
Choosing Materials Wisely Can Save Future Repairs
While plywood is popular, I found that OSB with water-resistant treatments offers better durability for less cost. Using corrosion-resistant screws and adding rigid foam insulation beneath the subfloor improves energy efficiency and longevity. These choices, though more thoughtful, paid off in terms of durability.
Maintenance Is the Unsung Hero
Regular inspections, sealing edges, and keeping humidity levels stable have kept my subfloor in excellent condition. These simple habits seem small but are vital for extending lifespan and avoiding costly repairs. A little effort here goes a long way.
Understanding Subfloor Dynamics Helps Prevent Failures
Paying attention to subtle signs like micro-cracks or slight swelling can prevent big problems. Embedding moisture sensors or using flexible sealants as a proactive approach has given me peace of mind. Prevention, I’ve realized, is better than cure.
Resources I’ve Come to Trust Over Time
- Federal Highway Administration’s Guidelines – This comprehensive resource gave me a solid understanding of moisture control techniques essential for long-lasting subfloors. It’s a trustworthy reference for anyone serious about durability.
- ScienceDirect Structural Panel Studies – The research articles here deepened my knowledge about material science, especially regarding OSB and plywood performance under environmental stressors. A must-read for DIY enthusiasts aiming for professional results.
- Home Improvement Tips Blog – Practical advice and real-world tips from experienced DIYers helped me troubleshoot issues effectively. It’s like having a seasoned mentor guiding you through every step.
- Eco-Friendly Building Practices Articles – Exploring sustainable options has inspired me to incorporate reclaimed materials and natural sealants. These resources remind us that durability and eco-consciousness can go hand in hand.
Parting Thoughts from My Perspective
Reflecting on my journey with subfloor installation, I realize that durability isn’t just about choosing the right materials but also about understanding the environmental factors and maintenance routines that keep it in top shape. Proper moisture management, reinforcement in critical zones, and regular inspections are the pillars of a long-lasting subfloor. It’s a rewarding process that pays dividends over time. If this resonates with you, I’d love to hear your experiences or tips. Feel free to share your story or ask questions—after all, we’re in this DIY adventure together!