It was a scorching summer afternoon when I finally stepped onto my outdoor wooden deck, only to be greeted by a warped, faded surface that looked years past its prime. The worst part? I had neglected proper staining and sealing, thinking a simple coat would suffice. That lightbulb moment hit hard — I realized I’d underestimated the importance of advanced staining & sealing techniques for outdoor decks. If you’ve ever faced the frustration of a deck that’s lost its luster or succumbed to the elements too quickly, you’re not alone.
Why Your Deck Deserves More Than Just a Basic Coat
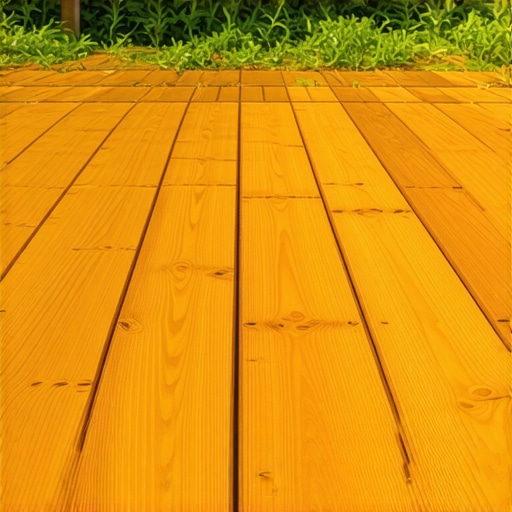
Outdoor wooden decks are more than just a backyard feature; they’re an investment in your home’s aesthetic and functionality. But exposure to sunlight, rain, snow, and temperature fluctuations takes a toll over time. Regular maintenance isn’t enough anymore — you need to understand the science behind proper staining and sealing to extend your deck’s life and keep it looking stunning. Trust me, neglecting this can lead to costly repairs or even complete replacement sooner than expected. According to a study by the Wood Protection Association, well-applied sealants can double the lifespan of outdoor wood, saving you time and money in the long run.
What We Will Cover Today
In this post, I’ll walk you through the advanced techniques that transformed my deck from a faded eyesore into a durable outdoor masterpiece. We’ll explore the right products, preparation steps, application methods, and maintenance tips that ensure your deck withstands the test of time. Ready to upgrade your outdoor space? Let’s dive into the secrets of advanced staining & sealing for long-lasting beauty.
Is It Really Worth the Extra Effort? A Common Skeptic’s Dilemma
Early in my journey, I made the mistake of rushing through the sealing process, thinking any product would do. The result? A peeling, uneven finish that required sanding and reapplication within a year. That experience taught me the importance of choosing the right products and applying them correctly. If you’re skeptical about investing additional time and effort, I get it. But trust me, the results speak for themselves — a deck that not only looks better but also endures the elements far longer.
If this sounds familiar, don’t worry. I’ll guide you step-by-step through the advanced techniques that will make your deck the envy of your neighborhood. From selecting the best stains to mastering sealing methods, you’ll learn how to protect your outdoor oasis for years to come. For more creative ideas on outdoor projects, check out this helpful guide.
Choose the Right Products for Long-Lasting Results
Start by selecting high-quality, UV-resistant stains and sealants designed specifically for outdoor wood. I vividly remember my first attempt, where I used a generic stain that faded within months. Switching to a premium, oil-based stain with added UV blockers significantly improved durability. Look for products labeled as “penetrating” or “penetrant,” which seep deep into the wood fibers, providing superior protection. For sealing, opt for a waterproof barrier that also offers breathability to prevent mold and rot.
Thorough Surface Preparation is Key
Before applying any stain or sealant, I learned the hard way that surface prep is everything. I remember spending an entire afternoon sanding my deck with a medium-grit sander, aiming to remove old paint and rough patches. After sanding, I cleaned the surface with a pressure washer, making sure to reach all crevices. Allow the wood to dry completely—at least 48 hours—before proceeding. Think of this step as giving your deck a fresh canvas; skipping it is like painting over a dirty wall.
Applying Stain for Deep Penetration and Even Coverage
Use a Quality Brush or Sprayer
For my first coat, I used a high-quality synthetic brush, working in the direction of the wood grain to ensure even absorption. I remember how streaky it looked at first, but patience paid off. Alternatively, a pump sprayer can achieve a quick, uniform coat; just be sure to back-brush after spraying to work the stain into the wood. Avoid applying too thick a coat—multiple thin layers will last longer and look better.
Timing and Weather Conditions
Apply stain on a day with temperatures between 50-70°F and low humidity. I once tried staining during a humid morning, and the finish didn’t dry properly, leading to sticky spots. Follow the manufacturer’s instructions for drying times between coats, typically 4-6 hours. Remember, consistency is key to avoiding blotchy patches or uneven color.
Sealing for Maximum Protection
Once the stain has dried fully, it’s time to seal. I used a clear, water-based sealant with UV protection, which I applied with a roller for smooth coverage. Work in small sections, maintaining a wet edge to prevent lap marks. For textured or hard-to-reach areas, a brush works best. Applying two coats, with dry times in between, creates a robust barrier. Think of sealing as putting on a raincoat—protecting the stain from water and UV rays that cause fading and deterioration.
Maintain Your Deck Effectively
Regular cleaning with a gentle deck cleaner and periodic reapplication of sealant every 2-3 years will keep your deck looking fresh. I set reminders on my calendar to inspect and touch up worn areas before they become major issues. This proactive approach ensures your investment continues to shine year after year.
Remember, patience and attention to detail during each step will dramatically extend your deck’s life. If you want to explore more creative DIY solutions for your home or garden, visit this guide.
Debunking Myths About Deck Staining & Sealing
Many DIY enthusiasts believe that applying a single coat of stain or sealant is enough to protect their outdoor decks. However, in my experience working with various outdoor projects, I’ve found that this is a oversimplification. The real secret lies in understanding the nuances of product compatibility, application techniques, and environmental factors that influence longevity. For instance, many assume that any sealant will do, but expert advice emphasizes using UV-resistant, breathable sealants to prevent mold and water damage, especially in humid climates. This misconception often leads to premature wear and costly repairs, which could have been avoided with proper product selection and multi-layer applications.
The Oops Factor: Avoiding the Common Pitfall of Surface Preparation
One of the most overlooked yet critical steps is thorough surface preparation. I’ve seen countless decks suffer from peeling and uneven finishes because homeowners skipped or rushed this step. Sanding, cleaning, and allowing ample drying time are essential to ensure the stain penetrates deeply and adheres uniformly. Failing to do so is a trap that can compromise the entire project, leading to uneven color and reduced durability. Think of surface prep as setting a solid foundation for a house; neglect it, and everything built on top is at risk. For a detailed guide on prepping your deck, I recommend exploring this resource.
What Advanced Techniques Are There to Maximize Durability?
Beyond basic application, advanced techniques such as applying multiple thin coats, utilizing specialized sprayers with back-brushing, and timing applications during optimal weather conditions can significantly enhance the lifespan of your stain and sealant. Additionally, incorporating UV inhibitors and water-repellent additives into your products provides extra protection. As noted in a study by the Wood Protection Association, decks treated with these advanced methods last twice as long as those with standard treatments. Remember, patience and precision during application are key to achieving professional-grade results. Want to learn more about innovative DIY solutions? Check out creative DIY ideas here.
Final Thoughts: Master the Nuances for Long-Lasting Decks
Understanding these hidden nuances and avoiding common myths can save you time, money, and frustration. It’s not just about applying products but doing so with expert-level techniques that consider environmental factors, product compatibility, and surface condition. If you’re committed to extending your deck’s life, take the time to educate yourself on these advanced tips. Have you ever fallen into this trap? Let me know in the comments. For more insights on sustainable home projects, visit this guide.
Maintaining your outdoor deck over time requires the right tools and a strategic approach to ensure it remains durable and visually appealing. After applying advanced staining and sealing techniques, the next step is regular upkeep with specialized equipment that makes the process efficient and effective. I personally rely on a few key tools that have proven indispensable in my outdoor projects.
Power Sanders for Surface Preparation
Investing in a high-quality orbital sander is crucial for maintaining a smooth, clean surface before reapplying stain or sealant. I prefer a variable-speed model that allows me to adjust the power based on the deck’s condition, especially when dealing with weathered or rough wood. Using coarse grit for initial sanding and fine grit for finishing ensures the surface is perfectly prepped, which directly impacts the longevity of the finish.
Pressure Washers for Deep Cleaning
A robust pressure washer with adjustable PSI settings is a game-changer for deck maintenance. I recommend models with a range of nozzles, particularly a 25-degree nozzle for general cleaning and a more focused 15-degree nozzle for stubborn grime. Proper cleaning removes moss, algae, and old stains, allowing the new coat to adhere better. Remember to keep the pressure moderate to avoid damaging the wood fibers.
Brushes and Sprayers for Application
For staining, I prefer high-quality synthetic brushes that work well with oil-based stains, ensuring deep penetration into the wood. When working on larger surfaces, a professional-grade sprayer with adjustable flow control speeds up the process while maintaining an even coat. I back-brush after spraying to push the stain into the wood and prevent drips or uneven coverage. This two-step approach combines efficiency with precision, leading to a more durable finish.
Long-Term Maintenance Tools
To keep your deck in top shape over the years, consider a few long-term tools such as a deck cleaner formulated for periodic use and a quality sealant applicator, like a roller with extension handle. Regular inspections with a flashlight help identify early signs of wear or damage. When repairs are needed, a wood filler designed for outdoor use ensures the structural integrity remains intact, extending the life of your deck.
Future Trends in Deck Maintenance
Looking ahead, I predict that smart technology will play a bigger role in outdoor maintenance. Devices equipped with sensors could monitor moisture levels and UV exposure, providing real-time data to optimize sealing schedules. Additionally, eco-friendly, biodegradable cleaning agents are gaining popularity, aligning with sustainable living trends.
How do I maintain my deck over time?
The key to long-lasting outdoor decks is a consistent maintenance schedule that includes thorough cleaning, timely resealing, and using the right tools for each task. Combining manual tools like brushes and extension rollers with power equipment such as pressure washers and sanders ensures your deck remains protected from the elements. Remember, investing in quality tools not only makes the job easier but also enhances the durability of your finish. For more detailed DIY ideas on outdoor projects and maintenance, explore this comprehensive guide.
The Hardest Lesson I Learned About Deck Maintenance
One of the most valuable lessons I discovered was how surface preparation can make or break the durability of your deck. Rushing through sanding or skipping the cleaning stage resulted in peeling stains and an uneven finish, costing me time and money. Now, I understand that patience during prep ensures a strong bond and lasting protection.
3 Myths About Deck Staining That Held Me Back
Initially, I believed that one coat of stain was enough or that any sealant would shield my wood. These misconceptions led to premature wear. The truth is, multiple thin coats and specialized UV-protective sealants are essential for real longevity. Recognizing these myths transformed my approach and significantly extended my deck’s lifespan.
What Experts Won’t Tell You About Sealants
Many overlook the importance of breathable sealants that prevent mold and water damage. I learned that choosing the right product—UV-resistant and designed for outdoor use—can double the life of your treatment. This insider knowledge helped me avoid costly repairs and kept my deck looking fresh for years.
My Essential Toolkit for Outdoor Deck Maintenance
To achieve professional results, I rely on a high-quality orbital sander for surface prep, a versatile pressure washer for deep cleaning, and a sprayer combined with a brush for stain application. Investing in these tools simplifies the process and ensures a durable finish. For detailed DIY tools and tips, explore this comprehensive guide.
Your Turn to Try
Now that you know the advanced techniques for staining and sealing your outdoor deck, it’s time to put them into action. Remember, patience and attention to detail are your best friends when creating a long-lasting outdoor space. Have you ever struggled with applying stain evenly or choosing the right sealant? Share your experiences below and let’s learn together!