Have you ever looked at a pile of discarded electronics or scrap metal and thought, “This could be something useful”? I sure have. My first attempt at building a solar food dehydrator was a mess—parts flying everywhere, and honestly, it didn’t work worth a darn. It was frustrating enough to make me want to give up, but then I had a lightbulb moment: what if I could reuse old materials and make it simple, cheap, and effective? That’s when I discovered the magic of upcycling for DIY projects like this, and let me tell you, it’s been a game-changer.
Why a Solar Food Dehydrator Matters More Than Ever
In today’s world, food preservation isn’t just about convenience. It’s about sustainability, reducing waste, and saving money. Plus, with the ongoing push towards greener living, solar-powered solutions are gaining momentum. Building your own solar food dehydrator from upcycled components isn’t just a fun project—it’s a step toward a more eco-friendly lifestyle. Imagine drying herbs, fruits, or even jerky, all powered by the sun, without a hefty electric bill or complex equipment. That’s the promise I want to share today.
Whether you’re a seasoned DIY enthusiast or just someone looking to cut down on food waste, this guide will help you transform discarded materials into a practical appliance. I’ll walk you through the whole process, share my biggest mistakes (so you can avoid them), and show you how to get started with materials you probably already have lying around. Ready to turn trash into treasure? Let’s dive in!
Is Building a Solar Food Dehydrator Actually Worth the Hype?
When I first thought about building one, I was skeptical. Would it really work? Would it be worth the effort? My early mistake was rushing into it without enough research, which led to a flimsy, inefficient design. But once I learned the key principles—like proper insulation, airflow, and sun exposure—I saw it could be both simple and effective. And according to a study by the University of California, solar drying can preserve food with minimal nutrients loss, proving that this isn’t just a gimmick but a proven technique for sustainable food storage.
If you’ve ever hesitated because you thought, “Is this really doable?” or “Will it last?”—trust me, I’ve been there. The good news is that with a little patience and some upcycled parts, you can build a solar dehydrator that works well and saves you money. I’ll show you how to avoid common pitfalls and create something durable and efficient. So, if you’re ready to roll up your sleeves and get crafty, let’s move on to the step-by-step process of assembling your own solar dehydrator from scratch!
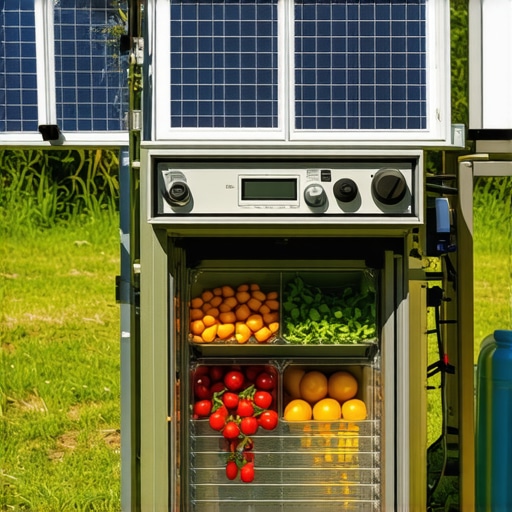
Gather Upcycled Materials for Your Dehydrator Frame
Start by collecting discarded wooden pallets, old picture frames, or scrap plywood. These materials serve as the structural base. Use a saw or even a sturdy knife to cut them into the desired size, typically around 2 feet by 3 feet for a manageable dehydrator. I remember the first time I used an old pallet, which was laying in my garage for years, and it turned out perfect for constructing the frame. Just ensure the wood is dry and free of rot or pests.
Build a Stable, Ventilated Box
Assemble your cut pieces with nails or screws, creating a box shape. Think of it like building a mini house—sturdy and well-ventilated. Drill small holes or slots on the sides for airflow. I once used an old window screen to cover the vents, which kept insects out while allowing hot air to escape. This step is crucial for even drying and prevents mold buildup.
Create a Reflective and Insulating Cover
Use reflective materials like aluminum foil or mylar sheets from old packaging to line the inside of your box. This boosts sun reflection and heat retention. For insulation, repurpose bubble wrap or foam from packaging. Line the interior walls with these to keep the heat steady. I taped layers of reflective foil to the inside of an upcycled cardboard box for a quick test run, and it worked surprisingly well. Remember, the goal is to trap heat and direct sunlight into your drying chamber.
Construct or Repurpose a Sun-Absorbing Cover
Use clear plastic or glass from old jars, windows, or plastic sheets to cover the top. This creates a greenhouse effect, trapping solar heat. Secure the cover with clips, tape, or even upcycled metal fasteners. I once used an old glass door from a broken cabinet, which provided excellent sunlight transmission. Ensure the cover is sealed well to prevent heat loss but easy to remove for loading and unloading.
Install a Fan or Passive Ventilation System
If you want faster drying, add a small, recycled computer fan powered by a solar panel or batteries. Alternatively, rely on passive ventilation by positioning vents at the bottom and top of your box, creating natural airflow. I experimented with an old computer fan from a broken PC, which I mounted on the side, connected to a small solar panel. It dramatically sped up the drying process, especially on cloudy days. Proper airflow prevents moisture buildup and prolongs the lifespan of your dehydrator.
Set Up the Drying Rack
Use reclaimed mesh trays, old window screens, or even wire racks from broken appliances. Place these inside the box, ensuring they are raised above the bottom to allow air circulation underneath. I once used an old baking rack, which was perfect as it allowed air to reach the food from below and above. Spread your herbs, fruits, or veggies evenly for uniform drying.
Test and Optimize
Place your dehydrator in a sunny spot, ideally south-facing, and monitor the temperature and humidity. Adjust vents or add reflective surfaces as needed. I learned that on a particularly hot day, a slight tilt of the cover helped prevent over-heating. Keep an eye on your first batch and tweak the design for better efficiency. Remember, patience and small modifications make a big difference.
Building your solar dehydrator from upcycled components is not only economical but also a rewarding way to contribute to sustainability. Every step, from sourcing materials to fine-tuning airflow, is an opportunity to learn and improve. When you see your dried herbs and fruits, you’ll appreciate the effort and creativity poured into this eco-friendly project. If you need more ideas on DIY projects, check out DIY projects for beginners or easy crafts for home decor.
Many enthusiasts jump into building their solar food dehydrator with good intentions, but there are nuanced misconceptions that can sabotage your efforts. One widespread myth is that simply sealing a box and exposing it to sunlight guarantees effective dehydration. In reality, without proper airflow management and insulation, your food may dry unevenly or spoil. The secret lies in understanding the balance between heat retention and ventilation, which many DIYers overlook. Passive airflow systems might seem sufficient, but in practice, integrating a small, solar-powered fan can make a significant difference, especially on cloudy days or in humid climates. As noted by experts in sustainable food preservation, controlled airflow prevents mold and ensures uniform drying, which is crucial for food safety and quality.
Another common mistake is choosing the wrong materials for the dehydrator’s structure. While upcycled wood and cardboard are tempting for their accessibility, they often lack the durability and insulation needed for long-term use. Using poor-quality materials can lead to rapid deterioration and decreased efficiency. Instead, focus on sturdy, weather-resistant components—think reclaimed pallets treated for outdoor use or metal frames that withstand the elements. This nuance is often missed by beginners eager to save money, but it’s vital for creating a reliable, safe dehydrator that lasts.
For advanced DIYers, a critical yet underappreciated aspect is the greenhouse effect created by the cover material. Clear plastics and glass trap heat effectively, but if they aren’t properly sealed or if the material isn’t UV resistant, you risk heat loss and material degradation over time. Using materials like recycled polycarbonate panels, which are UV stabilized, can dramatically extend your dehydrator’s lifespan. This is a level of nuance that separates a quick fix from a sustainable, high-performing project. In fact, studies have shown that UV-resistant plastics maintain clarity and structural integrity longer, ensuring consistent performance.
What about the myth that all sunlight is equally effective for dehydration?
Many assume that the more sunlight, the better, but the truth is that direct, consistent sunlight paired with optimal angles and heat retention matters more. Overexposure can even lead to food cooking or becoming too dry, losing nutrients. Adjusting the tilt of your cover and positioning your dehydrator for maximum southern exposure in the northern hemisphere can improve efficiency. This advanced understanding of solar geometry is often overlooked but is critical for high-quality dehydration. For detailed tips on optimizing sunlight exposure, check out smart DIY ideas for everyday problems.
In summary, the real expertise in building a solar food dehydrator lies in managing airflow, choosing durable materials, and understanding the nuances of solar heat. Avoid the trap of oversimplification, and your project will be more successful and sustainable. Have you ever fallen into this trap? Let me know in the comments or reach out through contact us for personalized advice. Remember, the devil is in the details, and mastering these nuances takes your DIY game to the next level!
Once you’ve built your upcycled solar food dehydrator, keeping it in top shape is crucial to ensure consistent, efficient drying. Regular maintenance not only extends the lifespan of your device but also guarantees food safety and quality. One of the most important aspects is cleaning the components thoroughly after each use—removing any residual moisture, food particles, or dust that can foster mold or attract pests. Use a soft brush or cloth with mild soap for the racks and the interior surfaces. Avoid harsh chemicals that might degrade upcycled materials or leave residues that could contaminate your food.
Monitoring the seals and covers is equally vital. Over time, plastic or glass covers can develop cracks or lose their UV resistance, which diminishes heat retention. Inspect the seals regularly and replace any worn-out weatherstripping or tape with durable, weather-resistant options. For the reflective surfaces like aluminum foil or mylar sheets, check for tears or dents that could reduce sunlight reflection. Replacing or repositioning these with recycled aluminum foil or reflective film from old solar panels can maximize solar gain.
Investing in the right tools makes maintenance smoother and more effective. I personally rely on a few key items: a soft microfiber cloth for gentle cleaning, a small brush for crevices, and a multimeter to check electrical connections if you’ve added a solar fan. For cleaning reflective surfaces, a damp cloth with a little vinegar solution helps remove smudges without scratching. When installing or repairing the solar fan, a cordless drill with various drill bits makes removing and attaching screws easier, especially in tight spots. Always keep spare screws, fasteners, and weatherproof tape handy—you never know when you’ll need them to fix a loose vent or crack.
Looking ahead, the trend in DIY solar dehydration is moving toward smart monitoring systems. Wireless temperature and humidity sensors can be integrated with simple microcontrollers like Arduino or Raspberry Pi to track drying conditions remotely. These systems can alert you when your food is ready or if the device needs attention, making long-term dehydration projects more manageable. As this technology becomes more affordable, expect to see more DIY enthusiasts adopting them to optimize efficiency and reduce manual checks.
How do I maintain my solar dehydrator over time?
The key to longevity lies in routine inspections and timely replacements. Regularly clean your reflective surfaces, check seals, and ensure the solar fan operates without obstruction. Lubricate moving parts if needed, and tighten loose screws. If your dehydrator is exposed to outdoor elements, consider applying a protective coating or paint to wooden parts to prevent rot. When you notice a drop in performance, don’t hesitate to troubleshoot electrical connections or replace worn components. Remember, a well-maintained dehydrator not only saves you money but also produces better, safer dried foods. Try upgrading your setup with a solar sensor system for real-time monitoring—it’s a game-changer for larger projects. For detailed DIY maintenance methods, visit this guide on bio-enzyme cleaners to keep your components pristine and eco-friendly.
Make maintenance a habit, and your solar dehydrator will serve you reliably for years. Regular checks, cleaning, and minor repairs are simple steps that make a huge difference in long-term performance. Don’t wait until it’s too late—get into the habit of inspecting your device monthly, especially after harsh weather. By doing so, you’ll avoid major breakdowns and keep your dried foods consistently perfect. Remember, a little effort now saves a lot of trouble later, and with the right tools and approach, maintaining your DIY solar dehydrator can be straightforward and even enjoyable.
What I Wish I Knew Before Starting This Journey
One of the biggest lessons I learned is that not all upcycled materials are created equal. Using old wood or cardboard might seem cost-effective, but durability and insulation matter more than I initially thought. I found that treating reclaimed pallets for outdoor use or choosing metal components dramatically improved longevity and efficiency.
Another insight was the importance of airflow management. Initially, I underestimated how critical passive ventilation is. Integrating small, recycled solar-powered fans or well-placed vents prevents mold and ensures even drying, which is essential for food safety.
My third revelation was about the sun’s position. I used to think that any sunny spot would do, but optimizing the angle for maximum solar gain—especially in different seasons—made a noticeable difference. Positioning the dehydrator south-facing and adjusting tilt based on the sun’s path improved dehydration times and quality.
Tools and Resources That Transformed My Approach
For building my dehydrator, I rely heavily on DIY guides like step-by-step DIY instructions. They provide detailed insights into material selection and assembly, saving me from costly mistakes.
My essential toolkit includes a cordless drill, a multimeter for electrical checks, and weather-resistant tape for sealing. These tools ensure my dehydrator remains functional and efficient over time.
Books such as Eco-Friendly Living with Upcycled Projects have broadened my understanding of sustainable DIY methods, inspiring me to think creatively about reuse and repurposing.
Online communities and forums also offer invaluable support. Sharing experiences and troubleshooting tips with fellow DIYers keeps me motivated and informed about new techniques or materials.
Keep Building and Innovating
Your journey into creating an eco-friendly, upcycled solar food dehydrator is just beginning. Every tweak and improvement not only enhances your device’s performance but also deepens your connection to sustainable living. Remember, the real reward lies in transforming everyday scraps into something that nourishes your family and the planet.
Are you ready to experiment with your own upcycled solar food dehydrator? Share your thoughts or questions below—I’d love to hear about your projects!