Discovering the Art of Veneer Repair Through Personal Trial
When I first noticed the peeling veneer on my beloved vintage coffee table, I felt a mix of frustration and curiosity. Veneer damage can be so disheartening because it mars the beauty of wood without the heavy bulk of solid wood. I decided to dive in and learn how to repair veneer like a pro, turning a frustrating moment into a rewarding DIY project. This guide is my personal account of the step-by-step process that restored my furniture and my confidence in tackling delicate repairs.
Understanding Veneer: Why Patience and Precision Matter
Before starting any repair, I took time to understand veneer — thin slices of wood glued onto surfaces. Because it’s delicate, improper repair can cause further damage. I learned that choosing the right adhesive and tools was essential. For my project, I used a high-quality wood glue designed specifically for veneers, which I sourced after checking recommendations from woodworking experts like those at Wood Magazine.
Step One: Preparing the Damaged Veneer
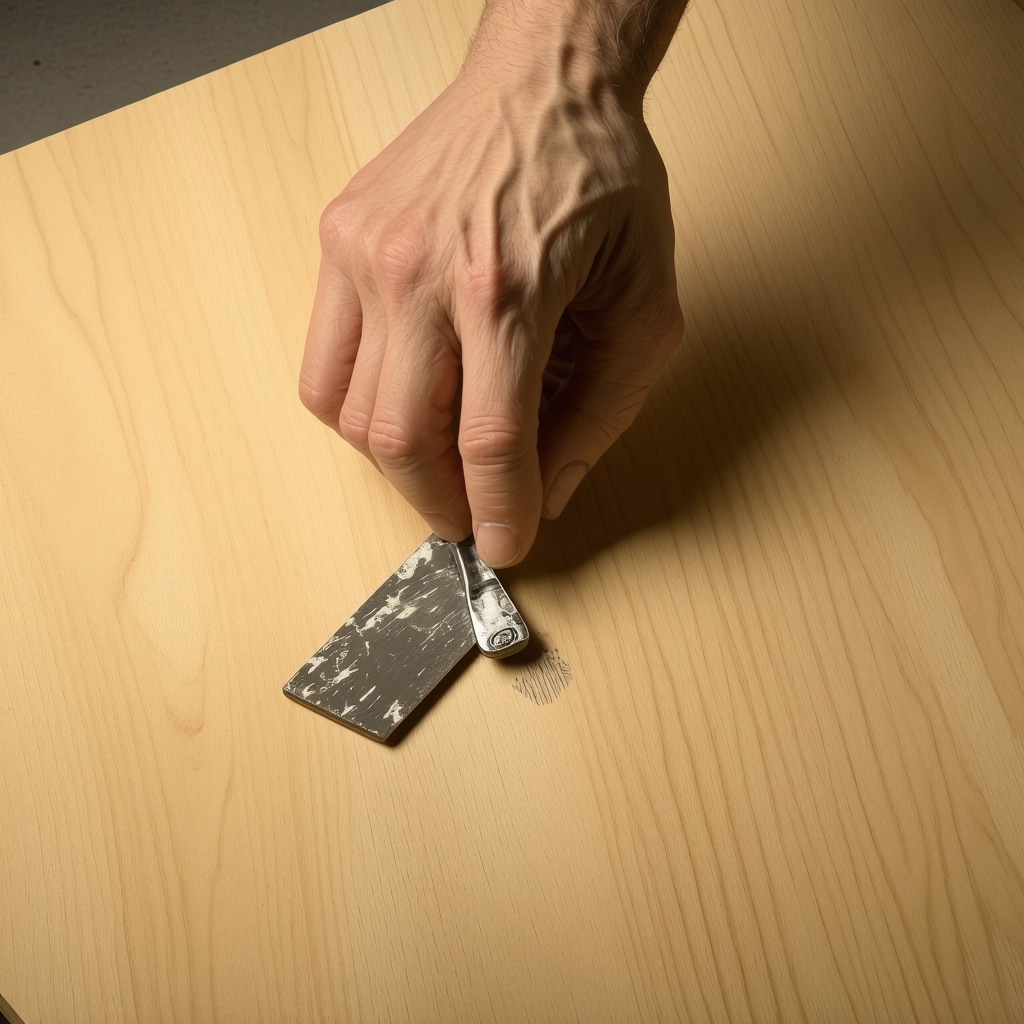
My first step was gently lifting the loose veneer edges using a thin putty knife. I was careful not to snap the fragile wood. After cleaning old glue residue with fine sandpaper and a soft cloth, the surface was ready for re-gluing. This preparation is crucial; skipping it can cause the repair to fail prematurely.
Step Two: Applying Adhesive and Clamping with Care
Applying a thin, even layer of wood glue on the underside of the veneer and the substrate was my next move. I pressed the veneer down carefully and used a small bar clamp with protective pads to avoid marks. Clamping overnight ensured a firm bond. I found that patience in this step paid off in a seamless repair.
How Do You Handle Veneer Gaps or Missing Pieces?
In my case, there was a small chip missing. I filled it with a veneer patch cut from leftover scraps, carefully matching the grain and color. If you can’t find matching veneer, wood filler tinted with stain can be an alternative. This delicate matching can make or break the final look.
Finishing Touches to Blend Repairs Seamlessly
Once the glue dried, I lightly sanded the repaired area and applied a matching stain and finish to blend it with the existing veneer. This step transformed the repair from visible patchwork to an almost invisible restoration. I highly recommend testing stains on scrap pieces first to get the color right.
My journey repairing veneer taught me valuable lessons about patience, precision, and the satisfaction of restoring cherished furniture. If you want to explore more smart DIY ideas for home improvement, I invite you to check out this collection of practical tips that helped me tackle many household fixes.
I’d love to hear about your own veneer repair experiences or any tips you might have picked up along the way. Feel free to share your stories or questions in the comments below!
Dealing with Complex Veneer Damage: When Simple Fixes Aren’t Enough
While minor veneer repairs can be straightforward, complex damage such as large cracks, extensive peeling, or water damage requires a nuanced approach. In these scenarios, understanding the veneer’s ply structure and substrate condition becomes critical. For instance, water damage can weaken both the veneer and the adhesive layer beneath, necessitating partial replacement rather than just re-gluing.
In one of my challenging projects, I encountered a coffee table with a veneer surface bubbling due to moisture trapped underneath. To address this, I carefully removed the damaged veneer section, prepared the substrate by sanding and sealing it to prevent further moisture intrusion, and then applied a new veneer patch. This method restored both the aesthetic and structural integrity of the piece.
Expert Tools and Materials That Elevate Your Veneer Repairs
Choosing the right tools can significantly affect the repair quality. Beyond the standard putty knife and clamps, I found that using a veneer scraper with a sharp blade allows for more controlled lifting of delicate edges without splintering. Additionally, a veneer roller helps ensure even pressure during gluing, avoiding air bubbles and improving adhesion.
When it comes to adhesives, hide glue remains a favorite among traditionalists for its reversibility and strong bond on wood fibers. However, modern PVA glues tailored for veneer offer excellent shelf life and ease of use, especially for beginners. I recommend testing adhesives on scrap veneer pieces to observe drying times and ease of cleanup before committing to the actual repair.
How Can Advanced Veneer Repair Techniques Preserve Antique Furniture Authenticity?
Preserving antique furniture demands a delicate balance between restoration and conservation. Advanced veneer repair techniques, such as using reversible adhesives and matching original veneer species and cuts, can maintain a piece’s historical value. For example, in restoring an 18th-century cabinet, I used hide glue and sourced matching veneer from reclaimed wood to replicate the original grain and patina.
Moreover, subtle color matching through layered staining and finishing can blend repairs without over-restoring, which might diminish the antique’s character. The Conservation Wiki offers an authoritative resource on these practices, emphasizing minimal intervention and reversibility to uphold furniture provenance.
Common Pitfalls in Veneer Repair and How to Avoid Them
One frequent mistake is applying excessive glue, which can seep through veneer seams and create unsightly stains. Using a thin, consistent adhesive layer is key. Another is inadequate clamping pressure or uneven clamping, which can result in bubbles or weak bonds. Using protective pads with clamps and ensuring even pressure distribution mitigates this risk.
Also, rushing through the drying process can compromise bond strength. Allowing sufficient curing time, ideally overnight or longer depending on adhesive specifications, ensures durability. Finally, mismatched stains or finishes can highlight repaired areas; testing and gradual color layering can produce seamless blends.
For more in-depth guidance on related home improvement projects that benefit from precision and patience, check out this comprehensive guide.
Have you faced any unusual veneer repair challenges or developed your own techniques? Share your experiences and questions in the comments to contribute to our community’s collective expertise!
Embracing the Unexpected Beauty in Veneer Repair Challenges
One of the most surprising and rewarding aspects of repairing veneer has been learning to appreciate the imperfections that sometimes emerge. Even with meticulous care, subtle variations in grain alignment or color shading can surface. Rather than seeing these as flaws, I’ve come to view them as the unique fingerprints of a handmade restoration. This perspective shift deepened my connection to the piece, transforming repair work from a mere fix into a creative dialogue with the original craftsmanship.
In some cases, especially when working with reclaimed or antique veneers, matching the exact species and cut isn’t always feasible. I recall a project where the available veneer scraps had a slightly different hue. Instead of forcing a perfect match, I carefully layered stains and finishes to harmonize the tones, resulting in a nuanced patina that felt authentic and intentional. This nuanced approach aligns with expert recommendations found in resources like Conservation Wiki, which emphasizes respecting the furniture’s history through minimal and reversible intervention.
When Patience Meets Precision: The Art of Layered Staining
Achieving a flawless finish after veneer repair is often about patience over speed. I found that applying stain in thin, multiple layers with drying time in between allows for gradual depth and color richness that a single coat can’t achieve. This technique, while time-consuming, offers remarkable control to blend repairs into the surrounding wood seamlessly.
Additionally, experimenting with various finishes—from shellac to lacquer or water-based polyurethanes—has helped me understand their different effects on sheen and texture. For anyone interested in exploring these finishes further, the guide on smart DIY ideas for everyday problems offers excellent insights into finishing techniques that preserve both beauty and durability.
How Do You Balance Restoration with Preserving Original Character?
One of the most profound questions I wrestled with during veneer repairs is how far to go in restoring a piece without erasing its story. Over-restoring can sterilize the charm that comes with age, while under-restoring might leave it vulnerable to further damage. I’ve found that assessing the historical value and intended use of the furniture guides this balance. For heirloom pieces, I lean towards conservation-focused repairs that stabilize and subtly enhance, rather than fully disguise.
Consulting authoritative conservation literature, such as the Conservation Wiki, has been invaluable in informing these decisions. Their emphasis on reversibility and minimal intervention encourages respect for the original maker’s intent—a principle I strive to embody in my work.
Personal Growth Through the Lens of DIY Veneer Repair
Beyond the technical skills, veneer repair has taught me lessons about patience, humility, and the joy of hands-on creativity. Each project presents its own puzzles and rewards, deepening my appreciation for the craft and history embedded in wood furniture. The process is as much about mindfulness and presence as it is about tools and materials.
If you’re inspired to embark on your own veneer repair journey or explore other creative DIY pursuits, I warmly recommend delving into resources like creative home decor crafts or the step-by-step DIY guides that have encouraged me along the way.
What are your thoughts on balancing restoration with preservation? Have you encountered moments where patience unlocked a better repair outcome? I invite you to share your stories, questions, or insights in the comments below—let’s continue learning together!
Integrating Scientific Understanding Into Veneer Repair Practices
Building on my hands-on experience, I delved into the scientific principles underlying veneer adhesion and wood behavior. Understanding wood’s hygroscopic nature—that it absorbs and releases moisture depending on ambient humidity—has been crucial in preventing recurrent veneer failures. This awareness informs my choice of adhesives and the timing of repairs, especially in regions with significant seasonal fluctuations.
For instance, choosing adhesives with flexible bonding properties helps accommodate slight wood movements without compromising the veneer’s integrity. Additionally, controlling the workshop environment’s humidity during repairs can drastically improve bond durability. These subtle yet impactful factors differentiate a temporary fix from a lasting restoration.
Customizing Veneer Matching Through Advanced Colorimetry
Matching veneer color and grain beyond a simple visual assessment has been an evolving challenge. I began exploring colorimetry tools to quantify color differences, enabling more precise stain formulations. This approach allowed me to replicate the nuanced hues and undertones of aged veneer, achieving seamless blends that fooled even seasoned eyes.
Moreover, layering translucent stains and glazes using a methodical, data-informed process yields richer depth and subtle texture variations. These techniques elevate veneer repair from a mere patching job to a sophisticated art form, honoring the original craftsmanship while embracing modern precision.
How Do Conservation Ethics Influence My Approach to Veneer Repair?
Conservation ethics profoundly shape my methodology, especially when working on antique or heritage pieces. I adhere to principles of minimal intervention and reversibility, ensuring that repairs do not obscure historical evidence or limit future treatments. This philosophy aligns with guidelines from the Conservation Wiki, which stresses the importance of documentation and the use of materials compatible with original components.
For example, when faced with irreversible damage, I opt for discrete inserts or fills that respect the piece’s story rather than concealing it entirely. This approach requires balancing aesthetic considerations with respect for provenance, which deepens the ethical complexity of veneer restoration.
Reflections on Craftsmanship: The Dialogue Between Maker and Restorer
Each veneer repair project feels like entering into a silent conversation with the original maker. Tracing grain patterns, feeling the texture, and interpreting imperfections become acts of empathy. This dialogue informs every decision, from adhesive selection to finishing techniques.
Embracing this perspective transforms veneer repair into a form of creative stewardship, where preservation and renewal coexist. It’s a journey that fosters not only skill development but also a profound appreciation for the material’s history and the hands that shaped it.
If you’re intrigued by the intersection of craftsmanship, science, and ethical restoration, I invite you to explore more advanced DIY insights in this detailed guide on antique furniture restoration. Your experiences and questions are most welcome—let’s continue this rich conversation in the comments!
Things I Wish I Knew Earlier (or You Might Find Surprising)
Sometimes, Imperfections Tell a Story
At first, I was so focused on making veneer repairs look flawless that any slight mismatch felt like failure. Over time, I realized these small imperfections—variations in grain alignment or subtle color differences—add character and authenticity. They remind me that restoration is a dialogue, not a disguise.
Patience Isn’t Just a Virtue; It’s Essential
Rushing through glue drying or staining almost always led to disappointing results. Waiting overnight (or even longer) for adhesives to cure and applying stain in thin, layered coats transformed my repairs from visible patches to seamless blends. It’s slow work, but the payoff is worth every minute.
The Right Tools Make a World of Difference
I used to think a putty knife and clamps were enough. Discovering specialized tools like veneer scrapers with razor-sharp blades and veneer rollers elevated my technique. They reduce damage risk and improve adhesion, making the repair process more professional and satisfying.
Conservation Ethics Can Guide Your Decisions
Especially with antiques, I learned to balance restoration and preservation. Using reversible adhesives and respecting the piece’s history helped me maintain its soul. Sometimes, less intervention is more meaningful than a perfect cosmetic fix.
Environmental Factors Matter More Than You Think
Understanding how wood reacts to humidity and temperature helped me prevent future veneer problems. Controlling workshop conditions and choosing flexible glues that accommodate wood movement have been game changers for durable repairs.
Resources I’ve Come to Trust Over Time
Conservation Wiki (here): An authoritative source on ethical restoration practices that helped me understand minimal intervention and reversibility principles.
Wood Magazine’s Adhesive Guide (here): This is where I found trusted recommendations on choosing the right glue for veneer, which made all the difference in bond quality.
DIY Kutak’s Smart Home Improvement Tips (here): A wonderful collection of practical advice that inspired my approach to finishing and precision in repairs.
Advanced Antique Furniture Restoration Guide (here): When I wanted to dive deeper into preserving historical value, this detailed guide was invaluable.
Parting Thoughts from My Perspective
Repairing veneer is much more than a technical task—it’s a journey into craftsmanship, patience, and respect for history. The key takeaway from my experience is that embracing the process, imperfections included, leads to richer, more meaningful results. The art of veneer repair intertwines science, skill, and soul, and mastering it is deeply rewarding.
If this resonated with you, I’d love to hear your thoughts or stories about your own restoration adventures. Sharing our experiences helps all of us grow, whether you’re just starting out or have years of hands-on practice. Feel free to drop your questions or insights in the comments below!
Reading through this detailed account of veneer repair really resonated with my own experience restoring an antique bedside table. I agree that patience is the key—rushing the drying phases or trying to cut corners often leads to disappointing results. I’ve found that the right tools, especially a good veneer scraper and a quality veneer roller, make a significant difference in achieving a professional finish. One challenge I encountered was matching the color perfectly, especially with aged, reclaimed veneer. I’ve started experimenting with layering translucent stains and even using small tinting drops to refine the shade. Has anyone explored digital colorimetry tools or advanced stain matching techniques? I’d love to hear about innovative methods others might be using to achieve seamless blends. Also, maintaining the original character of antique pieces is a delicate balance—sometimes embracing imperfections adds charm rather than detracts from their authenticity. Anyone else prone to seeing these flaws as features rather than faults?