How I Fell in Love with Multi-Layer Varnishing in Decoupage
When I first picked up decoupage, I was mesmerized by the endless possibilities of transforming ordinary objects into personalized art. However, achieving that flawless, glass-like finish took me on a journey filled with trial and error, especially when it came to mastering advanced decoupage techniques for seamless multi-layer varnishing. I still remember the excitement and frustration of my early projects, where uneven layers and bubbles threatened to ruin my efforts.
Discovering the Magic of Layering Varnishes: A Game Changer
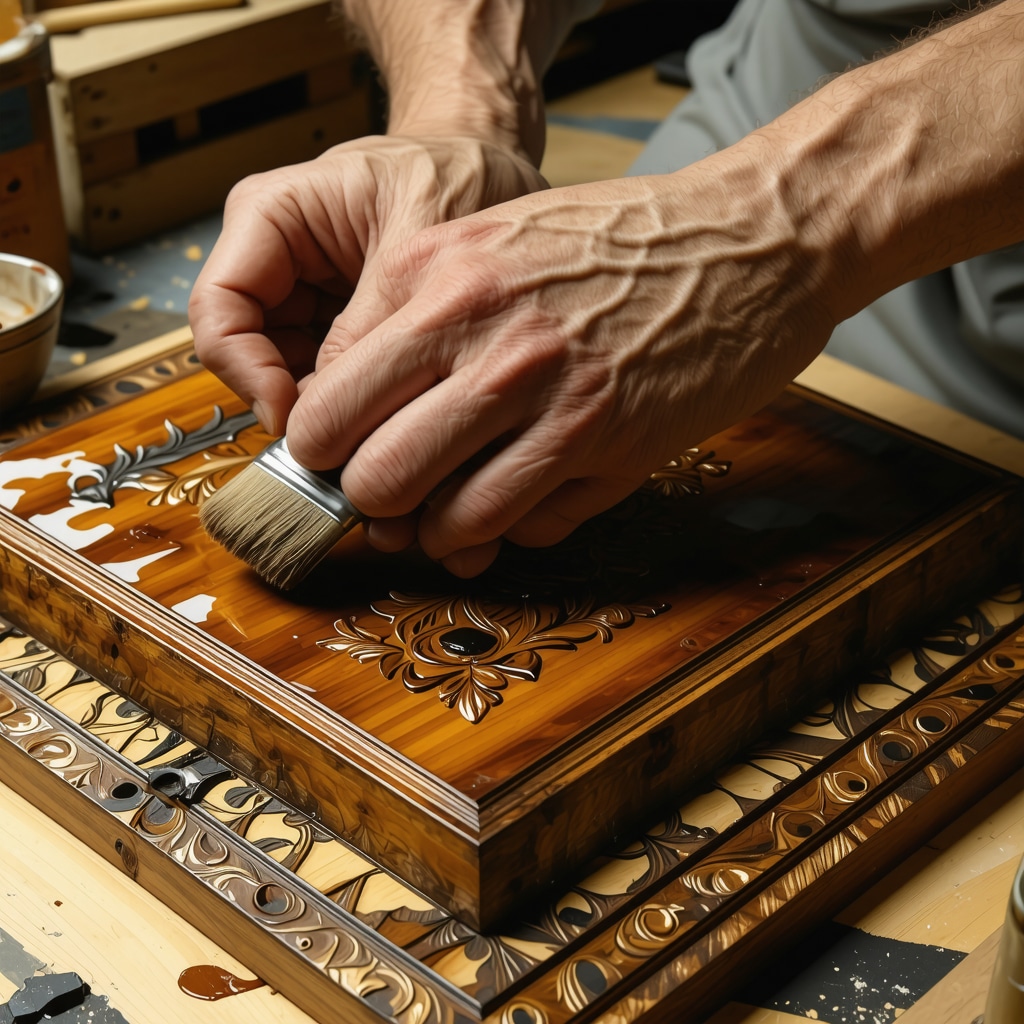
One of the biggest breakthroughs in my decoupage practice was learning the importance of applying multiple varnish layers with patience and precision. This technique not only protects the delicate paper designs but also creates a depth and smoothness that makes the artwork pop. I found that using a high-quality water-based varnish allowed for better control and faster drying without compromising the vibrancy of the images.
What truly helped me was experimenting with sanding between coats — lightly buffing the surface with fine-grit sandpaper after each dried layer. This step eliminates imperfections and ensures the next varnish layer adheres flawlessly, resulting in a glass-like, seamless finish that feels professional. It’s a technique often recommended by experts in decorative crafts, as noted by Craftsy’s detailed guide on decoupage varnishing.
What Are the Key Challenges in Achieving a Seamless Multi-Layer Finish?
From my experience, one major challenge is timing. Each varnish layer must be fully dry before sanding and applying the next to avoid smudging or uneven texture. Rushing this process often leads to cloudy or sticky finishes. Another challenge is maintaining a dust-free workspace, as tiny particles can get trapped between layers, spoiling the smoothness. I’ve learned to set up a clean, well-ventilated corner specifically for varnishing projects, which makes a huge difference.
Why Choosing the Right Tools Made All the Difference
Aside from varnish quality, the brushes and applicators I use have a huge impact. I prefer soft synthetic brushes that minimize streaks and help spread varnish evenly. Foam brushes are also great for thin, consistent coats but require gentle handling to prevent bubbles. Over time, I’ve curated a small toolkit optimized for multi-layer varnishing, which has elevated my decoupage projects considerably.
If you’re curious about exploring other creative home decor crafts, I highly recommend checking out some unique DIY crafts to try that can complement your decoupage skills.
Inviting You to Share Your Varnishing Experiences
How have your experiences been with multi-layer varnishing in decoupage or other crafts? I’d love to hear about your successes, challenges, or tips. Sharing our journeys not only enriches our skills but also builds a supportive community passionate about creative expression. Feel free to leave your thoughts or questions below!
Elevating Your Decoupage Finish: Beyond the Basics of Varnish Techniques
Once you’ve grasped the fundamentals of multi-layer varnishing, the next step is refining your approach to achieve truly museum-quality finishes. This involves a nuanced understanding of varnish types, environmental factors, and precision in application methods. For instance, experimenting with matte, satin, or gloss varnishes in combination can add subtle depth and texture to your decoupage projects, creating a custom look tailored to your artistic vision.
Moreover, environmental conditions such as humidity and temperature play a critical role in drying time and finish quality. I recommend using a hygrometer to monitor these variables, ensuring optimal conditions that prevent tackiness or cracking. This attention to detail can significantly influence the longevity and aesthetic quality of your finished pieces.
How Does Surface Preparation Influence the Longevity of Multi-Layered Varnish?
Surface preparation is paramount for lasting results. Before applying your first varnish layer, the substrate must be clean, smooth, and free from oils or residues that could interfere with adhesion. Light sanding of the base surface improves varnish bonding, while sealing porous materials prevents excessive absorption. Overlooking these steps can lead to premature peeling or uneven gloss.
In my projects, I often apply a thin primer coat specifically designed for mixed media surfaces to create a uniform base. This step, although time-consuming, pays off by enhancing the varnish’s durability and enhancing the vibrancy of the underlying paper designs.
Innovative Tools and Techniques for Flawless Application
Beyond brushes and foam applicators, advanced tools like spray varnish systems and microfiber rollers can offer superior control for large or intricate surfaces. Spraying, in particular, minimizes brush marks and achieves ultra-thin layers, which are ideal for delicate decoupage work. However, it requires practice to avoid over-application and runs.
Additionally, I’ve integrated the use of a UV-protective varnish in my final layers to safeguard colors from fading, especially for projects exposed to sunlight. This technique extends the life and brilliance of the artwork, which is crucial for heirloom-quality pieces.
For those interested in exploring further home decor enhancements, consider browsing unique DIY crafts to try that beautifully complement varnishing skills.
Expert Insights: What Are the Most Effective Ways to Avoid Common Varnishing Mistakes?
Common mistakes such as bubbles, streaks, and dust inclusion can be mitigated with deliberate techniques. For example, warming varnish slightly before application reduces viscosity, helping it level out more smoothly. Also, working in thin layers rather than thick coats prevents cracking and unevenness.
Cleaning brushes thoroughly between coats and storing varnish containers properly to avoid contamination are small yet impactful habits. As emphasized by the conservation experts at the American Institute for Conservation, maintaining clean tools and working environments is essential for preserving the integrity of decorative finishes over time.
Implementing these practices transforms varnishing from a mere finishing step into an art form that amplifies the beauty and durability of your decoupage creations.
Join the Conversation and Share Your Advanced Varnishing Techniques
I invite you to share your experiences with advanced varnishing methods. What specialized tools or environmental controls have you found indispensable? Your insights could inspire others and foster a community of craft enthusiasts dedicated to mastering decoupage. Please leave your comments or suggestions below, and if you’re eager to expand your DIY repertoire, explore our detailed step-by-step DIY guides for all skill levels.
Reflections on Patience and Precision in Varnishing
One thing I’ve come to appreciate deeply in my decoupage journey is how patience truly becomes an artist’s virtue when it comes to multi-layer varnishing. It’s tempting to rush through the process, especially when the excitement to see the finished piece is high. Yet, every time I slow down and honor the drying times, the results are noticeably superior—each layer contributes to a luminous depth that can’t be faked with shortcuts.
In fact, the tactile experience of running my fingers over those perfectly smooth layers gives me a quiet satisfaction that no quick fix can replicate. This tactile feedback loop also helps me identify the subtle imperfections that might need a gentle sanding before the next coat. It’s a meditative practice that connects me to the craft on a much deeper level.
Advanced Considerations: Balancing Sheen and Texture
After a while, I started experimenting with combining different varnish sheens within a project. For example, using a satin finish as a base and then layering selective gloss varnish on raised or highlighted areas to create subtle contrasts and visual interest. This technique adds a sophisticated complexity that makes the piece feel more dynamic and alive.
However, balancing these finishes requires an understanding of how each varnish interacts with light and the underlying paper or paint. It’s not always intuitive, and sometimes I’ve had to redo sections to achieve the right harmony. Resources like the Craftsy decoupage varnishing guide have been invaluable in helping me navigate these nuances.
How Do Environmental Factors Shape the Final Varnish Outcome?
Humidity, temperature, and airflow are subtle yet powerful players in the varnishing process. I once attempted a project during a humid summer day without controlling the environment, and the varnish dried unevenly, leaving a cloudy haze that marred the design. From that experience, I learned to monitor my workspace conditions closely and sometimes even use a small dehumidifier or fan to ensure optimal drying.
Moreover, temperature fluctuations can cause the varnish to cure improperly, affecting both durability and clarity. I’ve adopted the habit of varnishing in a stable environment—often early in the day when conditions are predictable—which has improved my success rate significantly.
Discovering the Joy of Custom Toolkits and Techniques
Over time, I curated a collection of specialized brushes, sanding tools, and even small airbrushes to refine my varnishing application. For instance, microfiber rollers have become one of my favorites for covering larger surfaces smoothly and efficiently without streaks or bubbles. I also invested in a UV-protective varnish for my outdoor pieces, which has made a noticeable difference in longevity and color retention.
For those looking to explore creative home decor, combining these varnishing skills with other projects can be hugely rewarding. I highly recommend checking out some unique DIY crafts to try that beautifully complement varnishing techniques and elevate your handmade decor.
Inviting You to Reflect and Share Your Varnishing Experiences
The varnishing journey is often one of subtle discoveries and personal growth as much as it’s about the finished product. I’d love to hear your stories—moments of triumph or lessons learned through varnishing challenges. What tools, environment tweaks, or techniques have transformed your work? Your insights can inspire others and enrich our creative community.
Feel free to leave your experiences or questions below, or explore more about enhancing your crafting skills through detailed step-by-step DIY guides. Together, we can keep pushing the boundaries of creativity and craftsmanship.
Unveiling the Subtle Art of Varnish Chemistry in Decoupage
As I delved deeper into the realm of multi-layer varnishing, I realized that beyond technique, understanding the chemistry behind varnishes profoundly shapes the final outcome. Each varnish type—be it acrylic, polyurethane, or epoxy—interacts differently with the paper fibers and adhesives beneath. For instance, water-based acrylic varnishes provide flexibility and clarity but can sometimes raise the paper fibers if applied too thickly. On the other hand, solvent-based varnishes offer durability but require meticulous ventilation and safety precautions.
I often experiment with layering a fast-drying acrylic base coat followed by a harder, more resilient polyurethane topcoat to strike a balance between protection and aesthetic vibrancy. This hybrid approach has yielded remarkably enduring finishes that withstand handling and environmental stress.
How Can I Tailor Varnish Layers to Enhance Textural Dimensions Without Compromising Clarity?
Integrating texture into a varnished surface while maintaining optical clarity can be challenging. In my practice, selectively incorporating microbeads or mica powders into intermediate varnish layers creates a subtle, tactile relief that catches light in fascinating ways. This technique demands precise control over varnish viscosity and layer thickness to prevent clouding.
Moreover, using a slow-drying varnish variant allows the additives to settle evenly, enhancing the surface’s dimensionality without sacrificing the paper’s crisp imagery. Resources like the American Institute for Conservation underscore the importance of compatibility between varnish additives and substrates to avoid long-term degradation, which I always keep in mind when experimenting.
Harnessing Environmental Controls for Consistent Museum-Quality Finishes
Environmental factors often operate silently but decisively during varnishing. To optimize drying and curing, I have outfitted my workspace with a temperature and humidity controller, ensuring conditions stay within a narrow range conducive to flawless drying. This setup includes a HEPA-filtered air purifier that minimizes airborne particulates, dramatically reducing dust inclusion—a notorious nemesis in multi-layer varnishing.
Another advanced strategy I’ve adopted is timing varnish applications to coincide with the early morning hours when ambient conditions are most stable. This subtle synchronization has enhanced the uniformity of my finishes and minimized defects like fisheyes or orange peel texture.
Crafting a Bespoke Varnishing Toolkit: Beyond Brushes and Rollers
My varnishing toolkit has evolved to include precision tools such as silicone squeegees for ultra-thin spread, micro-fiber lint-free cloths for buffing, and even a handheld humidity sensor for real-time environmental feedback. Additionally, I’ve found utility in a small airbrush system for applying ultra-fine varnish layers on intricate details, which is especially beneficial when working on delicate or contoured surfaces.
Integrating these specialized implements has elevated the finesse of my decoupage projects, allowing me to capture nuances that traditional brushes alone could not achieve. For those seeking to broaden their creative horizons, exploring unique DIY crafts to try can provide complementary techniques and fresh inspiration.
Encouraging a Dialogue: Share Your Nuanced Varnishing Experiences
I’d be truly eager to learn about your own explorations with varnish chemistry, environmental adaptations, or specialized tools. What breakthroughs or challenges have shaped your approach to multi-layer varnishing? Your shared insights not only enrich our collective expertise but also foster a vibrant, supportive community of passionate artisans. Please leave your thoughts or questions below, or if you desire, dive deeper with comprehensive step-by-step DIY guides that can elevate your craft to new heights.
Things I Wish I Knew Earlier (or You Might Find Surprising)
Patience Transforms the Finish More Than Fancy Tools
Early on, I chased after the latest varnishing gadgets, thinking they would magically perfect my decoupage projects. It took me a while to realize that the real game changer was simply respecting drying times and applying thin, even layers. No brush or spray can fix rushing the process; patience is truly the secret ingredient.
Environmental Control Is an Artist’s Best Friend
I used to overlook how much humidity and temperature impact varnish drying. A single humid day once left my project cloudy and uneven, teaching me the value of monitoring and managing my workspace climate. Now, a small hygrometer and a fan are always part of my setup, and the difference is night and day.
Sanding Between Layers Is Not Optional
At first, sanding felt like an extra hassle, but it’s become a meditative step I cherish. That gentle buffing smooths imperfections and creates a flawless bond for the next layer. Skipping it has cost me flawless finishes more times than I care to admit.
Different Sheens Can Create Subtle Visual Stories
Playing with matte, satin, and gloss varnishes within the same piece adds dimension and interest you wouldn’t expect from varnishing alone. It’s like painting with light and texture, bringing a new depth to decoupage art.
Understanding Varnish Chemistry Enhances Creative Freedom
Knowing how acrylic, polyurethane, or epoxy varnishes behave opens up experimental paths I never considered before—like mixing additives or layering different types for durability and effect. It’s a fascinating blend of art and science that deepened my appreciation for the craft.
Resources I’ve Come to Trust Over Time
Craftsy’s Decoupage Techniques Guide: This resource helped me grasp the nuances of multi-layer varnishing and finish types, offering practical advice that felt accessible and expert-driven.
American Institute for Conservation: Their insights on preserving decorative finishes and varnish chemistry were invaluable for understanding long-term care and avoiding common pitfalls.
DIY Kutak’s Unique DIY Crafts: Exploring complementary crafts here expanded my creative toolkit and inspired ways to incorporate varnishing into diverse home decor projects.
Step-by-Step DIY Guides for All Skill Levels: When I needed structured, clear guidance on advanced varnishing techniques, these guides provided approachable yet thorough instruction that boosted my confidence.
Parting Thoughts from My Perspective
Mastering multi-layer varnishing in decoupage has been a journey of patience, experimentation, and discovery. Beyond the technical steps, it’s taught me to slow down and connect more deeply with my craft—each layer a quiet conversation between the artist and the medium. The tactile satisfaction of a smooth, glass-like finish is a reward that never grows old.
If you’re stepping into this world, remember that every imperfection is a lesson, and every success a spark for your next project. I encourage you to explore the resources mentioned and try different approaches until you find what resonates with your style and space.
If this resonated with you, I’d love to hear your thoughts or varnishing stories. Sharing experiences enriches our community and keeps the creative spirit alive. Feel free to drop your reflections or questions below, and if you want to dive deeper into DIY home projects, don’t miss the inspiring ideas at DIY Kutak.
I completely relate to the journey described in mastering multi-layer varnishing with decoupage — it really feels like an art and science combined, doesn’t it? Early on, I struggled with bubbles and uneven textures too, especially when I was impatient about drying times. The advice about sanding between coats resonated with me deeply. I found that even a very light buff with fine-grit sandpaper made a monumental difference in how each subsequent layer adhered and how smooth the finish looked.
One thing I’ve experimented with recently is combining different varnish sheens in one project, using satin as the base and gloss on raised details, which adds an intriguing visual interest. However, balancing these finishes can be tricky, as sometimes the light reflection ends up uneven, and I’ve had to redo sections. Has anyone else played around with combining sheens and found ways to keep that harmony stable?
Also, I appreciate the emphasis on environmental control — I never expected humidity to be such a challenge here in Brisbane, but on rainy days the drying process definitely slows down. Using a small dehumidifier in my craft space made a real difference. Curious if anyone else has tips on managing workspace conditions for varnishing in coastal climates?
Ella, your insights about balancing satin and gloss sheens really struck a chord with me. I’ve had similar experiences where the uneven light reflection required some redo. What’s worked for me is applying a very thin mist of matte varnish over the whole piece after the gloss has fully cured; it seems to tone down harsh reflections and brings the finishes into better harmony without dulling the overall look. Regarding your question about workspace conditions in coastal climates, I’m based in Sydney and found that combining a small dehumidifier with an air purifier really helps maintain a dust-free, controlled environment. I also schedule my varnishing for early mornings when humidity dips slightly. Has anyone else tried layering varnishes this way or used timing strategies to combat coastal humidity? I’m curious how different craftspeople navigate these subtle but impactful environmental challenges in their varnishing routines.
It’s fascinating to read about everyone’s approach to balancing different varnish sheens in decoupage work. I’ve also found patience to be crucial, especially when it comes to waiting for each layer to fully cure before sanding. One thing I’d add from my experience, especially working here in Melbourne’s variable climate, is the benefit of using a controlled drying box. I built a simple enclosure with a small heater and filtered fan which helps regulate temperature and filter out dust, offering a consistently clean and dry environment for varnishing. This setup dramatically reduced issues with cloudiness and dust inclusion for me. Additionally, I prefer to end with a UV-protective varnish layer, which extends the life of my pieces when exposed to natural light indoors. I’m curious if others have tried creating mini controlled environments for varnishing or have other setups that help combat local humidity fluctuations? It seems like managing environmental factors is often as important as technique!
I really appreciate this detailed post—it’s a reminder that patience and proper surface prep are truly the backbone of a flawless decoupage finish. I’ve found that using a small, dehumidified space not only reduces dust but also helps with consistent drying times, especially in humid weather. I once experimented with UV resin coatings for added gloss and durability, which gave my projects that extra professionally sealed look, though it took some practice to avoid bubbles. Regarding environmental controls, has anyone tried combining a small turntable with a climate-controlled enclosure? It helps me achieve even coats on larger items without the risk of dust settling. How do others balance the need for detailed work in such controlled settings, especially when working on delicate or intricate pieces? Would love to hear your tips or experiences on managing these setups effectively. Thanks for sharing such inspiring insights—they’ve definitely broadened my approach!