Ever held a leather wallet and wondered why some look so ordinary while others exude craftsmanship and style? I remember the first time I tried to craft my own wallet. It looked promising until I reached the stitching stage — and then, disaster struck. The stitches were uneven, loose in places, and somehow, it just didn’t feel right. That frustrating moment taught me a vital lesson: mastering advanced stitching and edging techniques can transform a simple piece of leather into a work of art.
Why Precision Matters in Crafting Leather Wallets
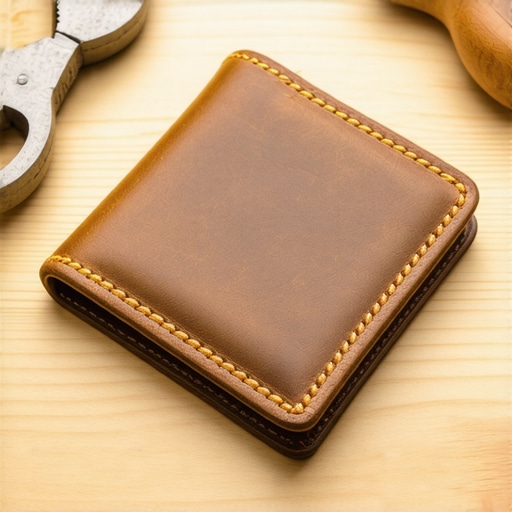
When you’re creating a bespoke men’s leather wallet, every detail counts. The stitching isn’t just about durability; it’s also the visual signature of your craftsmanship. Flimsy or sloppy stitches can ruin the overall look and feel of an otherwise beautiful wallet. That’s why I’ve dedicated myself to learning advanced techniques — not just to make my wallets last, but to ensure they look stunning from every angle.
In my early days, I made the mistake of rushing through the stitching process, thinking that any thread would do. Trust me, that was a big mistake. The right tools, proper tension, and a steady hand make all the difference. As I delved deeper, I found that perfecting these skills is a lot like good cooking — it’s about patience, practice, and attention to detail. And the rewards? A wallet so refined that it feels like a personal signature piece, crafted with care and expertise.
Is Over-Engineering Your Wallet Worth It?
Some folks might say, “Why spend so much time on stitching and edging? Isn’t a simple wallet enough?” Well, I used to think that too. But early on, I realized that the true beauty of a bespoke wallet is in the details. When you use advanced edging techniques, like burnishing or edge painting, you add a layer of sophistication that elevates your craft from basic to brilliant. Plus, a well-stitched wallet ages gracefully, developing a unique character over time.
One mistake I made early in my journey was neglecting the importance of proper preparation. Skipping steps like conditioning the leather or choosing the right thread size can sabotage your project. A little extra effort upfront pays off in the form of a wallet that looks professional and feels luxurious.
So, if you’ve ever faced the frustration of uneven stitches or rough edges, you’re not alone. But here’s the good news: with the right techniques and a bit of practice, you can create wallets that are not just functional but also stunning pieces of art. Ready to dive into the details? Let’s explore how to master these skills step by step, starting with the essential tools and materials you need. If you’re interested in broader DIY projects, check out some creative solutions for your home at DIY projects for beginners.
Before diving into the stitching process, gather your essential tools: a high-quality waxed thread, a sharp leather needle, edge bevelers, burnishing tools, and a stitching pony or clamp. I remember a time when I rushed this step, trying to save time, only to struggle with uneven stitches later. Proper tools make a significant difference, ensuring consistent tension and neat results.
Use a wing divider or scratch awl to score precise stitching lines along your wallet edges. Think of it like drawing a clear path for your stitches. I once skipped this step and ended up with crooked lines that threw off my entire project. Take your time here; a steady hand and a good ruler ensure your stitches stay even and aligned, which is crucial for a professional finish.
Thread your needle with a length of waxed thread, about three times the length of your wallet. Pass the needle through the pre-marked hole, then use the ‘running stitch’ method to create even, tight stitches. I once tried to double my thread to save time, but it caused uneven tension. Instead, work in small sections, pulling each stitch snug but not tight enough to pucker the leather.
Maintaining consistent tension is key. Imagine tightening a guitar string—you want it firm but not over-tightened. Use a stitching awl or an overstitch wheel to space your stitches evenly—typically 4mm apart. I found that using an overstitch wheel as a guide helped me avoid uneven gaps, elevating my craftsmanship significantly.
Starting with beveled edges, use an edge beveler to round off sharp corners. Then, apply edge paint or burnish with a slicker or canvas. I experimented with different burnishing tools, but a simple piece of denim paired with a dab of water and a burnishing gum gave me the best glossy finish. This step enhances durability and aesthetics, transforming a rough edge into a sleek, professional border.
Apply a small amount of water or edge balm and rub vigorously with your burnisher—think of it like polishing a shoe. Repeat multiple times, gradually building up a deep, shiny surface. I once rushed this step and ended up with dull edges; patience here results in a luxurious look that ages beautifully.
Once stitched and edged, set your wallet aside to dry if you’ve used any edge dyes or finishes. Test your stitches and edges for smoothness; sand down any rough spots with fine-grit sandpaper. Remember, every detail reflects your craftsmanship. With practice, these techniques will become second nature, turning simple leather into a bespoke masterpiece.
For more creative DIY ideas, visit crafts for all ages or explore unique DIY crafts.
When diving into leather wallet making, many enthusiasts fall prey to misconceptions that can hinder their progress or compromise the quality of their work. Let’s dig deeper into what most people get wrong and uncover the nuanced truths that can elevate your craftsmanship to expert levels.
Why the Myth of Perfect Uniformity Can Sabotage Your Progress
One widespread misconception is that stitching must be perfectly uniform down to the last stitch. While neatness is important, obsessing over absolute perfection can lead to frustration and even over-tooling, which damages the leather. Skilled artisans understand that slight variations in stitch length or tension add character and authenticity, especially as your skills mature. Instead, focus on consistency within a reasonable margin, and remember that practice makes perfect.
Addressing the Trap of Over-Edge Beveling
Another common mistake is over-beveling edges, believing that more rounded edges improve aesthetics. In reality, excessive beveling can thin out the leather, making edges prone to cracking or fraying over time. The key is to bevel just enough to smooth the edge, then burnish or edge paint for a durable, professional finish. This balance ensures longevity without sacrificing style.
Unlocking the Advanced Technique of Layered Burnishing
Many beginners think that a single burnishing session is enough for a glossy edge. In truth, layering burnishing with small amounts of water, gum, or edge dyes, and repeating the process, creates a deeper, more resilient luster. Patience here pays off; a layered approach enhances not just appearance but also the durability of the edges, which is crucial for wallets subjected to daily wear and tear.
Have you ever fallen into this trap? Let me know in the comments. Remember, mastering these nuances requires patience and a willingness to challenge conventional wisdom. For more insights into advanced DIY leatherwork, explore DIY projects for beginners or reach out through contact us for personalized guidance.
Keeping your leather wallet projects in top shape requires more than just skill — it demands the right tools and a commitment to maintenance. Over the years, I’ve tested countless equipment and techniques, and I’ve found that investing in quality tools not only improves your results but also extends the lifespan of your supplies. In this article, I’ll share my personal recommendations for tools that truly make a difference, along with tips on maintaining them for long-term success.
Why Quality Tools Make All the Difference
Using high-grade tools like a Japanese leathercraft knife ensures clean, precise cuts every time. I prefer the X-Acto Precision Knife because of its razor-sharp blades and ergonomic handle, which minimizes hand fatigue during long sessions. A dull blade can cause uneven edges and fraying, so I always keep a stock of fresh blades on hand. For stitching, I recommend a Leather Stitching Pony — it holds your project steady, allowing for even, consistent stitches without fatigue.
Another indispensable tool is a beveling tool. I use the Carlson Edge Beveler because of its durability and smooth operation, which helps achieve perfect rounded edges. Maintaining these tools is just as important as choosing them. Regularly cleaning and oiling your blades and bevelers prevents rust and keeps them performing like new.
How do I maintain my leatherworking tools over time?
Proper maintenance begins with cleaning your tools immediately after each use. For blades and cutting tools, wipe away leather dust and residue with a soft cloth and apply a light coat of oil — I prefer machine oil or mineral oil. This prevents rust and keeps the metal sharp. For edge bevelers and burnishers, a gentle scrub with a brass brush keeps the edges smooth and free from debris. Sharpen your leather blades regularly using a diamond stone or professional sharpening kit — a dull blade is a major obstacle in precision work.
In the future, I predict the trend towards eco-friendly and multi-functional tools will grow. More artisans are looking for sustainable options that minimize waste without sacrificing quality. For example, newer brands now offer biodegradable blades or tools made from recycled materials, which is great for both your craft and the environment.
Take Action: Keep Your Tools Sharp and Clean
One advanced tip I recommend is developing a routine to sharpen and clean your tools after each project. This small investment of time pays off by maintaining sharpness and preventing corrosion, ultimately saving you money and frustration. Try incorporating this habit into your workflow today and notice the difference in your craftsmanship.
For more DIY tips and advanced techniques, check out crafts for all ages and explore how proper maintenance can elevate your entire project process.
The Hardest Lesson I Learned About Leather Wallets
One of the most valuable lessons I discovered was that patience in perfecting edges and stitches pays off immensely. Rushing through these steps often results in a wallet that looks amateurish and wears out quickly. Embracing slow, deliberate craftsmanship transformed my projects from basic to beautiful.
3 Myths About Leather Wallet Making That Held Me Back
I used to believe that perfect uniform stitches were essential, but I learned that slight variations add character and authenticity. Additionally, I thought over-beveling edges was always better, yet moderation preserves leather strength. Finally, layering burnishing enhances durability—something I underestimated until I saw the stunning results firsthand.
What Experts Won’t Tell You About Creating Leather Wallets
Most seasoned artisans focus heavily on the prep work—conditioning leather, choosing the right threads, and maintaining tools. Skipping these steps might seem faster but ultimately compromises quality. The secret is consistency and attention to detail, turning simple materials into bespoke masterpieces that age beautifully.
My Essential Toolkit for Leather Wallet Crafting
High-quality tools make all the difference. I swear by a Japanese leathercraft knife for clean cuts, and a stitching pony keeps everything steady. Regular maintenance like sharpening blades and cleaning tools ensures longevity and precision, elevating your craft every time.
Where to Go from Here
If you’re eager to improve, explore detailed guides on DIY projects for beginners to build foundational skills. For advanced techniques, dive into [additional resources] and connect with a community that shares your passion. Remember, every wallet you craft is a step toward mastery.
Your Turn to Try
Now that you’ve learned some behind-the-scenes truths and tools of the trade, I challenge you to pick up your leather and start your next project. Focus on the details—stitch spacing, edge burnishing, and tool maintenance—and watch your craftsmanship flourish. What part of wallet making do you find most challenging? Share below and let’s grow together!