Ever stared at a pile of rusted, discarded scrap metal and wondered if it could be something more than just junk? I’ve been there, knocking over old cans, tangled wires, and twisted scrap, feeling stuck and frustrated. It wasn’t until I made a few rookie mistakes—like trying to weld without proper safety gear or rushing the cooling process—that I realized the true potential hidden in those rusty pieces. That lightbulb moment transformed my approach from reckless to creative. Today, I want to share how you can turn scrap metal into stunning sculptural art, saving money and making something uniquely yours.
The Power of Scrap Metal in Artistic Expression
Using discarded metal isn’t just eco-friendly; it’s also incredibly rewarding. Each piece has its own story—bits of history, textures, and colors that, when combined thoughtfully, become captivating art. My journey started with a simple idea: repurpose what others see as waste. Over time, I discovered that with the right techniques, even the most battered scrap can be shaped into sculptures, wall art, or garden ornaments. This process isn’t just about welding; it’s about breathing new life into old materials and expressing yourself creatively. If you’re curious about how to get started, check out some inspiring home decor ideas that utilize recycled materials.
What Will We Cover Today?
In this post, I’ll guide you through my tried-and-true methods for transforming scrap metal into art. From choosing the right materials to mastering basic welding techniques, I’ll help you avoid common pitfalls and unleash your creativity. Whether you’re a complete beginner or have some experience, my tips will set you on the path toward creating your own metallic masterpieces. Ready to turn trash into treasure? Let’s dive in!
Is Welding Scrap Metal Worth the Hype?
I’ll admit, I was skeptical at first. The fear of welding fumes, burns, and wasting time kept me from jumping in. My biggest mistake early on was rushing into projects without proper planning or safety precautions. That nearly ended my creative journey before it began. But once I learned the importance of patience, proper gear, and understanding the properties of different metals, everything changed. Now, I see scrap metal not as a problem but as an opportunity—an endless supply of raw material waiting for a new purpose. If you’ve ever hesitated, I promise that with a little guidance, scrap metal art is more accessible—and more rewarding—than you might think. Curious about more DIY projects? Explore easy beginner DIYs to boost your confidence.
So, if you’ve faced the frustration of tossing out old metal pieces or wondered how to get started without feeling overwhelmed, you’re not alone. Let’s turn that scrap pile into a gallery-worthy sculpture. Next, I’ll show you the essential tools and safety tips to make your creative welding journey smooth and fun. Stay tuned!
Gather the Right Tools and Materials
Start with a sturdy workbench, a reliable angle grinder, and a basic welding kit. For metal, gather assorted scrap pieces—old gears, wires, sheet metal, and rods. I once found a pile of broken bicycle parts that became the foundation for a whimsical garden sculpture. Clean your scrap with a wire brush to remove rust and dirt, ensuring better welds. Having the right tools makes all the difference in turning chaos into art.
Plan Your Design Before Welding
Sketch your idea on paper first. Break it down into manageable parts, like assembling a puzzle. I once tried to weld a complex abstract piece without a plan and ended up with a lopsided mess. Instead, I laid out the pieces on the floor, visualizing how they would fit together. Use clamps to hold pieces temporarily—this helps see the final look and prevents mistakes during welding. Remember, thoughtful planning saves time and material.
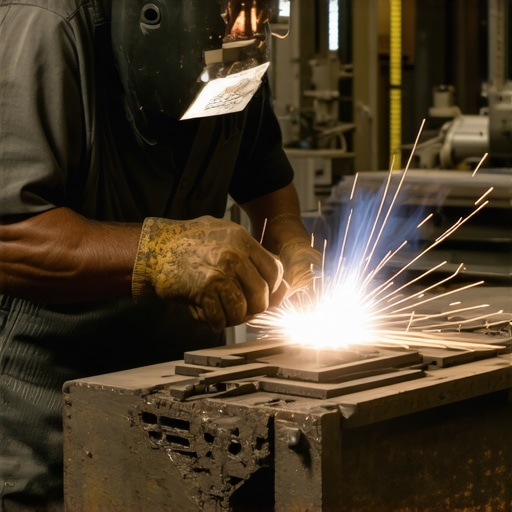
Weld with Purpose and Precision
Set your welder to the right voltage for the metal thickness. Practice on scrap to get a feel for steady, even beads. Think of welding like sewing—slow, deliberate, and consistent. In one project, I struggled with uneven welds that made my sculpture weak. By slowing down and maintaining a steady hand, I created clean, strong joints. Always wear safety gear—gloves, goggles, and a mask. Proper safety measures protect you from sparks and fumes, making the process safer and more enjoyable.
Shape and Assemble Your Piece
Use hammers, pliers, and bending tools to shape metal before or after welding. For example, I heated a flat sheet to gently curve it into a bowl shape, then welded the edges. This technique adds dimension and flow to your sculpture. Take your time; small adjustments can elevate your work from good to great. Remember, patience is key in crafting detailed, balanced art pieces.
Finish and Protect Your Artwork
After welding, grind rough edges for a smooth finish. Apply a rust-resistant paint or sealant to preserve your piece outdoors. I learned this the hard way when a sculpture I left uncoated developed rust within months. A clear coat or protective paint keeps your art vibrant and durable. Look for eco-friendly finishes if you want to maintain an environmentally conscious workspace.
Refine Your Craft and Experiment
Every project teaches something new. Try combining different metals or incorporating found objects for unique textures. I once embedded glass pieces into a metal frame, creating a stunning contrast. Keep experimenting and refining your skills—over time, your scrap metal art will become more sophisticated and personal. Sharing your progress with online communities can inspire new ideas and techniques, pushing your creativity further.
Many enthusiasts jump into scrap metal art with a lot of misconceptions that can hinder their progress and lead to costly mistakes. Let’s dig deeper into some of the most pervasive myths and uncover the truth behind them, so you can craft with confidence and avoid common pitfalls.
Why Do People Still Believe in These Misconceptions?
One of the biggest misconceptions is that scrap metal is too unpredictable or unstable for detailed art projects. The truth is, understanding the nuances of different metals—such as their melting points, corrosion resistance, and welding behaviors—is crucial. For example, using galvanized steel without proper precautions can release toxic fumes, a hazard often overlooked by beginners. Rushing this process or trying to weld without considering the specific metal properties can result in weak joints or unsafe conditions. Educating yourself about the nuances, like the importance of selecting compatible metals or applying appropriate finishing techniques, greatly enhances your results and safety.
Common Mistakes When Working with Scrap Metal
Another common trap is neglecting proper surface preparation. Rust, dirt, and old paint can compromise weld quality. Many overlook this step, leading to weak bonds or uneven finishes. Instead, a thorough cleaning with a wire brush or grinder is essential before welding. Moreover, many artists believe that more heat equals a better weld. In reality, excessive heat can warp thin metal or cause brittleness. Mastering the correct settings on your welder and practicing on scrap pieces can save you from these expensive errors.
Advanced Question: How Can I Achieve Professional-Grade Finish with Scrap Metal?
For seasoned DIYers aiming for a professional look, the secret lies in meticulous finishing. This includes grinding welds smoothly, polishing surfaces, and applying rust-resistant coatings or patinas for aesthetic effects. Using high-quality tools and practicing techniques like feathering edges can elevate your art from amateurish to gallery-worthy. Remember, the finishing touches make a huge difference in the final presentation and durability of your piece. If you want to explore more about refining your craft, check out home decor ideas for inspiration on achieving stunning results.
Have you ever fallen into this trap? Let me know in the comments. The more you understand the nuances, the better your scrap metal art will become. Remember, mastering these advanced aspects not only improves your skills but also ensures your projects are safe, durable, and visually captivating.
How do I keep my tools in top shape for scrap metal sculpture?
Maintaining your tools is crucial for producing high-quality welds and ensuring safety during your projects. I personally rely on a high-quality angle grinder, like the Makita GA7021, which offers durability and consistent performance. Regularly clean the grinding discs and replace them when worn to prevent uneven cuts and sparks flying unpredictably. For welding, I use a MIG welder such as the Lincoln Electric K2185, which provides precise control and reliability. Always inspect your welding tips and replace them if they show signs of wear or clogging, as this directly affects weld quality and safety.
Proper storage is equally important. Keep your tools in a dry, organized toolbox to prevent rust and damage. Applying a light coat of machine oil on metal parts after use can prolong their lifespan and keep them ready for your next project. For safety gear, invest in a good pair of welding gloves, a helmet with auto-darkening filters, and safety goggles. These aren’t just accessories—they’re investments in your safety and the quality of your work.
What are some smart maintenance routines for long-term results?
Developing a routine helps catch issues early and keeps your workspace efficient. After each project, clean your tools thoroughly to remove dust, rust, and metal shavings. Use a wire brush or compressed air to clear debris from your welding machine’s vents, which prevents overheating. Periodically check your power cords and connections for wear or damage, replacing them as needed to avoid electrical hazards.
Lubricate moving parts—like the hinges on your welding helmet or adjustable clamps—using manufacturer-recommended oils. This reduces wear and ensures smooth operation. Also, keep a log of maintenance dates and parts replaced. This habit helps you plan upgrades and avoid unexpected breakdowns, saving money over time.
Is there a trend in tools for DIY scrap metal art?
Yes, the trend is leaning towards more versatile, user-friendly equipment with enhanced safety features. For example, cordless angle grinders with brushless motors offer mobility and longer battery life, making outdoor projects more manageable. Additionally, digital welding machines with built-in diagnostics help beginners and pros alike maintain optimal settings, reducing material waste and improving weld consistency. As DIYers push the boundaries of scrap metal artistry, tools are evolving to support more complex designs with ease and safety.
If you’re serious about elevating your craft, I recommend investing time in learning proper maintenance techniques for your equipment. A well-maintained tool is your best ally in achieving professional-grade results. Try scheduling a weekly check-up of your gear, and see how it transforms your workflow. For more advanced DIY ideas and maintenance tips, explore home decor ideas that can inspire your next project.
The Hardest Lesson I Learned About Scrap Metal Art
Early in my journey, I believed that any scrap metal could be welded into art without much planning. It led to messy, weak sculptures that broke easily. The breakthrough came when I realized that understanding the properties of each metal—like melting points and corrosion resistance—is crucial for durability and safety.
3 Myths About Scrap Metal Sculpting That Held Me Back
One common misconception was that scrap metal is too unpredictable for detailed work. Actually, with proper surface prep and technique, even complex designs are achievable. Another myth was that more heat makes a better weld—excessive heat warps metal and weakens joints. Lastly, I thought safety was secondary; now I see that protective gear is vital for safe, high-quality projects.
What Experts Won’t Tell You About Finishing Scrap Metal Art
Polishing welds and applying protective coatings can elevate your work from amateur to professional. Feathering edges and using rust-resistant paints preserve your art’s appearance and longevity. The real magic is in the details—refining your finish transforms basic scrap into gallery-worthy art.