My Journey Into Sustainable Food Preservation
Last summer, I found myself experimenting with ways to make my garden more eco-friendly and self-sufficient. One project that truly captivated me was designing a solar food dehydrator using upcycled parts. It was a rewarding challenge that combined my love for gardening, DIY craftsmanship, and environmental consciousness.
Why I Chose a Solar Food Dehydrator for My Garden
Dehydrating fruits and vegetables is a fantastic way to preserve harvests, reduce waste, and enjoy nutritious snacks year-round. I realized that building my own dehydrator could lower my carbon footprint significantly. Plus, using recycled materials felt like a personal victory in sustainability. I read that solar dehydration is an ancient technique that’s gaining renewed interest due to its eco-friendliness (source), and I was eager to try it myself.
Gathering Upcycled Components: Turning Trash Into Treasure
The fun began with sourcing parts from around my home—old metal cans, discarded plastic containers, and broken window frames. I wanted materials that could withstand outdoor conditions and reflect my commitment to reuse. I also incorporated some solar thermal panels I found at a salvage yard. The idea was to create a system that was both functional and environmentally responsible.
The Design Process: Crafting a Solar Dehydrator Step-by-Step
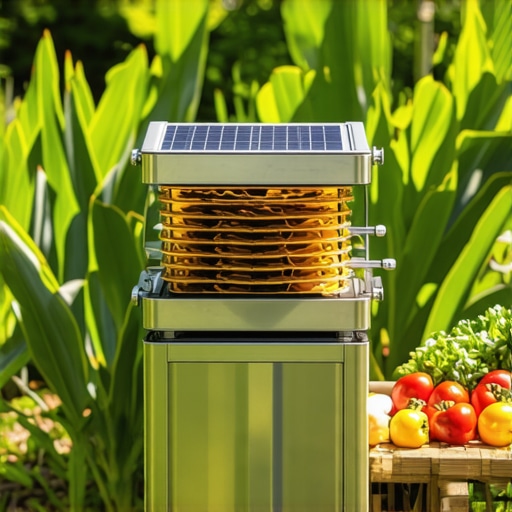
My first step was designing a simple but effective structure. I built a box from reclaimed wood, ensuring it had good ventilation and was sealed against weather elements. The solar collector was attached on top—an old window frame painted black to absorb sunlight efficiently. Inside, I lined the base with wire racks made from upcycled metal mesh, perfect for drying slices of fruit and herbs. I also added a small chimney to allow moisture to escape, inspired by classic solar oven designs.
How Can DIY Enthusiasts Optimize Their Solar Dehydrator for Better Efficiency?
To maximize efficiency, I learned that positioning the dehydrator in a south-facing spot with minimal shade is crucial. Insulating the sides with recycled foam or newspaper helps retain heat. Covering the racks with clear, upcycled plastic sheets creates a greenhouse effect, boosting temperature and airflow. Regularly rotating the trays ensures even drying, which is essential for food safety and quality.
If you’re interested in creating your own eco-friendly dehydrator, I recommend exploring detailed guides on DIY step-by-step tutorials. They’re invaluable for beginners and seasoned DIYers alike.
Sharing My Success and Inviting Your Creativity
After a few days, I was thrilled to see my dehydrated tomatoes, herbs, and apple slices turning out perfectly. Not only did I save money and reduce waste, but I also gained a deeper connection to my food and environment. It’s inspiring to see how upcycled materials can be transformed into practical, sustainable solutions. I encourage you to experiment with your own garden projects—there’s so much potential in DIY and eco-friendly ventures.
Have you ever built a solar dehydrator or used upcycled components in your garden? I’d love to hear about your experiences or ideas—drop a comment below and share your story!
Unlocking the Secrets of High-Performance DIY Solar Dehydrators: Tips from the Pros
Creating a solar food dehydrator isn’t just about assembling recycled parts; it requires understanding the nuances of design, placement, and insulation to optimize performance. As an experienced DIY enthusiast, I’ve learned that attention to detail can significantly elevate your dehydrator’s efficiency and longevity.
Strategic Placement: The Cornerstone of Solar Efficiency
Positioning your dehydrator in a south-facing area with maximum sunlight exposure is fundamental. Avoid shaded spots caused by trees, buildings, or fences, as even minor shading can drastically reduce heat absorption. Additionally, elevating the dehydrator on a platform or stand ensures better airflow underneath and reduces ground heat loss, which can be crucial for maintaining consistent temperatures.
Insulation Techniques: Keeping the Heat In
Proper insulation minimizes heat escape, making your dehydrator more effective. Recycled foam boards, fiberglass, or even thick layers of newspaper can be used to insulate the sides and back of your structure. An often-overlooked detail is sealing any gaps or cracks with weatherproof tape or recycled caulking, which prevents cold air infiltration and heat leakage, ensuring your dehydration process is both efficient and energy-conserving.
Enhancing Airflow and Temperature Control
While natural airflow is essential, adding adjustable vents or small fans powered by small solar panels can help regulate humidity and temperature. Proper ventilation prevents moisture buildup that can lead to mold or spoilage. Installing a transparent cover—upcycled plastic or glass—over the racks creates a greenhouse effect, trapping solar heat and maintaining a higher internal temperature. Regularly monitoring the temperature with a basic thermometer helps maintain optimal dehydration conditions, typically between 125°F and 135°F for most fruits and herbs. Would you like to explore more advanced techniques such as integrating passive solar heating elements or thermal mass materials? Check out smart DIY solutions for innovative ideas.
Maintaining Food Safety and Quality During Solar Dehydration
Even with a well-designed dehydrator, consistent monitoring is vital. Overdrying can diminish flavor and nutrients, while underdrying risks spoilage. Using a hygrometer or moisture meter can help you determine when your food is properly dried. Additionally, rotating trays periodically ensures even dehydration, especially in larger setups. For added safety, storing dried foods in airtight containers or vacuum-sealed bags prolongs freshness and prevents reabsorption of moisture.
What Are the Practical Challenges in Scaling Up DIY Solar Dehydrators for Larger Operations?
Scaling a solar dehydrator from small kitchen projects to larger, garden-sized models introduces complexities such as increased heat loss, structural stability, and uniform air distribution. Larger models require more extensive insulation, possibly multiple solar collectors, and enhanced airflow management. Consulting expert resources like detailed DIY guides can provide insights into managing these challenges effectively. Additionally, considering local climate variations ensures your dehydrator performs reliably year-round.
If you’re eager to deepen your knowledge, I suggest exploring comprehensive DIY tutorials, which break down complex processes into manageable steps for all skill levels.
Are you ready to experiment with advanced insulation materials or incorporate passive solar techniques into your dehydrator design? Sharing your ideas or questions can spark a community of eco-conscious DIYers committed to sustainable living—so leave a comment below or suggest more reading resources!
Refining the Design: The Art of Balancing Efficiency and Sustainability
Over time, I discovered that the key to an effective solar dehydrator isn’t just about upcycled materials but also about the subtle interplay of design elements. For instance, incorporating reflective surfaces made from recycled aluminum foil or mirrors can significantly boost solar gain by directing more sunlight into the dehydration chamber. This trick, inspired by passive solar design principles, can be quite effective if carefully implemented, and it’s a satisfying way to maximize the potential of eco-friendly materials (more smart DIY solutions).
Harnessing Thermal Mass for Consistent Dehydration Conditions
One advanced technique I experimented with involved adding thermal mass elements—like recycled bricks or stones—inside the dehydrator. These materials absorb and store heat during peak sunlight hours and slowly release it when the sun wanes, maintaining a more stable internal temperature. This approach reduces fluctuations that can compromise food safety and quality, especially during unpredictable weather. The concept echoes traditional passive solar heating systems, which have been refined over centuries for maximum efficiency (explore more eco-friendly techniques).
Implementing Advanced Insulation for Year-Round Use
In colder seasons, insulation becomes critical. I learned that integrating recycled foam panels, sheep’s wool, or even upcycled textiles can dramatically improve heat retention. Sealing every gap with weatherproof tape or recycled caulking ensures minimal heat loss. For a truly sustainable approach, I experimented with insulating materials sourced from old clothing or discarded mattresses, which not only provides excellent thermal properties but also aligns with my zero-waste philosophy. Proper insulation allows the dehydrator to operate effectively even in less-than-ideal sunlight conditions, extending its usability throughout the year (more advanced DIY projects).
Optimizing Airflow: Beyond Natural Convection
While passive airflow is fundamental, I found that adding small, solar-powered fans—made from salvaged components—can significantly improve moisture removal and uniform drying. Positioning adjustable vents and integrating simple thermometers allows me to monitor and tweak conditions on the fly. This small investment transforms a basic solar dehydrator into a more sophisticated system capable of handling larger quantities and more delicate foods, like herbs and flowers, without sacrificing quality (more on advanced techniques).
Sharing Insights and Inviting Community Knowledge
Building this dehydrator has been a journey of continuous learning. Every season, I refine my techniques—adding reflective surfaces, improving insulation, or experimenting with airflow controls. I encourage fellow DIY enthusiasts to explore these nuanced aspects, as they can make a significant difference in performance. Have you tried integrating thermal mass or advanced insulation into your projects? I’d love to hear your experiences or ideas—share your insights in the comments or dive into related DIY guides on creative home decor or everyday problem-solving.
Harnessing Reflective Surfaces for Superior Solar Gain
One of the nuanced strategies I employed involved integrating recycled aluminum foil or repurposed mirrors as reflective surfaces within my dehydrator. These materials effectively redirect maximum sunlight onto the drying chamber, significantly boosting internal temperatures and reducing drying times. This technique, rooted in passive solar design principles, not only enhances efficiency but also exemplifies sustainable craftsmanship. For those eager to push the boundaries of DIY solar dehydration, experimenting with reflective surfaces can yield remarkable results and inspire innovative designs.
Implementing Thermal Mass for Consistent Temperature Stability
Another advanced approach I adopted was incorporating thermal mass elements such as reclaimed bricks or natural stones inside the dehydrator. These materials absorb solar heat during peak hours and gradually release it, smoothing out temperature fluctuations caused by passing clouds or weather changes. This method, akin to traditional passive solar heating systems, ensures a more stable environment for delicate foods like herbs and flowers, preserving their aroma and nutrients. Exploring the use of recycled or repurposed thermal mass materials can significantly improve year-round performance of your dehydrator.
Enhancing Insulation with Upcycled Materials for Cold Seasons
To extend the usability of my dehydrator into colder months, I focused on superior insulation techniques using upcycled materials. I sourced old foam panels, discarded textiles, and even wool from recycled garments to insulate the sides and back of the structure. Sealing every gap with eco-friendly weatherproof tape or recycled caulking minimized heat loss and maintained optimal dehydration conditions. This diligent insulation strategy not only conserves energy but also aligns with a zero-waste philosophy, demonstrating how resourcefulness can elevate DIY projects.
Optimizing Airflow with Solar-Powered Fans and Ventilation Control
While passive airflow is fundamental, I integrated small, solar-powered fans—constructed from salvaged components—to actively manage humidity and temperature. Adjustable vents and digital thermometers allow real-time monitoring and fine-tuning of conditions, ensuring even dehydration across large batches. This hybrid approach, combining passive and active ventilation, transforms a basic solar dehydrator into a sophisticated system capable of handling diverse foods without compromising quality. For those interested in integrating such technology, exploring renewable energy-powered solutions can greatly enhance efficiency.
What Are the Best Practices for Scaling Up to Larger, More Complex Solar Dehydrators?
Scaling up involves addressing structural stability, heat retention, and uniform airflow. Larger units require extensive insulation, multiple solar collectors, and advanced airflow management systems. Consulting expert resources, like detailed DIY guides, can provide invaluable insights into designing scalable, durable solutions. Additionally, understanding local climate patterns ensures your dehydrator remains effective throughout different seasons. If you’re considering a significant expansion, experimenting with modular designs or multi-unit configurations might offer flexibility and ease of maintenance. Dive deeper into these advanced techniques by exploring comprehensive tutorials available at DIY step-by-step guides.
Inviting Your Innovations: Share Your Advanced Solar Dehydrator Experiences
My journey into refining solar dehydration techniques continues to evolve, and I encourage fellow DIY enthusiasts to explore reflective surfaces, thermal mass, and active ventilation solutions. Sharing your experiments and insights fosters a community of sustainable innovators. Have you incorporated advanced insulation or passive solar elements into your dehydrator? I invite you to comment below or visit my blog to exchange ideas and inspire collective progress in eco-friendly food preservation. Together, we can push the boundaries of sustainable DIY craftsmanship and transform simple projects into high-performance systems.
Things I Wish I Knew Earlier (or You Might Find Surprising)
The Hidden Power of Upcycled Materials
Looking back, I realize I underestimated how much potential recycled components have in DIY projects. I once hesitated to use an old window frame for my solar dehydrator, fearing it wouldn’t be durable enough. Turns out, with proper sealing and treatment, upcycled materials can outperform new, cheaply made parts—saving money and reducing waste.
The Importance of Strategic Placement
Initially, I built my dehydrator without considering the exact sunlight angles. Only after experimenting did I discover how vital positioning is. Placing it south-facing and elevating it a bit can dramatically boost efficiency, making the dehydration process faster and more uniform.
Insulation Is a Game Changer
I used to think a simple structure was enough, but insulation makes all the difference—especially in colder weather. Incorporating recycled foam or even old wool sweaters can keep the heat in, extending the dehydrator’s usability beyond the summer months.
Monitoring Tools Elevate the Process
Adding a basic thermometer or hygrometer might seem trivial, but it helps me fine-tune dehydration. Knowing the exact internal temperature prevents over- or under-drying, ensuring food safety and preserving nutrients.
Scaling Up Presents Unique Challenges
Trying to increase capacity isn’t just about making everything bigger. It involves managing airflow, heat retention, and structural stability. I’ve found that modular designs and proper insulation are key to successful larger setups.
The Value of Community and Sharing
Engaging with fellow DIYers through forums or social media has opened my eyes to innovative ideas I’d never think of alone. Sharing successes and setbacks keeps the learning curve exciting and collaborative.
Resources I’ve Come to Trust Over Time
- Instructables: A treasure trove of detailed, user-generated DIY guides. I’ve learned so much about building solar dehydrators and other sustainable projects here.
- Renewable Energy World: An authoritative source for understanding solar technology and eco-friendly innovations, helping me optimize my designs.
- Green Living Tips: Practical advice on sustainable living practices, including food preservation and resource management, which complement my DIY efforts.
- My Local Salvage Yard: Not a website, but an invaluable resource for finding upcycled materials—often overlooked but full of hidden gems.
Parting Thoughts from My Perspective
Embarking on DIY projects that focus on sustainability has profoundly changed how I view resourcefulness. Building a solar dehydrator from upcycled parts not only reduces my environmental footprint but also deepens my connection to the food I grow and enjoy. If this journey resonates with you, I encourage you to start small—perhaps by experimenting with recycled materials or optimizing your garden space. Remember, every little effort adds up, and sharing your experiences can inspire others to embrace eco-friendly innovations. Feel free to drop your thoughts or questions in the comments—I’d love to hear about your own adventures in sustainable DIY living!
I really appreciate this detailed share on making a solar dehydrator with upcycled parts. I attempted a small project last summer using recycled wooden pallets and some old plastic bottles for the cover, and it was surprisingly effective when positioned correctly. Your insights on insulation and placement were especially helpful because I found that even slight shade can significantly slow down dehydration. I’ve been considering adding small solar-powered fans to boost airflow, similar to what you described, but I wonder about the energy efficiency of small active systems versus passive designs. Has anyone here experimented with fan-assisted dehydration without significantly increasing energy use? It’d be great to hear how others have balanced energy efficiency with optimal drying conditions. I’m keen to learn more about thermal mass — I’ve heard it can really stabilize internal temperatures. Do you think adding black stones or bricks inside the dehydrator makes a notable difference in unpredictable weather? Thanks again for such an inspiring post; it’s encouraging to see how resourcefulness and recycling can come together for sustainable food storage.