Ever had that sinking feeling when your oven suddenly refuses to heat up right before dinner? I remember the first time it happened to me—standing there, staring at a cold oven, wondering what I’d missed. It’s frustrating, especially when you’re used to whipping up meals or baked treats without a hitch. But what if I told you that a lot of oven problems are surprisingly simple to fix, even if you’re not a seasoned DIYer? Today, I’ll walk you through the most common issues with your oven’s elements and other components, so you can troubleshoot like a pro and save money on repairs.
Why Fixing Your Oven Yourself Matters More Than You Think
Ovens are the heart of many kitchens, and when they break down, it can throw your whole routine off. The good news is, many malfunctions stem from faulty heating elements, broken thermostats, or loose wiring—all fixable with a bit of patience and the right guidance. Plus, according to the U.S. Department of Energy, maintaining and repairing appliances like your oven can reduce waste and extend their lifespan, saving you money and helping the environment. But I’ll admit, I made a pretty rookie mistake early on—trying to replace an element without turning off the power, which led to a rather shocking experience. Trust me, safety first!
So, if you’ve ever faced a chilly oven when you needed it most, or just want to get ahead of potential problems, this guide is for you. We’ll cover how to identify the culprit, test your oven’s components, and fix common issues yourself. No need to call in a professional for every little hiccup—often, the solution is right at your fingertips.
Is DIY Oven Repair Worth the Hassle
Now, I get it—some folks might be skeptical about tackling oven repairs on their own. Is it really safe? Will I end up causing more damage? These are valid concerns. Early on, I made the mistake of rushing into replacing a heating element without consulting the manual or shutting off the power, which nearly turned into a disaster. But with a little research, proper safety precautions, and step-by-step instructions, you can handle most repairs confidently. Plus, there are plenty of resources and tutorials available online, like detailed guides on troubleshooting electric ovens, that make the process straightforward.
If you’ve ever stared at your broken oven and wondered whether you should call a repair technician or give it a go yourself, you’re not alone. The good news is, with the right approach, DIY repairs can be safe, cost-effective, and empowering. Ready to dive into the details? Let’s get your oven back in top shape—because nothing beats the satisfaction of fixing it yourself.
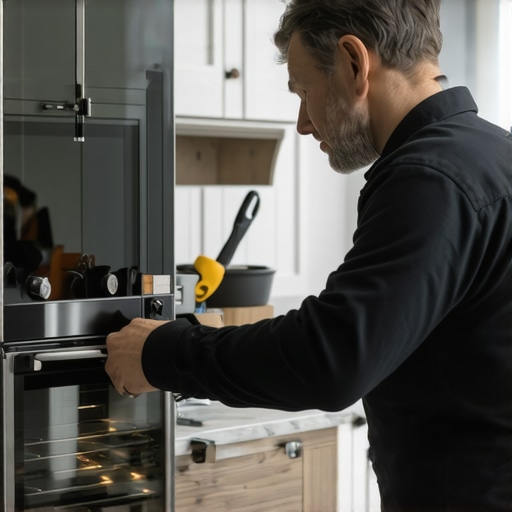
Disconnect Power Before Starting
Always turn off the oven and unplug it from the power source before beginning any repair. I learned this the hard way when I tried replacing a heating element without switching off the circuit—shockingly, it almost caused a serious injury. To avoid this, switch off the breaker or unplug the oven, and wait a few minutes to ensure all residual power is gone.
Identify the Faulty Component
Check if your oven isn’t heating evenly or at all. To test the heating element, remove the oven racks and locate the element at the bottom or top of the oven. Visually inspect for visible damage like cracks or blisters. If you see any, it’s likely the culprit. I once found a broken wire near the element that I didn’t notice at first, which explained why my oven refused to heat.
Test the Heating Element with a Multimeter
Remove the heating element from the oven following your model’s manual. Set your multimeter to the ohms setting, and place the probes on each terminal of the element. A reading of zero or infinite indicates a broken element. I tested mine, and the multimeter needle jumped, confirming the need for a replacement. If you’re unsure how to use a multimeter, check out this comprehensive guide.
Replace the Faulty Element
Buy a compatible replacement from a hardware store or online. Fit the new element by aligning it with the mounting brackets and reconnecting the wires securely. When I replaced mine, I made sure to tighten all screws firmly, so nothing would come loose. Secure everything back in place and double-check the connections.
Test the Oven After Repair
Plug the oven back in or turn on the circuit breaker. Turn on the oven and set it to a baking temperature. Use an oven thermometer to verify it heats correctly. During my first test, I watched the thermometer, and it reached the set temperature within minutes—much faster than before. If it still doesn’t heat properly, revisit the wiring or consider testing other components like the thermostat.
Check the Thermostat and Wiring
If the heating element is fine, the thermostat could be faulty. Use your multimeter to test the thermostat’s continuity. Disconnect it from the oven, set your multimeter, and test each terminal. No continuity indicates a broken thermostat. Also, inspect wiring harnesses for loose or burnt wires—these can cause heating issues. For detailed wiring troubleshooting, visit this step-by-step troubleshooting guide.
Reassemble and Final Check
Once all components are tested and replaced as needed, reassemble the oven. Make sure all screws and connectors are tight. Turn the power back on and run a test cycle. If the oven heats evenly and reaches the desired temperature, the repair is successful. I recommend keeping an eye on the first few uses to ensure everything stays in working order.
When it comes to fixing your oven, many DIY enthusiasts fall into common traps rooted in misconceptions. One of the biggest myths I often encounter is the idea that replacing a heating element will instantly resolve all heating issues. In reality, ovens are complex systems where multiple components work together, and focusing solely on the element can lead to unnecessary replacements or overlooked problems.
Another widespread mistake is assuming that all heating elements are universal. This isn’t true—each oven model has specific parts designed for it, and using an incompatible replacement can cause further damage or safety hazards. Always double-check the specifications or consult your oven’s manual before purchasing parts.
Many people overlook the importance of testing thermostats and wiring, assuming that a faulty heating element is the sole culprit. However, issues like broken thermostats or loose wiring connections are equally common and can be the root cause of uneven heating or complete failure. Proper testing with a multimeter is crucial to pinpoint the exact issue, saving you time and money.
Why Do Most DIY Repairs Fail Without Proper Testing
Many amateur repairs fail because of assumptions rather than evidence. For example, replacing a visibly cracked element without testing it first might seem logical, but a proper multimeter test can reveal that the issue lies elsewhere, like in the thermostat or wiring harness. According to expert technicians, comprehensive diagnostics are essential for effective repairs—don’t skip these crucial steps.
Furthermore, a common trap is rushing into repairs without disconnecting power. This oversight can lead to electric shocks or damage to your oven’s electronic controls. Always turn off the power at the breaker and wait a few minutes before starting any work. Safety should always come first, even if you’re eager to fix the problem quickly.
In the end, understanding the nuances of your oven’s components and avoiding these misconceptions can make DIY repairs more successful. Instead of guessing, take the time to diagnose properly. If you want a detailed guide on troubleshooting wiring and thermostats, check out this step-by-step troubleshooting guide. Remember, a little knowledge and caution go a long way in keeping your oven running smoothly and safely. Have you ever fallen into this trap? Let me know in the comments.
Maintaining your oven over time ensures it continues to perform efficiently and safely. One of the most effective ways to do this is by investing in quality tools designed specifically for appliance repair and maintenance. For example, I personally rely on a high-quality multimeter, such as the Fluke 117, because of its precision and durability. It helps me quickly identify faulty thermostats, broken wiring, or dead heating elements, saving me both time and effort. Additionally, a set of insulated screwdrivers and pliers is essential for safely handling electrical components without risking shocks or damage.
Beyond basic hand tools, I recommend using digital infrared thermometers when testing oven temperature accuracy. This device allows me to verify that the oven heats evenly and reaches the set temperature, which is crucial for baking precision. I prefer models like the Etekcity Lasergrip 774, which provides quick readings and accurate results, making troubleshooting much more straightforward.
Keeping your oven in top shape also involves regular cleaning and inspections. Periodically removing the oven racks and inspecting the heating elements and wiring harnesses can catch issues early before they escalate. Using a soft brush or vacuum attachment helps clear dust and debris from internal components, preventing overheating or electrical faults. For stubborn grime, I use a mixture of baking soda and vinegar, which is both eco-friendly and effective.
What Tools Do I Recommend for Long-Term Oven Care?
In my experience, a multimeter, infrared thermometer, and insulated screwdrivers are the trio of essential tools for maintaining your oven. These enable thorough inspections, accurate temperature readings, and safe component replacements. Investing in quality tools initially pays off by reducing the need for professional repairs down the line and extending the lifespan of your appliance.
Looking ahead, I predict that smart diagnostic tools integrated with IoT technology will become more prevalent, allowing homeowners to monitor their appliances remotely and receive maintenance alerts. This trend will make DIY maintenance even more accessible and proactive, reducing downtime and repair costs.
How do I keep my oven functioning well over time?
Regular maintenance is key. Schedule periodic inspections, clean components, and replace worn parts promptly. Always disconnect power before working on your oven, and refer to your model’s manual for specific troubleshooting steps. Using the right tools, like a precision multimeter and infrared thermometer, ensures you diagnose issues accurately and carry out repairs safely. For a comprehensive guide to troubleshooting and maintaining your oven, visit this step-by-step troubleshooting guide. Remember, a little preventative care now can save you big repairs later. Try out one of these advanced maintenance tips today and keep your oven working like new for years to come!
Lessons I Wish I Learned Sooner About DIY Oven Fixes
- One of my biggest lightbulb moments was realizing that a thorough diagnosis saves time and money. Instead of blindly replacing parts, testing with a multimeter revealed the real culprit, like a broken thermostat or wiring issue.
- I used to think that replacing a heating element would fix all heating problems. Turns out, ovens are complex; sometimes, the problem lies in the control board or wiring, not just the element.
- Safety is paramount. Always disconnect power before starting repairs. Once, I nearly got shocked because I rushed without turning off the breaker. Proper precautions keep DIY projects safe and stress-free.
- Using the right tools—like a quality multimeter and infrared thermometer—makes troubleshooting much easier. Investing in good tools initially can prevent costly mistakes and extend your oven’s lifespan.
- Patience pays off. Carefully following step-by-step guides ensures you don’t miss crucial steps, like securing wires properly or reassembling components correctly. The satisfaction of fixing it yourself is worth the effort.
My Top Picks for DIY Oven Maintenance and Repair Tools
- Fluke 117 Multimeter: Precise, durable, and easy to use, this multimeter helps me quickly identify faulty components and avoid unnecessary replacements. I trust it for all electrical troubleshooting.
- Etekcity Lasergrip 774 Infrared Thermometer: This tool verifies oven temperature accuracy and helps spot uneven heating. It’s a game-changer for baking and troubleshooting heating issues efficiently.
- Insulated Screwdrivers and Pliers: Safety first! High-quality insulated tools protect me from shocks and make working with electrical parts safer and more comfortable.
- Online Troubleshooting Guides: Resources like DIYKutak’s step-by-step guides provide detailed instructions tailored to specific models, saving me time and confusion when diagnosing issues.
Your Turn to Take Action and Keep Your Oven Running
Fixing your oven yourself might seem daunting at first, but with the right knowledge and tools, it becomes a rewarding experience that saves money and extends your appliance’s life. Remember, patience and safety are your best allies in this process. Start small, stay cautious, and enjoy the pride of a DIY victory. If you’re ready to deepen your skills, check out the home improvement tips and DIY ideas for more expert advice. What’s the first repair you plan to tackle on your oven? Let me know below!