My Unexpected Encounter with Scrap Metal and Garden Art
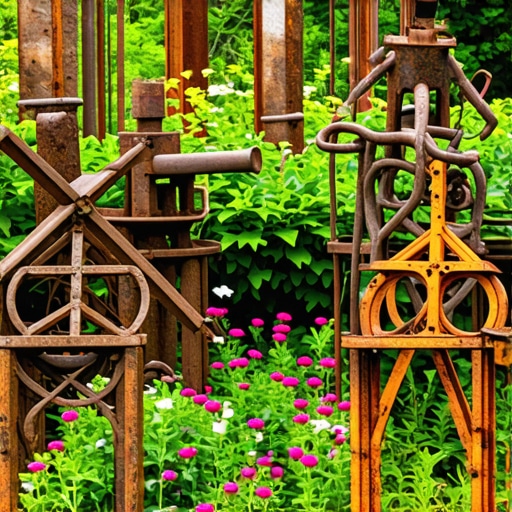
One sunny afternoon, I was wandering through a local scrapyard, feeling uninspired until I spotted a heap of discarded metal pieces. That moment sparked my curiosity: could these rusty scraps become beautiful garden sculptures? Since then, transforming discarded scrap metal into stunning garden art has become a meaningful hobby that combines creativity with sustainability.
Why I Chose Scrap Metal for Garden Sculptures
Initially, I was drawn to scrap metal because it’s an eco-friendly way to repurpose materials that might otherwise end up in landfills. I also appreciated the versatility; different shapes and textures allowed me to experiment and craft unique designs. Plus, the durability of metal means my sculptures can withstand weather and time, making them perfect for outdoor spaces.
Getting Started: My Personal Tips for Artistic Metalwork
When I began, I learned that safety is paramount—wearing protective gloves and eye gear is essential. I also invested in basic tools such as a welder, metal cutters, and a sturdy work surface. For inspiration, I browsed online galleries and tutorials, like those found at DIY crafts for all ages, which helped me develop my skills gradually.
How to Turn Rusty Bits into Art: My Creative Process
The process begins with selecting scrap pieces that resonate with my vision. I then clean and prepare the metal, sometimes adding a patina for color effects. Welding allows me to connect pieces securely, creating intricate shapes like flowers, animals, or abstract forms. I found that incorporating found objects—like old gears or bolts—adds character and charm to each sculpture.
What are the best techniques for preserving the color and finish of metal sculptures?
To maintain the look of my garden art, I use weather-resistant sealants and sometimes apply a clear coat to prevent rust and fading. Regular maintenance, such as cleaning off dirt and inspecting for corrosion, keeps my sculptures vibrant over the years. For more advanced techniques, consulting resources like DIY architectural projects has been invaluable for honing my finishing skills.
Sharing my journey has been incredibly rewarding, and I love hearing from fellow garden enthusiasts. If you’re curious about starting your own scrap metal sculpture, I encourage you to explore local scrap yards and online tutorials. Remember, even rusty bits can be transformed into captivating art that enhances your outdoor space.
If you’ve ever tried turning scrap metal into garden art, I’d love to hear your experiences! Feel free to leave a comment below or share your photos. For more creative DIY ideas, consider browsing home decor DIY projects.
Advanced Techniques for Preserving Your Metal Garden Art
After crafting stunning scrap metal sculptures, the next critical step is ensuring their longevity and maintaining their vibrant appearance. As an experienced artist, I highly recommend applying weather-resistant protective coatings, such as clear sealants or specialized outdoor paints, to shield your creations from rust and environmental damage. Regular inspection and cleaning can significantly extend their lifespan, allowing your art to shine through seasons and years.
Choosing the Right Sealants and Finishes for Durability
Opting for high-quality sealants designed for outdoor use is essential. Products like clear epoxy or polyurethane coatings provide a durable barrier against moisture and UV rays. When applied correctly—preferably after cleaning and priming—the finish not only preserves the metal’s natural patina but also enhances its aesthetic appeal. For those interested in experimenting with color effects, patina solutions or heat treatments can add unique hues, but remember to seal these finishes properly for lasting results.
Expert Advice on Repairing and Restoring Rusted Sculptures
Even with the best preventive measures, minor corrosion may occur over time. The key is prompt repair—removing rust with wire brushes or sandblasting, then treating the surface with rust inhibitors. For more intricate projects, techniques like welding small repairs or reapplying protective layers can restore your sculpture to its original beauty. Learning from authoritative sources, such as DIY architectural projects, can provide insights into advanced finishing and restoration methods.
What are the most effective methods for achieving a seamless weatherproof finish on complex scrap metal sculptures?
Creating a seamless, weatherproof finish involves meticulous surface preparation—cleaning, sanding, and degreasing before applying primer. Multiple thin coats of sealant or paint, allowed to dry thoroughly between applications, ensure an even, durable layer. Incorporating techniques like spray painting or airbrushing can help achieve smooth coverage on complex shapes. For intricate details, brushing with quality brushes ensures precision. Regular maintenance, such as wiping off dirt and inspecting for corrosion, keeps the sculpture vibrant and intact for decades.
If you’re eager to elevate your metal art projects, exploring advanced finish techniques can make a significant difference. For more inspiration, consider browsing home decor DIY ideas to incorporate your sculptures into a cohesive outdoor aesthetic.
Have you experimented with finishing or restoring scrap metal sculptures? Share your experiences and tips below—your insights could inspire fellow DIY enthusiasts. Also, don’t forget to check out more expert advice on sustainable and creative DIY projects at Smart DIY innovations for modern living.
Deepening My Understanding of Metal Preservation: Personal Insights and Challenges
Over the years, I’ve realized that preserving outdoor metal sculptures is as much an art as it is a science. One challenge I encountered was dealing with sculptures that had intricate details and hard-to-reach crevices. Applying sealants uniformly without drips or missed spots required patience and precision. This experience taught me the importance of choosing the right tools—brushes with fine tips or spray applicators—and the value of meticulous surface preparation before sealing.
My Approach to Tackling Complex Shapes: Techniques and Reflections
When working on complex, multi-dimensional sculptures, I found that multiple thin coats of protective finish yield the best results. Patience is key—allowing each layer to dry thoroughly prevents uneven finishes and bubbles. I also experimented with heat treatments to create unique patina effects before sealing, inspired by techniques discussed at DIY architectural projects. These advanced finishing steps not only enhance aesthetic appeal but also add an extra layer of protection against environmental wear.
How Can I Achieve a Seamless, Long-Lasting Finish on Intricate Sculptures?
This question has been central to my journey. The secret lies in meticulous surface prep—removing rust, degreasing, and sanding to create a smooth canvas. Then, applying a primer designed for metals significantly improves adhesion. The key is to use multiple, light coats of high-quality sealants, allowing adequate drying time. For intricate details, airbrushing can help achieve even coverage without obscuring fine features. Regular maintenance, such as gentle cleaning and inspections, ensures the sculpture remains vibrant for decades.
Exploring Further: Resources and Personal Recommendations
For those eager to delve deeper, I recommend exploring authoritative resources like DIY architectural projects. They provide valuable insights into advanced finishing techniques, including heat patina and layered coatings. Connecting with fellow artists and sharing your experiences can be incredibly rewarding—it’s inspiring to see how others preserve their outdoor art, often blending traditional methods with innovative solutions.
Engaging with the Community: Your Experiences and Ideas
If you’ve undertaken similar projects or have unique techniques for weatherproofing your metal sculptures, please share your stories and tips in the comments. Your insights could help others overcome challenges and extend the lifespan of their outdoor art. Also, consider exploring related DIY projects like home decor DIY ideas to incorporate your sculptures into broader outdoor aesthetics. Remember, every rusted piece has the potential to become a lasting masterpiece with the right care and passion.
Refining Preservation Strategies: Beyond Basic Sealants and Sealant Layers
As I delved deeper into the art of safeguarding my metal sculptures against the elements, I discovered that selecting the appropriate topcoat is crucial for long-term durability. High-performance outdoor epoxy or polyurethane coatings, such as those recommended by DIY architectural experts, form an impervious barrier that resists rust, UV damage, and moisture intrusion. Applying these in multiple thin layers with careful drying intervals ensures a seamless, protective finish that maintains the sculpture’s aesthetic integrity over decades. Additionally, integrating UV-stable pigments or colorants during sealing can help preserve vibrant hues, especially when working with patina or heat-treated surfaces.
Addressing Intricate Details: Precision in Repair and Restoration
When confronted with sculptures featuring intricate cutouts or hard-to-reach crevices, I found that employing specialized tools like fine brushes, spray applicators, or even airbrush systems significantly enhances coating uniformity. For example, after wire-brushing and rust removal, I often use a small airbrush to apply thin coats of rust inhibitor or sealant into tight spaces, avoiding drips and ensuring comprehensive coverage. This meticulous approach is essential for preventing hidden corrosion pockets that could compromise the sculpture’s structural integrity over time. For complex repairs, techniques like cold welding or advanced patching with metal fillers can seamlessly restore damaged areas, as demonstrated in professional restoration guides.
Achieving a Seamless, Long-Lasting Finish on Complex Shapes
Creating a flawless, weatherproof finish on multi-dimensional sculptures demands rigorous surface prep—degreasing, sanding, and priming with metal-specific primers. Then, employing spray painting or airbrushing allows for even coverage on complex geometries, thereby eliminating brush marks or uneven layers. I also recommend applying multiple ultrathin coats, allowing each to dry thoroughly, to build a resilient barrier that withstands environmental stresses. Regular maintenance—such as gentle cleaning with a soft cloth and periodic inspection—further extends the lifespan of your outdoor art, keeping it vibrant and rust-free for generations. For those interested in further mastery, exploring advanced patina techniques and layered coatings can add unique character and protection, as outlined at home decor DIY resources.
Engage with the Community: Share Your Restoration Triumphs and Challenges
If you’ve experimented with sealing or restoring intricate scrap metal sculptures, I encourage you to share your insights and experiences. Your tips can help fellow enthusiasts achieve professional-grade results and extend the life of their outdoor masterpieces. Additionally, browsing dedicated tutorials and expert advice, such as those available at Smart DIY innovations, can provide fresh ideas for elevating your craft. Remember, every rusted or damaged piece holds potential—your expertise and care can transform it into a resilient, stunning garden feature that endures through seasons and years.
Things I Wish I Knew Earlier (or You Might Find Surprising)
1. The Power of Patience
When I first started working on scrap metal sculptures, I underestimated how much patience was required. Rushing the sealing process often led to uneven finishes or rust spots. Taking my time with multiple thin coats and letting each one dry thoroughly made a huge difference in the longevity and appearance of my garden art.
2. Surface Preparation Matters More Than You Think
Proper cleaning, sanding, and priming before applying any sealant are essential steps I once overlooked. Skipping these made my sculptures more prone to rust and weather damage. Now, I see surface prep as the foundation of durable outdoor metal art.
3. Not All Sealants Are Created Equal
Choosing the right weather-resistant sealant can be tricky. I’ve learned to prefer high-quality outdoor epoxy or polyurethane coatings, which provide a seamless, long-lasting barrier. Experimenting with different products taught me what works best for my climate and sculptures.
4. Regular Maintenance Extends Lifespan
Cleaning off dirt and inspecting for corrosion every season keeps my sculptures vibrant. Catching rust early and reapplying sealant as needed has helped my garden art look fresh year after year, even in harsh weather.
5. Artistic Techniques Add Character and Protection
Incorporating heat patinas or applying colored finishes before sealing not only enhances aesthetic appeal but also provides an extra layer of protection. I recommend exploring these techniques at DIY architectural projects for inspiration.
6. The Value of Community and Resources
Connecting with fellow artists online and consulting trusted resources has been invaluable. Sharing tips and experiences helps me improve my craft and discover new methods to preserve my outdoor sculptures.
Resources I’ve Come to Trust Over Time
- DIY Architectural Projects: This website offers detailed guides on patina techniques and protective finishes, which have been instrumental in my learning process. I recommend it to anyone serious about outdoor metal art.
- Expert Restoration Guides: Articles and tutorials from experienced restorers teach advanced techniques for rust removal and repairing damaged sculptures, boosting my confidence in tackling complex projects.
- Specialized Sealants: Brands like Rust-Oleum and Krylon provide weatherproof coatings that I trust for their durability and ease of application. Their products help me achieve a professional finish.
Parting Thoughts from My Perspective
Preserving outdoor metal sculptures is both an art and a science. The key takeaway from my journey is that meticulous surface prep, choosing the right sealants, and regular maintenance are crucial for creating garden art that withstands the elements. Every rusted piece holds potential, and with a bit of care, it can become a cherished feature in your outdoor space. If this resonates with you, I’d love to hear your thoughts or experiences. Feel free to share in the comments or explore more DIY ideas at home decor DIY projects. Remember, every piece of scrap metal has a story—and with love and patience, it can be transformed into a lasting masterpiece.
What a fascinating story about turning scrap metal into garden art! I completely agree that the durability of metal makes it a great material for outdoor sculptures. I’ve recently begun experimenting with similar ideas using recycled materials from my local scrapyard, but I find that choosing the right protective sealant is quite challenging, especially for intricate shapes. Do you have any tips on the best sealants or application techniques to ensure a seamless, weatherproof finish on complex sculptures? I’d love to hear your advice. Also, I’ve noticed that the patina process can really add unique character, but I worry about fading over time. How do you maintain or restore those colours without compromising durability? Thanks for inspiring me to get more creative with recycled metal—it’s a rewarding way to combine artistry with eco-consciousness.