Why Copper Foil Is the Secret Sauce of Stained Glass Magic
If stained glass art were a symphony, copper foil would be the conductor’s baton—subtle, yet essential. While lead came historically held the spotlight, copper foil techniques have revolutionized the craft, allowing artists to sculpt intricate designs with finesse and flexibility. I remember my first stained glass project, fumbling with lead strips, only to discover the copper foil method’s elegance and precision. Suddenly, the glass pieces aligned like dancers in a ballet, held together seamlessly with soldered glints. It’s artistry and engineering colliding beautifully.
Peeling Back the Layers: The Copper Foil Process Demystified
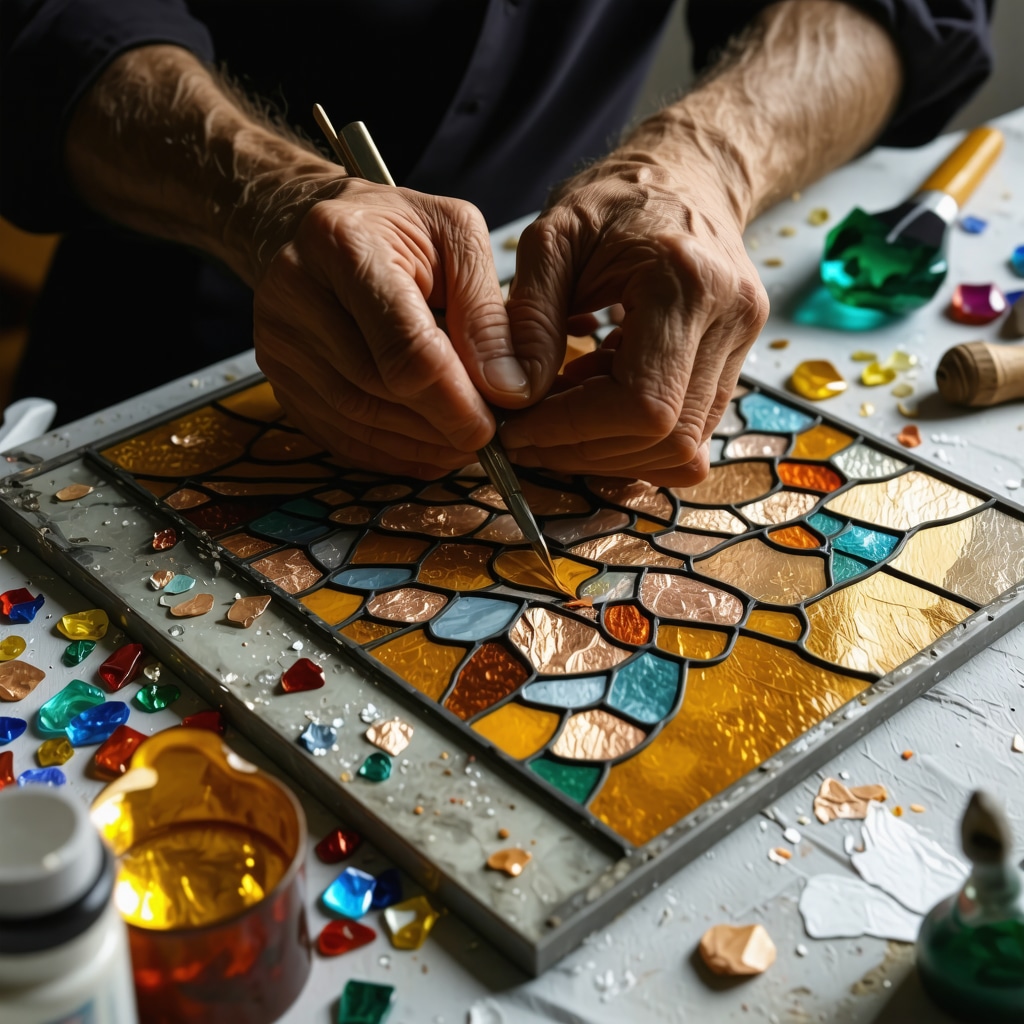
At its core, copper foil is deceptively simple: wrap the edges of each glass piece with a thin adhesive copper tape, then solder the seams to join them. But don’t be fooled—mastering this craft takes patience and a keen eye. The foil must be applied smoothly, with no wrinkles or gaps, to ensure strong bonds and a clean finish. Beginners often underestimate the tactile finesse required, but once you nail the technique, the possibilities for detailed patterns explode.
Is It Really Just Wrapping and Soldering, or Is There More Alchemy Here?
Absolutely more! The choice of foil width, the quality of adhesive, and even the solder’s composition play pivotal roles. For example, 7/32-inch foil suits delicate designs, while wider foils offer sturdiness for larger panels. Flux application is another art—too much can create unsightly residues; too little, and the solder won’t flow properly. This nuanced balance transforms copper foil from a mere technical step into a craft in its own right. Experts in the field, such as those chronicled by Craftsy’s stained glass tutorials, emphasize these subtleties as game-changers.
Tools of the Trade: Your Copper Foil Arsenal
Before diving into your next masterpiece, arm yourself with the right tools: a quality glass cutter, a fid or burnishing tool to press down foil edges, fine-tip flux applicators, and a temperature-controlled soldering iron. Trust me, skimping on these will cost you hours of frustration. The ritual of prepping glass, carefully foiling, and soldering becomes almost meditative—each step a dance of precision.
Ready to Wrap Yourself in Creativity?
If you’re itching to add stained glass artistry to your DIY repertoire, copper foil techniques open a world of intricate designs and shimmering possibilities. And if you’re hungry for more creative inspiration, why not explore unique DIY crafts to try for home decor? Your stained glass journey is just a foil wrap away.
Got your own copper foil tips or tales? Share your experiences in the comments below—let’s build a community that celebrates the art of stained glass together!
Beyond Basics: Elevating Your Copper Foil Technique with Pro Insights
Once you’ve wrapped your head around the fundamentals of copper foil, the next frontier lies in refining your technique for flawless aesthetics and durability. Seasoned artisans emphasize the importance of burnishing—the process of firmly pressing the foil onto glass edges to eliminate gaps and wrinkles. Using a dedicated fid tool or even a smooth wooden stick, you can achieve a seamless bond that not only strengthens the panel but also enhances solder adhesion. Additionally, consider the environment where you work; humidity and temperature affect adhesive performance and solder flow, turning a simple project into a lesson in microclimate control.
The Art of Soldering: From Functional to Fabulous
Soldering is more than melting metal—it’s where craftsmanship truly shines. Choosing the right solder composition (typically a 60/40 tin-lead alloy or a lead-free alternative for health-conscious crafters) impacts how smoothly the metal flows and how shiny the finish appears. Temperature control is paramount; too hot, and you risk cracking delicate glass or scorching the foil; too cool, and the solder won’t fuse properly, leaving weak joints. Practicing on scrap pieces can build muscle memory, making your joints consistently clean and strong. For a professional touch, learn to feather the solder bead edges, creating fluid lines that complement your stained glass design rather than appearing as an afterthought.
How Can Mastering Copper Foil Transform Your Home Decor Projects?
Integrating copper foil stained glass into your living space can elevate the ambiance by introducing both artistry and light play. Imagine a custom-made window panel casting colorful reflections or a striking lamp shade that diffuses warm glows—these are attainable with your enhanced foil skills. For inspiration and practical ideas on incorporating such crafts into your interior, explore unique DIY crafts to try for home decor. The tactile satisfaction of crafting your own stained glass piece also encourages mindfulness, a boon in today’s hectic world.
Experts from the Craftsy stained glass tutorials highlight how mastering copper foil not only improves craftsmanship but also expands creative horizons, enabling delicate filigree and intricate mosaics previously unattainable with traditional lead came.
Maintenance and Longevity: Keeping Your Copper Foil Masterpieces Radiant
After investing time and skill into your stained glass work, proper maintenance ensures it remains stunning for years. Gentle cleaning with a soft cloth and mild soap avoids damaging the foil or solder lines. Avoid abrasive cleaners that can strip away protective coatings or dull the copper’s shine. Periodically inspect your panels for signs of oxidation or lifting foil edges, especially in high-humidity environments. Addressing these issues early by re-burnishing or applying protective waxes can significantly extend your piece’s life.
For a deeper dive into preserving and restoring stained glass, check out resources like smart DIY ideas for home improvement, where practical guidance meets expert know-how.
Have you tried copper foil stained glass in your projects? What tips or challenges have you encountered? Share your stories and questions in the comments—let’s cultivate a vibrant community passionate about this luminous art!
Micro-Precision Techniques: Mastering Foil Application for Complex Glass Cuts
As stained glass artists progress beyond basic forms, they encounter the challenge of wrapping irregular or intricate glass shapes with copper foil. Achieving a flawless wrap on curves, points, and tiny facets demands not only steady hands but also strategic foil sizing and tension control. Seasoned artisans often pre-cut foil strips slightly longer than the edge length, then gently stretch the adhesive copper tape to conform closely around bends without wrinkling. Employing magnification tools and ultra-fine fids can refine the burnishing process, ensuring every microscopic gap is sealed. This precision prevents solder seepage beneath the foil, which can weaken joints and mar the piece’s aesthetic. For those tackling complex mosaics or filigree designs, mastering these micro-tactics dramatically elevates both durability and visual impact.
How Does Environmental Control Influence Copper Foil Adhesion and Solder Quality?
Environmental factors, often overlooked by novices, profoundly affect copper foil adherence and soldering outcomes. Relative humidity levels above 60% can degrade the foil adhesive’s tackiness, leading to lifting edges that compromise panel stability. Conversely, very dry environments may cause static cling, attracting dust that interferes with solder flow. Temperature also plays a dual role: cooler workshop temperatures slow solder melting and can yield brittle joints, while excessively high temperatures risk overheating glass and damaging foil integrity. Maintaining a controlled workspace—ideally between 68°F and 75°F with 40%-55% humidity—optimizes foil stickiness and solder fluidity. Some professionals even employ localized heat lamps or dehumidifiers to maintain these precise conditions during critical phases.
According to research consolidated by the National Park Service’s Technical Preservation Brief 27, controlling environmental parameters during stained glass fabrication and restoration is essential to prevent premature degradation and ensure long-term structural integrity.
Innovative Soldering Alloys: Enhancing Strength and Shine for Complex Stained Glass Panels
While traditional 60/40 tin-lead solder remains a staple, contemporary stained glass artisans are experimenting with advanced lead-free alloys and silver-infused solders to balance health considerations with superior mechanical and aesthetic qualities. Silver-bearing solders, for example, offer higher tensile strength and a brighter finish that resists dulling over time. However, they require precise temperature management, typically melting at temperatures exceeding 600°F, demanding soldering irons with advanced thermal regulation. Additionally, flux formulations have evolved, incorporating organic acid-based activators that promote smoother solder flow and reduce residue. These innovations empower artists to create large-scale, structurally demanding panels without sacrificing the delicate lines and luminous effects that define stained glass artistry.
Preservation Protocols: Advanced Strategies to Protect Copper Foil Artworks in Varied Environments
Beyond routine cleaning, seasoned stained glass conservators employ protective coatings such as microcrystalline waxes or UV-resistant lacquers to shield copper foil and solder lines from oxidation and environmental pollutants. Applying these coatings requires meticulous surface preparation, including gentle de-greasing and ensuring foil edges are securely burnished to prevent moisture ingress. For installations exposed to outdoor elements or fluctuating climates, incorporating sacrificial protective layers and periodic inspections form part of a comprehensive maintenance regimen. Moreover, understanding galvanic corrosion risks—where contact between copper foil and other metals can induce degradation—is critical when mounting panels in metal frames or architectural settings. Selecting compatible framing materials and incorporating insulating barriers can mitigate these electrochemical reactions.
For practitioners seeking expert guidance on long-term care, the National Park Service’s preservation briefs offer authoritative, technical insights grounded in decades of conservation experience.
Ready to elevate your stained glass craft beyond fundamentals? Experiment with these advanced techniques and environmental controls to achieve masterpieces that not only captivate but endure. Dive deeper into specialized tutorials and community discussions to refine your skills further—your next luminous creation awaits!
Micro-Precision Wrapping: The Artistry Behind Intricate Copper Foil Application
When your stained glass designs venture into the realm of complex geometry—think delicate curves, sharp points, and slender filigrees—the copper foil application transforms from a routine task into a nuanced craft demanding micro-precision. Experts advise pre-cutting foil strips slightly longer than the glass edges, then gently stretching the adhesive copper tape to conform seamlessly around bends without wrinkles or air pockets. Utilizing ultra-fine burnishing tools under magnification enables the meticulous sealing of microscopic gaps, preventing solder seepage that could weaken structural integrity or mar the visual purity of your artwork. This refined technique elevates your projects from charming to museum-worthy masterpieces.
How Can You Harness Environmental Controls to Perfect Copper Foil Adhesion and Soldering?
Environmental conditions are a silent yet formidable player in copper foil stained glass success. Relative humidity exceeding 60% can dramatically reduce adhesive tack, causing foil lifting that jeopardizes panel cohesion. Conversely, extremely dry air fosters static, attracting dust particles that interfere with solder flow and joint strength. Temperature variations also play a critical dual role: cool workshops slow solder melting, risking brittle joints, while excessive heat can crack glass or degrade foil adhesion. The artisan’s sanctuary ideally maintains 68°F to 75°F with 40%-55% humidity, optimizing both foil stickiness and solder fluidity. Some masters employ dehumidifiers or localized heat lamps to fine-tune these parameters during critical assembly phases. Insights from the National Park Service’s Technical Preservation Brief 27 emphasize that controlling your workspace microclimate is essential for long-term stability and brilliance.
Innovations in Solder Alloys: Balancing Strength, Safety, and Shine for Contemporary Artisans
While the venerable 60/40 tin-lead solder has been a trusted staple, modern stained glass artists increasingly embrace advanced alternatives that marry health consciousness with performance. Silver-infused solders deliver superior tensile strength and a radiant finish that resists dulling, though they demand precise temperature management—often exceeding 600°F—necessitating professional-grade soldering irons. Meanwhile, evolved flux formulas incorporating organic acid-based activators enhance solder flow and minimize residue, ensuring cleaner joints and more luminous results. These innovations empower artisans to tackle larger, structurally demanding panels without sacrificing the delicacy of intricate lines or the glowing allure inherent to stained glass.
Protecting Your Masterpieces: Cutting-Edge Preservation Techniques for Copper Foil Artworks
Beyond everyday cleaning, advanced preservation strategies are vital to safeguard your copper foil creations against environmental wear and oxidation. Conservators recommend applying microcrystalline waxes or UV-resistant lacquers after meticulous surface preparation—degreasing and thorough burnishing—to form invisible shields against moisture and pollutants. For outdoor or variable climate installations, protective sacrificial layers combined with scheduled inspections help preempt degradation. Additionally, understanding galvanic corrosion is crucial; copper foil in contact with incompatible metals can suffer electrochemical deterioration. Choosing compatible framing materials and incorporating insulating barriers mitigates these risks, ensuring your artwork retains its brilliance for decades. The National Park Service’s preservation briefs offer invaluable, expert-backed guidance for these advanced care protocols.
Ready to push your stained glass skills into the stratosphere? Explore further expert tutorials and community wisdom at master copper foil techniques and share your own nuanced tips or questions below. Let’s illuminate the stained glass craft together—one shimmering detail at a time.

Expert Insights & Advanced Considerations
Precision Burnishing: The Unsung Hero of Copper Foil Mastery
While applying copper foil might seem straightforward, the true strength and aesthetic harmony come from meticulous burnishing. Experts stress that using specialized fids or smooth tools to firmly press the foil edges eliminates gaps and wrinkles, preventing solder seepage and enhancing bond durability. This micro-level attention transforms fragile panels into resilient works of art.
Environmental Control: Crafting the Perfect Microclimate for Foil Adhesion and Solder Flow
Stained glass artisans seldom talk about how much humidity and temperature subtly influence the process. Maintaining workshop conditions between 68°F and 75°F with 40%-55% humidity optimizes adhesive tack and solder fluidity. Some professionals even deploy dehumidifiers or localized heat sources during assembly to ensure consistent results, especially when working with complex or large-scale panels.
Innovative Alloys: Balancing Performance and Safety in Solder Selection
Modern soldering blends tradition with innovation. While the classic 60/40 tin-lead alloy remains popular for its flow and finish, silver-infused and lead-free solders offer enhanced tensile strength and a brighter, longer-lasting shine. These materials require precise temperature control and advanced tools but reward the artisan with superior durability and health-conscious benefits.
Advanced Preservation: Beyond Cleaning to Prolong Masterpiece Longevity
Protecting copper foil artworks demands more than gentle cleaning. Conservation experts recommend microcrystalline waxes or UV-resistant lacquers applied after careful surface preparation. Understanding galvanic corrosion risks when framing and selecting compatible materials further safeguards integrity, especially in fluctuating climates or outdoor installations.
Curated Expert Resources
- National Park Service’s Technical Preservation Brief 27: An authoritative guide detailing environmental control and preservation protocols essential for stained glass longevity, invaluable for both artisans and conservators. Read more.
- Craftsy’s Stained Glass Tutorials: A comprehensive series offering nuanced insights into copper foil techniques, soldering tips, and creative applications, ideal for advancing beyond beginner methods. Explore tutorials.
- DIYKutak’s Master Copper Foil Techniques for Stunning Stained Glass Art: A practical resource blending step-by-step guides with expert advice tailored for hobbyists aiming to elevate their stained glass craftsmanship. Discover more.
- DIYKutak’s Creative Solutions for Home Decor: Unique DIY Crafts to Try: For inspiration on integrating stained glass art into your living space, this resource offers diverse ideas that complement your copper foil projects. Get inspired.
Final Expert Perspective
Mastering the art of copper foil techniques unlocks a realm where precision, environment, and material innovation converge to create stained glass masterpieces that endure and dazzle. The subtlety of burnishing, the discipline of environmental control, and embracing modern solder alloys together elevate craftsmanship to professional heights. For those ready to push boundaries, exploring advanced preservation methods ensures your creations remain radiant legacies. Engage with expert communities, share your insights, and continue refining your skills to illuminate spaces and imaginations alike.
For further inspiration and practical guidance, explore related DIY crafts for home decor and deepen your expertise through master copper foil techniques. Your next stained glass masterpiece awaits.
Reading through the article, I was particularly struck by how copper foil truly is the game-changer in stained glass artistry. The comparison to a conductor’s baton is apt—it’s subtle yet transforms the whole performance. I recall when I shifted from lead came to copper foil for my projects, it completely opened up possibilities for more intricate designs that were just impossible before. One challenge I’ve encountered, especially as a beginner, is getting the foil to sit perfectly smooth without wrinkles. The article’s emphasis on burnishing and environmental conditions resonates with me, as I’ve noticed that working in a humid space sometimes causes the foil to lift a bit before soldering. Does anyone else experiment with their workspace environment to improve adhesion? Also, I’d love to hear from others on how they choose solder types between traditional and newer silver-infused options—balancing ease of use with durability seems like an ongoing puzzle. Overall, mastering these nuanced techniques feels like the real magic behind turning simple glass pieces into stunning, enduring artwork. It makes me wonder, what’s the community’s favourite tip for elevating copper foil application beyond the basics?
Emily, your observations about the importance of environmental control in copper foil adhesion really struck a chord with me. I’ve also found that working in a humid studio can be tricky; the foil sometimes feels like it just won’t stick right, no matter how carefully I wrap it. What’s helped me recently is setting up a small dehumidifier near my workspace and maintaining a stable temperature, which seems to improve the tackiness significantly. About solder choice, I tend to start with traditional 60/40 solder for practice due to its forgiving flow and lower melting point, then graduate to silver-infused solder for pieces intended to last or be displayed prominently because of its strength and shine. The key challenge I’ve encountered is balancing temperature settings to avoid overheating the foil but still achieve a smooth solder bead. I’d love to know how others fine-tune their soldering irons to cater to these delicate nuances. Also, has anyone experimented with combining different foil widths within the same project to enhance both detail and strength? It seems like a promising technique to push stained glass artistry further.
I really enjoyed this comprehensive breakdown of copper foil techniques. As someone who recently started dabbling in stained glass, I can vouch for the importance of burnishing—it’s surprising how much it improves solder adhesion and overall panel durability. I’ve also noticed that working in a controlled environment definitely helps, especially in areas with high humidity, which often causes foil lifting and uneven solder flow. Using a small dehumidifier has made a noticeable difference in my projects.
Regarding solder types, I’ve experimented with both traditional 60/40 and newer lead-free options. While the lead-free solder is healthier and offers some advantages in terms of environmental impact, I find that it requires a bit more finesse with temperature control to get a clean, shiny finish. Has anyone else noticed similar differences or found particular brand recommendations that work well?
Additionally, I’ve been curious about combining different foil widths within a project to balance detail and strength. Has anyone here tried this? Would love to hear your experiences or tips on managing those transitions seamlessly.
This post really resonates with me, especially the importance of burnishing and environmental control. I’ve found that even a slight change in workshop humidity can impact how well the foil adheres, and I’ve started using a small dehumidifier and a fan to keep things stable. Regarding solder choices, I initially stuck with traditional 60/40, but I’ve recently experimented with silver solder for its brighter finish and added durability, especially for pieces that will be exposed to sunlight or high humidity. The transition wasn’t difficult, but it does require fine-tuning soldering temperatures. I love the idea of combining different foil widths within a piece—I’ve tried it on smaller projects with good success, creating more intricate details without sacrificing strength. Has anyone else here experimented with multi-width foils on larger panels? Would love to hear your tips on managing those transitions smoothly.
This article really highlights how crucial proper foil application and environmental controls are in stained glass work. I’ve been experimenting with burnishing techniques recently, and I can confirm that taking that extra step to press the foil firmly does make a noticeable difference in solder joints’ strength and overall finish. One challenge I often face is maintaining a stable workspace environment; fluctuating humidity seems to cause the foil to lift or become tricky to manipulate. I’ve started using a dehumidifier and a consistent temperature, which has improved my results considerably. Regarding solder choices, I tend to stick with traditional 60/40 for most projects, but I’m curious if anyone has transitioned to lead-free alloys and how they compare in terms of ease and durability. Also, I’d love to hear tips about seamlessly combining different foil widths within a single design—has anyone found effective techniques for managing transitions without visible seams? I believe honing these micro-precision skills really allows for creating more intricate and lasting stained glass pieces.
This post really made me think about the precision involved in copper foil work—beyond just wrapping and soldering, that meticulous burnishing truly can make or break the final look. I’ve recently started experimenting with different foil widths within a single piece to add both strength and intricate detail, and I find that pre-cutting longer strips and gently stretching the foil helps around curves. Has anyone else found that adjusting the workspace environment, like using a dehumidifier or even small climate control units, significantly improves foil adhesion and solder flow? I’ve noticed substantial differences in my results when I maintain a steady temperature and humidity. Also, I’ve been leaning toward traditional 60/40 solder, but with the latest advances, I am curious if others have shifted to lead-free or silver-infused options for both safety and the brighter finish. Would love to hear your experiences—what is your secret to flawless, durable stained glass panels?