Discovering the Strength of Traditional Joinery in My Workshop
As an avid DIY enthusiast, I always looked for ways to strengthen my furniture projects. My journey into mastering Master Mortise & Tenon Joints began when I decided to restore an antique table. The old joints had loosened over time, and I realized that understanding traditional techniques could make a real difference. This experience was a turning point that deepened my appreciation for woodworking craftsmanship.
Why I Chose the Mortise & Tenon Technique Over Others
After exploring various joinery methods, I found that Mortise & Tenon provides unparalleled strength and stability. Unlike simple butt joints or screws, this technique creates a mechanical lock that withstands stress. I also learned that this method has been used for centuries in furniture making, a testament to its durability. For a visual guide, I often refer to authoritative sources like Wood Magazine’s comprehensive tutorials on DIY guides.
My Personal Tips for Crafting Perfect Mortise & Tenon Joints
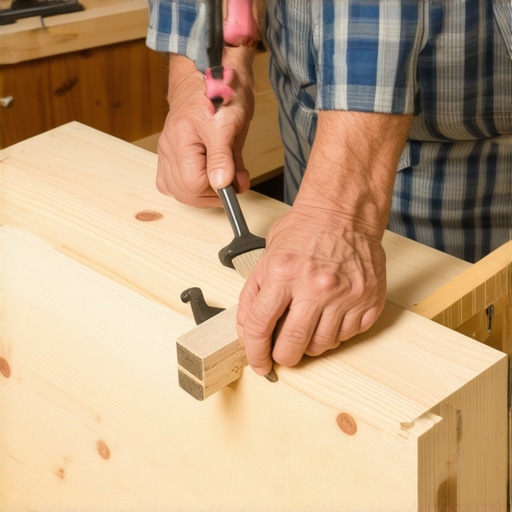
Creating these joints requires patience and precision. I recommend first practicing on scrap wood to get comfortable with the measurements and tools. A sharp chisel and a good drill are essential. I prefer to mark the mortise with a pencil, then carefully chisel out the hole, ensuring it fits snugly with the tenon. The fit should be tight but not forced, as this guarantees strength without splitting the wood. Over time, I’ve found that a good glue, like hide glue, enhances durability while allowing for future repairs.
What are the common mistakes to avoid when making Mortise & Tenon joints?
One mistake I frequently see beginners make is rushing the process, leading to loose or overly tight joints. Also, neglecting proper measurements can result in misaligned pieces. Using the right tools, such as a mortising machine or a router, can improve accuracy. For those interested in honing their skills further, I suggest exploring advanced techniques like through tenons or wedged joints, which add both strength and aesthetic appeal.
If you’re passionate about creating furniture that lasts, mastering the Master Mortise & Tenon Joints is a rewarding skill. I encourage you to try it yourself—start with simple projects and gradually challenge yourself. Sharing your experiences and tips can help build a community of skilled woodworkers. Feel free to leave a comment below or visit our Contact Us page for more advice.
Unlocking the Secrets of Expert Joinery for Durable DIY Furniture
Traditional joinery techniques like the Mortise & Tenon are the backbone of high-quality furniture craftsmanship. As an experienced DIY enthusiast, I’ve discovered that mastering these methods transforms a simple project into a lasting masterpiece. The key lies in understanding the nuances that differentiate amateur attempts from professional results, ensuring your furniture stands the test of time.
How Can Advanced Joinery Techniques Enhance Your DIY Creations?
While basic joints are suitable for casual projects, exploring advanced techniques such as through tenons or wedged joints adds both strength and aesthetic appeal. These methods distribute stress more evenly and provide a refined look, making your furniture not only functional but also visually impressive. For example, incorporating a wedged tenon can prevent joints from loosening over time, which is essential for pieces subjected to frequent use. To deepen your understanding, check out comprehensive tutorials on DIY guides.
What Are the Critical Factors in Achieving Perfect Fit and Strength?
Precision is paramount. I always recommend practicing on scrap wood to perfect your measurements and tool handling. Using sharp chisels and accurate marking techniques ensures tight-fitting joints that don’t require excessive force. Additionally, selecting the right adhesive, such as hide glue, can facilitate future repairs without damaging the wood. Attention to detail in aligning the mortise and tenon parts is crucial for both strength and aesthetics. Remember, patience and practice are your best allies in mastering these skills.
What are the common pitfalls that can compromise your joinery work?
One frequent mistake is rushing through the process, leading to misaligned or weak joints. Overly tight joints can cause splitting, while loose joints compromise stability. Neglecting proper measurements or using inappropriate tools can also diminish quality. For example, attempting to cut a mortise with a dull chisel results in uneven edges, which affects the joint’s integrity. To avoid these issues, I recommend investing in quality tools and taking the time to measure carefully. For complex projects, consider using power tools like a router or mortising machine, which can significantly improve accuracy and efficiency.
If you’re eager to take your woodworking skills to the next level, exploring innovative joinery techniques is highly recommended. Not only do these methods enhance durability, but they also add a touch of craftsmanship that elevates your work above standard DIY furniture. For inspiration, browse through creative DIY home decor ideas.
What are your experiences with traditional joinery? Do you have a favorite technique or a challenging project you want to share? Drop a comment below, or if you’re looking for more detailed guidance, visit our Contact Us page for expert advice. Enhancing your skills in joinery not only improves your projects but also deepens your appreciation for woodworking craftsmanship.
Overcoming the Nuances of Precision in Complex Joinery
As I delved deeper into advanced joinery, I realized that perfection often lies in the details. For instance, when crafting through tenons, achieving the right shoulder alignment can be surprisingly tricky. A slight miscalculation can compromise the entire aesthetic and strength of the piece. To refine my technique, I started using calipers for more accurate measurements and invested in a high-quality marking gauge. These small adjustments made a significant difference, emphasizing that mastery is often about paying attention to the subtle nuances that distinguish a good joint from a truly excellent one.
Integrating Traditional Techniques with Modern Tools for Superior Results
While traditional hand tools bring authenticity and craftsmanship to my projects, I’ve found that combining them with modern power tools enhances efficiency without sacrificing quality. For example, using a router with a mortising jig allows for cleaner, more consistent mortises, especially on larger pieces. Nevertheless, I always check the fit manually with a chisel to ensure precision. This blend of old and new techniques creates a workflow that respects the craftsmanship of the past while embracing the conveniences of today’s technology. If you’re interested in exploring this hybrid approach, you might find valuable insights in resources like advanced techniques.
How Can I Ensure Long-Term Durability in My Complex Joints?
Durability is a key concern when pushing the boundaries of joinery complexity. I’ve learned that selecting the right adhesive plays a critical role—hide glue, for instance, not only offers strong bonds but is reversible for future repairs. Additionally, applying a thin layer of glue evenly and clamping the joint with appropriate pressure for the right duration prevents gaps or weak spots. Another tip is to account for wood movement; I always allow for seasonal expansion and contraction by designing joints that can accommodate slight shifts. This foresight ensures that intricate joints remain intact over decades, transforming a project from temporary to timeless.
What are the most common pitfalls that can sabotage advanced joinery efforts?
One of the most frequent mistakes is overconfidence—assuming that complex joints can be rushed or measured imprecisely. For example, attempting to cut delicate dovetails without proper tools or misjudging tenon length can result in weak or misaligned joints. Using inadequate tools, such as dull saw blades or poorly calibrated marking gauges, can cause inaccuracies that cascade into structural issues. I’ve also found that neglecting to test fit multiple times during the process leads to surprises at the final assembly. To mitigate these risks, I recommend practicing on scrap wood extensively and taking a methodical, patient approach—qualities that are vital for sophisticated woodworking. For technical inspiration, exploring advanced metalwork techniques can also provide valuable cross-disciplinary insights.
Delving into these advanced aspects of joinery not only elevates the structural integrity of your furniture but also deepens your understanding of the craft. Every project becomes a story of patience, precision, and artistry—an ongoing journey that continuously challenges and enriches my skills. I encourage you to share your own experiences or ask questions about the nuances of complex joinery. Feel free to comment below or visit our Contact Us page for personalized advice. Remember, mastery in woodworking is as much about the journey as it is about the finished piece, and every joint tells a story of craftsmanship.
Refining Your Technique: The Art of Precision in Advanced Joinery
As I progressed into more sophisticated woodworking projects, I discovered that the devil truly is in the details. Achieving perfect alignment in complex joints like through tenons or dovetails demands an unwavering focus on precision. I invested in high-quality calipers and marking gauges, which dramatically improved my ability to measure and transfer intricate dimensions accurately. This meticulous approach not only elevates the structural integrity but also enhances the visual harmony of the finished piece, embodying true craftsmanship.
Harmonizing Tradition with Cutting-Edge Tools for Superior Results
Blending traditional hand tools with modern machinery has become a cornerstone of my workflow. For example, using a router equipped with a mortising jig allows for cleaner, more consistent mortises, especially on larger or more complex projects. Yet, I always verify the fit manually, appreciating the tactile feedback that only hand-fit joints provide. This hybrid approach respects the artistry of classic craftsmanship while leveraging technological advancements, resulting in furniture that is both durable and aesthetically refined. For insights into integrating old and new techniques, exploring advanced techniques can be invaluable.
Ensuring Long-Term Durability in Complex Joinery Amidst Wood Dynamics
Achieving longevity in sophisticated joints involves more than just precise cutting and fitting. I emphasize the importance of suitable adhesives—hide glue, for instance, offers a strong bond while remaining reversible, facilitating future repairs. Applying a thin, even layer of glue and clamping correctly ensures tight, gap-free joints. Additionally, designing joints that accommodate seasonal wood movement prevents cracking or loosening over time. By factoring in these considerations, I create furniture that not only withstands daily use but also ages gracefully, turning fleeting projects into heirlooms.
Engage with My Journey: Share Your Advanced Joinery Challenges and Triumphs
If you’re eager to elevate your woodworking skills, I invite you to reflect on your experiences with complex joints. Have you faced particular challenges or discovered innovative solutions? Sharing these insights can foster a vibrant community of passionate woodworkers. Feel free to leave a comment below or reach out through our Contact Us page. Remember, mastering advanced joinery is a journey of continuous learning and experimentation—your stories and questions enrich this collective craftsmanship.
Things I Wish I Knew Earlier (or You Might Find Surprising)
Mastering Precision Takes Patience
One of the biggest surprises was realizing how much patience and meticulousness are required for perfect joinery. Early in my projects, I often rushed measurements, which led to loose or misaligned joints. Over time, I discovered that taking the extra moment to double-check measurements and use quality tools made all the difference. This lesson transformed my approach from hurried to careful, resulting in much stronger and visually appealing furniture.
Not All Glue Is Created Equal
I used to think any wood glue would do the trick, but I found that selecting the right adhesive, like hide glue, can significantly impact the durability and repairability of your joints. It’s a game-changer—allowing for stronger bonds that are also reversible if needed for future repairs. This insight helped me create furniture that holds up over time and can be easily maintained.
Mixing Old and New Techniques Enhances Results
Combining traditional hand tools with modern power tools has been a revelation. For instance, using a router with a mortising jig speeds up the process while hand-fitting the joints adds that personal craftsmanship touch. This hybrid approach has allowed me to produce high-quality, durable pieces efficiently without sacrificing the authentic feel of traditional woodworking.
Advanced Joinery Adds Both Strength and Style
Experimenting with techniques like wedged joints or through tenons has pushed my skills further. These joints not only strengthen the furniture but also add aesthetic appeal that makes each piece unique. Learning these methods opened up new creative possibilities and made my projects stand out.
Wood Movement Is a Hidden Challenge
Understanding how wood expands and contracts with seasons was a real eye-opener. Designing joints that accommodate this movement prevents cracks and loosening over time. This knowledge has helped me ensure that my furniture remains beautiful and functional for years, turning simple projects into lasting heirlooms.
Resources I’ve Come to Trust Over Time
- Wood Magazine: Their detailed tutorials and expert tips have been invaluable for learning precise joinery techniques. I highly recommend browsing their DIY guides for comprehensive guidance.
- Fine Woodworking: This publication offers in-depth articles on advanced joinery and traditional craftsmanship, helping me deepen my understanding of classic techniques.
- The Woodworkers Guild of America: Their videos and tutorials cover a broad range of skills, from beginner to expert, making complex topics accessible and engaging.
Parting Thoughts from My Perspective
Looking back, mastering traditional joinery and understanding its nuances has been one of the most rewarding aspects of my DIY journey. It’s amazing how a simple joint, when crafted with care and precision, can elevate a piece from ordinary to extraordinary. If you’re passionate about creating furniture that lasts, I encourage you to embrace both the patience and the curiosity needed to learn these techniques. Remember, every project is a learning experience, and the skills you develop will serve you for a lifetime. If this resonated with you, I’d love to hear your thoughts—feel free to share your own experiences or questions in the comments below. Happy woodworking!”,
I really appreciate the detailed insights shared here about mastering mortise and tenon joints. As someone new to traditional woodworking, I’ve found that the initial practice on scrap wood is incredibly helpful to get a feel for the tools and the fitting process. The emphasis on patience resonates with me, especially when trying to avoid overly tight joints that can split the wood. Using hide glue sounds like a fantastic tip, especially since it allows for future repairs—something I hadn’t considered deeply before.
Has anyone experimented with different types of wood for mortise and tenon joints? I’ve heard that hardwoods can be more challenging but also more durable, while softer woods are easier to work with but may not hold up as well over time. I’d love to hear about your experiences and any recommendations for specific wood types or techniques that can enhance the strength and longevity of these joints.
This post really hit home on the importance of patience and precision when working with traditional joinery like mortise and tenon. I’ve spent quite some time experimenting with different woods, and I’ve found that a good hardwood such as oak or maple definitely offers better strength and longevity, especially for furniture meant to endure years of use. However, these woods do require sharper tools and more effort to cut cleanly, which can be a challenge for beginners. Softer woods like pine are much easier to work with and are perfect for practice or smaller projects, but they do tend to wear out faster over time or be more susceptible to damage.
In your experience, have you noticed any particular wood types performing better when combined with specific joinery techniques? I’m also curious whether any of you have experimented with exotic woods or treated woods for special projects? It seems like combining traditional joints with durable, high-quality materials really raises the bar for furniture that really lasts. Would love to hear other tips on best wood choices for enhancing both strength and aesthetic appeal in joinery projects.