My First Encounter with a Drywall Disaster
It all started when I accidentally bumped into a wall during a weekend renovation, leaving a sizable hole that seemed impossible to fix. As someone passionate about DIY projects, I was determined to repair it myself, especially since the textured surface added an extra layer of complexity. This experience ignited my interest in mastering drywall repair techniques, particularly for large holes and textured surfaces.
Understanding the Unique Challenges of Textured Walls
Textured drywall requires a different approach compared to smooth surfaces. I learned that using the right materials and techniques makes all the difference. For large holes, I discovered that a combination of durable patching compounds and meticulous sanding ensures a seamless finish. According to experts at DIYKutak, choosing the appropriate repair products is crucial for textured surfaces, preventing the repair from standing out.
Step-by-Step: My DIY Method for Large Holes
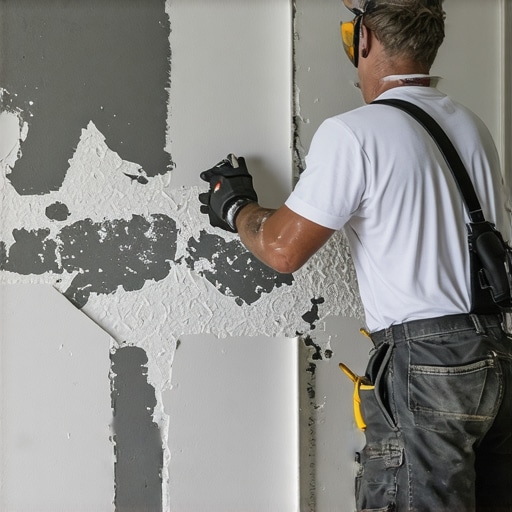
First, I cleaned the damaged area thoroughly, removing loose debris. Then, I cut a piece of drywall slightly larger than the hole, securing it with drywall screws. Using joint compound, I blended the edges, feathering the patch into the existing wall. For textured surfaces, I applied a matching texture using a sponge or spray, carefully replicating the original pattern. Patience and attention to detail helped me achieve a professional-looking repair.
Can Precision Drywall Repair Be Self-Taught?
Absolutely! With the plethora of tutorials online and quality tools available, anyone can learn to repair drywall effectively. I found that practice makes perfect, and starting with small patches boosts confidence. The key is to use the right techniques, especially for textured walls, which demand a bit more finesse. For comprehensive guides, I recommend visiting DIYKutak’s DIY Guides.
What Are the Best Tools and Materials for Precision Drywall Repair?
In my experience, a good putty knife, drywall saw, quality joint compound, and textured spray are essential. Investing in a drywall sander also helps achieve smooth, even surfaces. Personally, I prefer using pre-mixed compounds for convenience and consistency. Sharing your own tips or favorite tools in the comments can help fellow DIY enthusiasts improve their drywall repairs!
Repairing large holes in textured drywall was a challenging yet rewarding experience. It taught me the importance of patience, precision, and using the right materials. If you’re tackling similar projects, remember that detailed preparation and matching textures are key. Don’t hesitate to explore detailed tutorials or even reach out to professionals when needed. Happy repairing!
Mastering the Art of Texture Matching in Drywall Repairs
Matching the original texture is arguably the most challenging aspect of drywall repair, especially for textured surfaces like popcorn, knockdown, or swirl finishes. As a DIY enthusiast with years of experience, I found that understanding the specific texture type and practicing with similar materials greatly improves results. For instance, popcorn textures can sometimes be recreated using a spray-on technique with shared texture spray, but achieving a seamless blend requires subtle variation and patience. Consulting detailed tutorials, such as those at DIYKutak offers invaluable insights into various texture replication methods.
Choosing the Right Tools for Texture Replication
Having the proper tools is vital for a professional finish. For textured repair, a sponge, stippling brush, or even a specialized spray kit can help mimic the original pattern. When dealing with complex textures, a digital camera or smartphone can be used to capture the wall’s texture pattern, which can then be reproduced with a spray or trowel. Additionally, a flexible putty knife helps feather the joint compound into existing drywall without damaging the surrounding surface. Investing in a high-quality drywall sander accelerates the finishing process and ensures a smooth surface before texture application.
How Can I Ensure Long-Lasting and Seamless Repairs?
Preparation is key to durability. Applying a primer or bonding agent before the joint compound enhances adhesion and prevents future cracking. For textured surfaces, multiple thin layers of compound work better than one thick coat. Once the patch is dry, lightly sanding the edges helps blend the repair seamlessly. When applying texture, test on a scrap piece or hidden area first to perfect your technique. Moreover, environmental factors like humidity and temperature can affect drying time and texture adherence, so it’s wise to work in optimal conditions. For more detailed guidance, explore DIYKutak’s comprehensive tutorials.
Can Advanced DIY Techniques Elevate Your Drywall Skills?
Absolutely! Incorporating advanced techniques such as spray texture matching, custom blending, and even stenciling can elevate your drywall repair from basic to professional-grade. These methods require patience and practice but yield remarkable results. For those eager to push their skills further, participating in specialized workshops or watching expert demonstrations can be incredibly beneficial. Remember, mastering textured drywall repair not only restores your wall’s appearance but also boosts your confidence in tackling complex DIY projects.
What Are the Most Overlooked Details That Make or Break a Drywall Repair?
Attention to small details distinguishes amateur repairs from professional results. Ensuring that joint compound is thoroughly feathered, textures are accurately replicated, and surfaces are properly primed can make a significant difference. Additionally, lighting plays a role; inspecting your work under different light conditions reveals imperfections you might otherwise miss. Sharing your insights or asking experienced DIYers for feedback can help refine your technique. For further reading, check out DIYKutak, which covers detailed craftsmanship tips for home projects.
If you found these tips helpful, consider sharing your own drywall repair stories or asking questions in the comments. For more expert advice on home improvement, visit our contact page.
Unveiling the Secrets Behind Perfect Texture Replication
One of the most satisfying moments during drywall repair is achieving a flawless texture match that seamlessly blends the patch with the existing wall. From my personal experience, understanding the nuances of various textures—whether popcorn, knockdown, or swirl—can transform a good repair into a professional-looking finish. I remember spending hours experimenting with different spray patterns and blending techniques, realizing that patience and attention to detail are paramount in this craft.
The Art and Science of Texture Matching
Matching textures isn’t just about replicating a pattern; it’s about understanding the underlying materials and application methods. For example, popcorn texture is typically created with a spray-on mixture of drywall compound and Styrofoam beads, requiring a specific spray gun and technique for replication. Conversely, knockdown textures involve applying joint compound with a trowel and then lightly flattening the peaks with a drywall knife. Mastering these subtle differences can make or break the repair’s visual coherence.
Deep Dive: Advanced Spray Techniques for Texture Replication
When I first attempted spray textures, I underestimated the importance of pressure settings, nozzle size, and the consistency of the mixture. Using a compressor with adjustable pressure, I slowly fine-tuned the spray gun until I achieved a pattern that closely resembled the original. For complex textures, I often use a digital camera to capture the pattern from multiple angles, then recreate it on the wall with a spray kit. This process, while meticulous, significantly elevates the quality of the final finish. For detailed guidance on spray techniques, I recommend exploring DIYKutak’s tutorials.
Can Custom Blending Elevate Your Texture Matching Skills?
Absolutely. Creating custom blends of joint compound with added textures—such as fine sand, cornstarch, or special texturizing agents—allows you to mimic specific wall finishes more accurately. I once experimented with a mixture containing fine silica sand to replicate a gritty knockdown texture, which turned out remarkably well after a few trial runs. The key lies in gradual testing, using scrap drywall panels to perfect your mixture and spray technique before tackling the actual wall. This approach not only saves time but also boosts confidence in handling more complex projects.
The Role of Environmental Factors and Finishing Touches
Environmental conditions like humidity and temperature can influence how textures set and cure. I learned to work in controlled conditions whenever possible, especially when working with delicate textures that require precise drying times. Light sanding after the texture has dried helps to blend any minor imperfections, ensuring a seamless transition. Additionally, a light mist of water or a textured spray can be applied to subtly alter the pattern if needed. Sharing your experiences or asking for advice from seasoned professionals can provide invaluable insights—sometimes, the tiniest adjustment makes all the difference.
Elevate Your Drywall Repair Game with Continuous Learning
Advanced techniques, such as custom blending and nuanced spray application, can significantly improve your drywall repair results. They demand patience, practice, and a willingness to experiment, but the reward is a flawless finish that rivals professional craftsmanship. I encourage DIY enthusiasts to delve into online tutorials, participate in workshops, or connect with experienced tradespeople to refine their skills further. Remember, mastering these techniques not only restores your walls but also deepens your understanding of material behavior and application science. If you’re eager to explore more advanced DIY solutions, check out this resource for innovative ideas that can elevate your home projects.
Refining Your Texture Matching: The Finesse of Expert Techniques
Achieving a seamless texture match is akin to mastering a delicate art form, requiring not only technical skill but also an intuitive sense of material behavior. Over the years, I’ve experimented extensively with various spray patterns and blending methods to perfect my drywall repairs, especially for intricate textures like swirl or skip trowel finishes. One key insight I’ve gained is that the consistency of the joint compound plays a pivotal role; too thick, and it won’t spray evenly, too thin, and it may sag or drip, disrupting the pattern. According to industry specialists at DIYKutak, maintaining the right mixture and practicing on scrap drywall are essential steps toward professional results.
Utilizing Technology for Precision Texture Replication
To elevate my texture matching, I began capturing the wall’s original pattern with a high-resolution camera, analyzing the spray or application pattern in detail. This technique allows me to replicate complex textures with greater fidelity. Digital tools also enable me to experiment virtually with different spray angles and pressures before applying them to the wall, saving time and reducing material waste. Advanced spray guns with adjustable pressure settings and interchangeable nozzles grant further control, ensuring the pattern mimics the original surface precisely. Such technological integration is a game-changer for DIY enthusiasts aiming for professional-grade finishes.
Can Custom Blending and Material Additives Enhance Texture Matching?
Indeed, customizing your joint compound with specific additives can dramatically improve texture replication. For instance, incorporating fine silica sand or specialized texturizing agents can mimic gritty or stippled finishes more accurately. I’ve experimented with blending different compounds and additives, creating tailored textures that blend seamlessly with existing wall patterns. This process involves meticulous trial and error, testing on scrap pieces and adjusting the mixture until the desired consistency and appearance are achieved. Such precision not only enhances the aesthetic quality but also prolongs the durability of the repair, as highlighted by DIYKutak.
How Do Environmental Factors Impact Texture Application and Curing?
Environmental conditions, particularly humidity and temperature, significantly influence the drying and curing process of textured finishes. I learned to work in climate-controlled environments whenever possible, especially for delicate textures that require a certain drying window to set properly. Variations in humidity can cause textures to either dry too quickly or too slowly, leading to inconsistencies. Applying a light mist of water or using a specialized retardant spray can help manage drying times and prevent cracking or uneven textures. Paying attention to these subtle factors ensures that the final finish maintains its integrity and visual appeal over time.
Join the Community: Share Your Advanced Techniques
If you’ve experimented with innovative methods or developed your own tips for high-level drywall texture matching, I invite you to share your insights. Engaging with a community of skilled DIYers and professionals can open new avenues for learning and refinement. For further inspiration and advanced project ideas, explore this resource. Remember, mastery in drywall repair is an ongoing journey—every project offers an opportunity to hone your skills and push the boundaries of what’s possible in home improvement.
Things I Wish I Knew Earlier (or You Might Find Surprising)
1. The Subtle Art of Texture Replication
One unexpected revelation was how crucial it is to analyze and understand the original wall texture before attempting a repair. I once rushed into applying a spray texture without studying the pattern, only to find the patch glaringly obvious. Spending time observing and even photographing the texture can save you hours of frustration later.
2. The Power of Small Details
It’s the tiny tweaks—like adjusting spray pressure or blending technique—that make a huge difference. I learned that matching the original surface’s depth and pattern takes patience and a keen eye, especially for complex finishes like swirl or knockdown textures.
3. Environment Matters
Working in ideal conditions—low humidity and moderate temperatures—can significantly influence how textures set and cure. I once tried to texture during a humid summer day, and the results were less than perfect, reminding me to choose the right timing for these delicate steps.
4. Practice on Scraps
Practicing your texture techniques on scrap drywall or hidden areas is invaluable. It allows you to perfect your spray pattern and texture consistency without risking your main wall, boosting confidence and ensuring better results.
5. Patience is a Virtue
Rushing through texture matching often leads to noticeable mismatches. Taking your time, applying multiple thin layers, and allowing proper drying results in a seamless blend that will stand the test of time.
6. Use the Right Tools
From textured spray kits to sponges and stippling brushes, having the appropriate tools simplifies the process immensely. Investing in quality equipment can elevate your DIY drywall repair game to professional levels.
Resources I’ve Come to Trust Over Time
- DIYKutak: Their comprehensive tutorials on drywall repair and texture matching have been my go-to resource for detailed techniques and product recommendations. The site’s practical advice makes complex tasks approachable for DIYers.
- Home Depot’s DIY Guides: Offering step-by-step instructions and tool reviews, their guides helped me understand the importance of proper prep and finishing touches, especially for textured surfaces.
- YouTube Channels like DIY Creators: Visual demonstrations of texture techniques provided clarity that written instructions sometimes lack, building my confidence in executing complex textures.
Parting Thoughts from My Perspective
Mastering drywall texture matching is a skill that combines patience, observation, and practice. The process taught me that even small details matter and that the right tools and environment can make or break a project. For anyone tackling textured drywall repairs, I recommend starting with small patches, practicing on scrap, and gradually building your confidence. Remember, every wall is a new opportunity to learn and improve. If this resonated with you, I’d love to hear your own experiences or tips—sharing knowledge makes all of us better DIY enthusiasts. Feel free to drop your comments or questions below, and happy repairing!