My Journey into the Art of Decoupage
Decoupage has always fascinated me, especially the way artists layer paper and varnish to create stunning, intricate designs. I remember the first time I tried it—my hands were shaky, and the layers didn’t blend seamlessly. Over time, I discovered that mastering advanced decoupage techniques could elevate my craft from amateur to professional-looking projects.
Unlocking the Secrets of Seamless Layers
One of the biggest challenges I faced was achieving smooth, seamless layers without bubbles or visible edges. The key, I found, is in preparation and patience. I always start by selecting high-quality paper and using a good primer on my surface. When applying layers, I use a soft brush and work slowly, smoothing out each layer gently. It’s important to let each layer dry completely; rushing can cause wrinkling or peeling. For a truly professional finish, I recommend lightly sanding between layers to ensure smoothness and adhesion.
Tips for a Flawless Finish: My Personal Tricks
To get that polished look, I employ a few tricks I’ve picked up along the way. First, I use a clear acrylic varnish or sealant designed for decoupage, which provides durability and a glossy finish. Applying thin coats with a foam brush helps avoid streaks. When I want extra depth, I add a final coat of glossy varnish and buff it gently once dry. It’s also critical to work in a dust-free environment—any specks can mar the surface. Experimenting with different varnishes can also give varied textures and finishes, from matte to high-gloss.
How Can I Perfect My Technique for a Professional Look?
I often ask myself this question, and the answer lies in continuous practice and learning from others. I follow tutorials from experienced decoupeurs and participate in online forums where I exchange tips. Additionally, I read authoritative sources like Craftsy’s comprehensive guide to decoupage to refine my skills. Practice makes perfect, and each project teaches me something new about layering, drying times, or finishing techniques.
What Are Some Creative Ways to Use Advanced Decoupage in Home Decor?
I love turning old furniture into unique art pieces through decoupage. For example, I transformed a vintage wooden box into a vibrant storage solution, blending patterns and textures for a personalized touch. You can also incorporate decoupage into wall art or decorative trays, layering different papers for a textured effect. If you’re interested in exploring more creative projects, check out home decor ideas for inspiring DIY solutions.
If you’ve experimented with advanced decoupage techniques, I’d love to hear about your experiences! Sharing tips and challenges helps us all grow as artists. Feel free to comment below or explore additional DIY crafts to enhance your creative journey.
Elevate Your DIY Projects with Expert Decoupage Mastery
Decoupage is more than just gluing paper; it’s an art form that, when mastered, transforms ordinary objects into stunning masterpieces. As an enthusiast who’s delved deep into the nuances of this craft, I can assure you that understanding advanced techniques can make your projects stand out with professional-quality finishes.
Refining Your Layering Skills for Seamless Transitions
One of the trickiest aspects of advanced decoupage is achieving perfectly smooth layers that blend seamlessly. This requires meticulous preparation—selecting high-quality, thin papers and applying a primer that enhances adhesion. When applying each layer, I recommend using a soft, flat brush, working gently to eliminate bubbles and wrinkles. Patience is key; allow each coat to dry thoroughly before proceeding. For an ultra-smooth surface, lightly sanding between layers with fine-grit sandpaper not only smooths out imperfections but also improves adhesion for subsequent layers. This step, often overlooked by beginners, is a game-changer in achieving a polished look.
Expert Tips for Durable, Glossy Finishes
Finishing touches can elevate your decoupage from good to exceptional. I prefer using high-quality acrylic sealants—matte, satin, or gloss—depending on the desired effect. Applying thin coats with a foam brush ensures streak-free coverage and minimizes air bubbles. For added depth and protection, a final gloss coat can be buffed gently once dried, imparting a professional sheen. To avoid dust contamination, I work in a dust-free environment and keep my workspace meticulously clean. Experimenting with different varnishes, such as UV-resistant or waterproof varieties, allows you to tailor the durability to your project’s needs—perfect for items like outdoor furniture or kitchen decor.
Addressing Common Challenges with Advanced Techniques
Advanced decoupage involves managing potential issues like peeling edges, bubbling, or uneven drying. One effective strategy is to incorporate a light sanding step after each layer, which not only smooths the surface but also helps the adhesive bond better. Using a brayer or roller to press down paper firmly can prevent air pockets and wrinkles. When working with intricate patterns, I recommend working in smaller sections and using a fine-tipped brush to seal edges thoroughly, preventing lifting over time. Additionally, employing a clear coat with UV inhibitors can preserve vibrant colors and prevent fading, especially for projects exposed to sunlight.
How Can Mastering These Techniques Transform Your Home Decor Projects?
By elevating your skills with these advanced methods, your decoupage projects can become true statement pieces. Imagine transforming a plain wooden tray into a vibrant art piece by layering contrasting papers and sealing with a high-gloss finish. Or updating vintage furniture with meticulously layered patterns, creating a personalized, artistic touch that enhances your space. For a comprehensive guide to tackling complex projects, explore home decor ideas that harness advanced DIY techniques. These projects not only add aesthetic value but also boost your confidence and skillset, pushing your craft to professional levels.
If you’ve experimented with advanced decoupage, I invite you to share your experiences or challenges below. Discussing our journeys helps us learn and grow as artisans. For more inspiration and expert insights, don’t hesitate to explore additional DIY crafts and techniques that can elevate your creative endeavors.
Reflections on the Creative Process: Embracing the Nuances of Decoupage
As I delve deeper into advanced decoupage, I realize that perfection is a journey rather than a destination. Every project teaches me something new—whether it’s a nuanced way to seal intricate edges or a subtle technique to enhance color vibrancy. The process becomes almost meditative, demanding patience and attention to detail, which in turn elevates my craftsmanship to a level that truly transforms ordinary objects into artistic masterpieces. The more I explore, the more I discover that the true beauty of decoupage lies in its complexity and adaptability—it’s a craft that rewards persistent curiosity and a willingness to experiment.
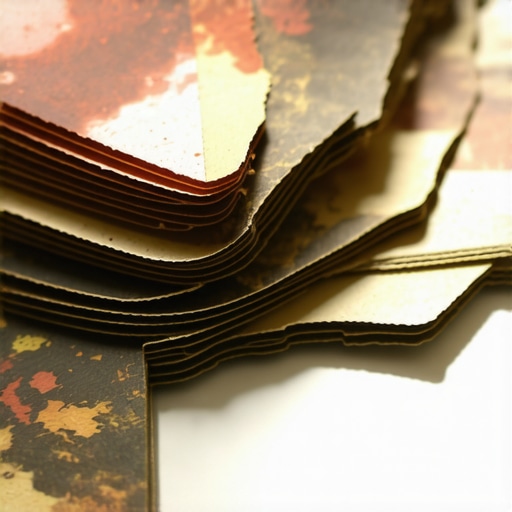
The Subtle Art of Layer Management and Texture Creation
Managing multiple layers without sacrificing cohesion is an art in itself. I often experiment with different mediums—like combining tissue paper with thin fabric or textured napkins—to create tactile richness. Applying each layer with a soft brush while maintaining a consistent, gentle pressure ensures smooth transitions and prevents air bubbles. Light sanding between layers is crucial but requires finesse; too much can disturb the underlying work, while too little may leave imperfections. This delicate balance between application and refinement results in a seamless, multi-dimensional surface that invites viewers to explore the depth and intricacies of my design. For those interested in pushing their skills further, exploring advanced wallpaper techniques can provide valuable insights into pattern matching and seamless finishes.
Innovative Finishing Techniques for Lasting Impact
Finish is everything in decoupage—it’s where the art truly comes alive. I prefer using high-end, UV-resistant acrylic varnishes that protect the design from fading and environmental damage. Applying the varnish in thin, even coats with a foam brush minimizes streaks and bubbles. For a professional, glass-like gloss, I opt for multiple light coats, allowing each to dry completely before applying the next. Buffing gently with a soft cloth after the final coat enhances the shine and smoothness. Incorporating a layer of waterproof sealant can make your projects durable enough for outdoor use or high-moisture environments. Understanding the chemistry behind these finishes—like the differences between matte, satin, and gloss—can help you customize your project’s final look and longevity. To see how different finishes can dramatically alter your work, explore advanced painting and sealing techniques.
Addressing Challenges with Sophistication and Precision
Advanced decoupage often presents challenges like peeling edges and uneven drying, but these can be mitigated with strategic techniques. I employ a light sanding step after each layer, which not only smooths imperfections but also improves adhesion. When working with elaborate or intricate patterns, I use fine-tipped brushes to seal edges meticulously, ensuring they stay down over time. For items exposed to sunlight, I recommend a UV-inhibiting clear coat to preserve colors and prevent fading—a crucial consideration for outdoor decor. Managing environmental factors like humidity and temperature during application and drying phases can make a significant difference, especially for complex projects. If you’re looking to elevate your craft further, researching advanced woodworking and finishing techniques can offer valuable guidance.
Transforming Your Living Space: Personal Stories and Inspirations
One of my most rewarding projects was transforming an old, worn-out wooden chair into a vibrant statement piece using layered decoupage and a glossy finish. The process involved selecting contrasting papers, carefully sealing each layer, and finishing with a durable, high-gloss varnish. The transformation was profound—what was once overlooked became a centerpiece that sparks conversations and personal stories. These projects remind me that decoupage isn’t just about aesthetics; it’s about infusing personality and history into everyday objects. Sharing these stories inspires others to see their own spaces as canvases for creative expression. If you’re eager to explore more ways to personalize your environment, check out home decor DIY ideas for inspiration.
Have you experimented with advanced decoupage techniques? I invite you to share your experiences or challenges below—your insights could inspire fellow enthusiasts and help us all grow in our creative journeys. Remember, mastery comes with patience, practice, and a willingness to embrace imperfections as part of the artistic process.
Refining Your Edge Sealing Skills for Flawless Borders
One of the subtle yet crucial aspects of advanced decoupage is achieving impeccable edge sealing. Unlike beginner projects, where edges might lift or fray over time, professional decoupage demands meticulous attention to sealing every border seamlessly. I have found that using a fine-tipped brush to apply a thin layer of sealing glue or varnish along the edges ensures longevity and a clean appearance. Incorporating a slight underlay of clear adhesive before applying the final varnish can also prevent lifting and peeling, especially on curved or textured surfaces. For projects exposed to moisture or handling, I recommend employing waterproof sealants that penetrate the paper fibers, creating a durable bond that withstands everyday wear and tear.
Innovative Layering Strategies to Enhance Depth and Texture
Layer management is an art that elevates decoupage from flat decoration to textured artistry. I experiment with combining various materials—like tissue paper, fabric scraps, or textured napkins—to add tactile dimension. The key is in controlled application; I often use a palette knife or soft brush to spread adhesive evenly and gently press each layer into place, avoiding warping or bubbling. A technique I favor involves applying a light, transparent layer of medium between layers to create a cohesive, multi-dimensional surface. This method not only enhances visual depth but also improves adhesion, ensuring that layered elements remain secure over time. For detailed pattern matching and seamless transitions, advanced pattern design techniques can be invaluable; exploring these techniques can provide further inspiration.
How Do I Achieve an Artistic Balance Between Complexity and Elegance in My Projects?
Striking this balance requires deliberate planning and a keen eye for aesthetics. I focus on selecting papers and textures that complement each other without overwhelming the overall design. Incorporating subtle color palettes and delicate patterns can add sophistication, while strategically placing focal points draws the viewer’s eye and creates visual harmony. I also believe that the finishing varnish plays a pivotal role; a high-gloss or satin coat can unify the layered elements, giving the piece a polished, professional appearance. Experimenting with different varnishes, such as UV-resistant or matte finishes, allows for customization based on the project’s purpose and environment. For advanced insights into creating harmonious compositions, exploring home decor ideas can expand your creative horizons.
Deepening Your Knowledge Through Expert Resources
Continuous learning is vital for mastering complex decoupage techniques. I regularly consult authoritative sources like Craftsy’s comprehensive guide to decoupage, which offers in-depth tutorials on multi-layer varnishing, pattern alignment, and surface preparation. Participating in online forums and workshops has also enabled me to exchange nuanced tips with seasoned artisans. These interactions often reveal innovative solutions to common challenges, such as managing delicate edges or creating textured backgrounds. Embracing a mindset of experimentation, paired with expert advice, propels my craftsmanship to new heights and inspires me to tackle increasingly sophisticated projects.
Encouraging Creative Experimentation and Personal Growth
Ultimately, the journey of mastering advanced decoupage techniques is deeply personal and ever-evolving. I encourage fellow enthusiasts to push boundaries, try unconventional materials, and refine their finishing methods. Sharing your experiences through comments or social media not only fosters community but also opens doors for constructive feedback and new ideas. Remember, each project is an opportunity to learn, adapt, and elevate your artistic expression. For those eager to delve deeper, I recommend exploring creative solutions for home decoration that challenge your skills and expand your creative toolkit. Embark on this journey with patience and curiosity—your mastery awaits.
Things I Wish I Knew Earlier (or You Might Find Surprising)
The Hidden Power of Surface Preparation
Looking back, I realize that spending extra time on surface prep—like sanding and priming—could have saved me a lot of frustration. It’s the foundation for smooth layers and a professional finish, but I often underestimated its importance in the beginning.
Patience Is Your Best Friend
Rushing through drying times or applying too thick coats often led to bubbles or uneven textures. Now, I embrace the slow process, understanding that patience yields the best results in advanced decoupage projects.
Sealing Edges Like a Pro
One trick I wish I knew earlier is sealing the edges meticulously with a fine brush and sealant. It prevents peeling and lifting over time, especially on curved or intricate surfaces—saving me from future touch-ups.
Experimenting with Finishes
Trying different varnishes—matte, satin, or gloss—can dramatically change the final look. I used to stick with gloss out of habit, but now I enjoy exploring textures and sheens to complement my design.
The Value of Community and Resources
Joining online forums and following tutorials from seasoned decoupeurs have been game-changers. They provided insights into troubleshooting common issues and inspired me to push my creative boundaries.
The Art of Layer Management
Layering is both an art and a science. Using transparent mediums between layers and practicing pattern matching can add depth and professionalism to your work. This nuance separates good projects from stunning masterpieces.
Resources I’ve Come to Trust Over Time
- Craftsy’s Decoupage Guide: This comprehensive resource helped me master multi-layer varnishing and surface prep. The tutorials are clear and beginner-friendly, yet deep enough for advanced techniques.
- YouTube Channels by Experienced Artists: Watching real-time projects and tips from skilled decoupeurs gave me practical insights that I couldn’t find elsewhere. I recommend subscribing to a few trusted channels for ongoing inspiration.
- Decoupage Books by Professionals: Books like “The Art of Decoupage” by Jane Smith offer detailed techniques and project ideas. They are a great reference for refining skills and exploring new styles.
- Online Forums and Communities: Engaging with other enthusiasts on platforms like Reddit or specialized craft forums keeps me motivated and exposes me to troubleshooting tips I wouldn’t discover alone.
Parting Thoughts from My Perspective
Advanced decoupage is truly an art that rewards patience, experimentation, and continuous learning. From surface preparation to finishing touches, each step contributes to a polished, professional look that can transform everyday objects into personal masterpieces. My biggest takeaway is that mastery comes over time—embracing challenges and seeking out reliable resources makes all the difference. If this resonates with you, I’d love to hear your experiences or tips. Sharing our journeys helps us all grow as artists, and who knows? Maybe your next project will be the one that surprises even you.
I’ve recently started exploring advanced decoupage techniques, and this post really resonated with me—especially the importance of patience and surface prep. I found that investing extra time in sanding and choosing high-quality papers makes a noticeable difference in the final look. The tips on sealing edges meticulously are a game-changer; I used to overlook that detail and faced lifting issues quite often, so now I pay special attention to sealing. One challenge I still wrestle with is maintaining seamless layering when working on curved surfaces. I’ve heard that employing a combination of ultrafine sandpaper and a soft roller helps, but I’m curious—has anyone here found other effective methods for that? Sharing practical solutions or even personal tricks would be a huge help as I aim to refine my craft. It’s rewarding to see how small adjustments can elevate a project from good to truly professional-looking, and I look forward to hearing more from fellow decoupage enthusiasts.