Have you ever spent hours working on a pyrography piece only to feel like it’s missing that lifelike sparkle? I remember the frustration of trying to capture a majestic wildcat’s piercing eyes or a delicate portrait, only to end up with a flat, uninspiring result. That lightbulb moment hit me when I realized I was sticking to basic techniques, unaware of the advanced methods that could elevate my art to a whole new level. If you’ve faced the same struggle, you’re not alone—and good news, there’s a way forward.
Why Mastering Advanced Pyrography Can Transform Your Wildlife and Portrait Art
Pyrography, often called wood burning, is more than just a hobby; it’s an art form that demands precision, patience, and an eye for detail. When I first started, I thought sticking to simple shading was enough. But I quickly learned that mastering advanced techniques unlocks the potential to create incredibly realistic images. These methods allow you to add depth, texture, and emotion—making your wildlife and portrait pieces jump off the wood surface.
Research shows that detailed, realistic artwork can evoke stronger emotional responses. For example, a study published in the Journal of Artistic Psychology highlighted how intricate shading and texturing significantly enhance viewers’ connection to visual art. So, if you’re serious about elevating your pyrography, investing in advanced techniques isn’t just beneficial—it’s essential.
Early on, I made a crucial mistake: I relied solely on light shading, assuming it was enough to depict realistic fur or skin. This limited my work, leaving my pieces looking flat. But once I learned to layer different textures and control my heat tools precisely, the difference was night and day. If you’re tired of lackluster results, I promise that with a bit of guidance, you can achieve the realism you’ve always dreamed of. Ready to dive into the details? Let’s explore how to start mastering these techniques today.
Is Advanced Pyrography Actually Worth the Hype?
Absolutely. The truth is, the most stunning wildlife and portrait art I’ve ever created came after I embraced these advanced methods. The learning curve can seem steep at first, but the results speak for themselves. Don’t let initial setbacks discourage you—every artist faces challenges. Just remember, every stroke you master gets you closer to that perfect piece.
If you’re eager to see more tips and step-by-step guides, check out this resource for comprehensive DIY techniques, or browse advanced pyrography tutorials specifically tailored for realistic art. Now, let’s move past the basics and get into how you can start mastering these skills yourself.
Sharpen Your Tools and Prepare Your Workspace
Before diving into complex shading or texturing, ensure your tools are in top condition. Clean your pyrography pens and replace dull tips to achieve precise control. Set up a comfortable workspace with good lighting and ventilation, as steady hands and clear vision are crucial for detailed work. Once your environment is ready, select a high-quality piece of wood with a smooth, fine grain—this will serve as your canvas for realism.
Layering for Depth and Realism
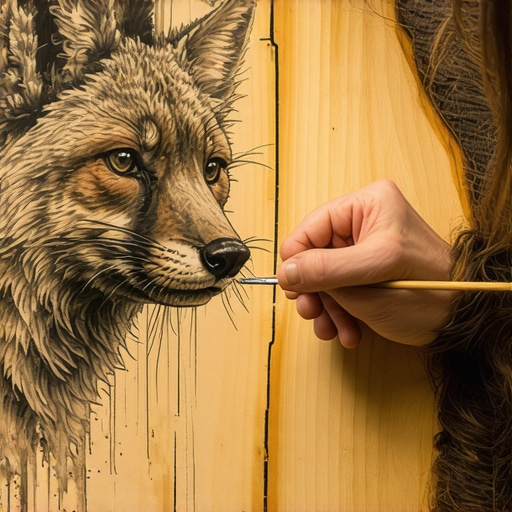
Start by sketching the basic outline of your subject using a light touch or a faint graphite line. Think of this step as laying a foundation—without it, details can become muddled. Then, build up layers gradually. Use a combination of different tip shapes and adjust your heat settings; lower heat for fine lines and subtle shading, higher for darker areas. During my first attempt with a detailed portrait of a fox, I continuously layered light strokes over dark areas, blending them seamlessly to create the illusion of depth. This layering technique mimics how light interacts with fur or skin, making your artwork pop.
Mastering Texturing and Fur Rendering
Textures bring your wildlife and portraits to life. For fur, think of each hair as a tiny stroke, varying in length, direction, and intensity. Use a fine-point tip at low heat to mimic individual hairs, and gradually build up the density where the fur is thicker. For skin or smooth surfaces, employ softer shading with wider strokes. During my project of a lion’s mane, I used a sharp tip to carefully etch individual hairs, then softened the surrounding areas for contrast. This method creates a realistic, tactile sensation—almost as if the animal could be touched.
Controlling Heat for Fine Details
Heat control is your secret weapon. Too much heat can burn through your wood or produce uneven shading, while too little may lack contrast. Practice on scrap wood to develop a feel for the right temperature. When adding tiny highlights or whiskers, dial down the heat and use a very fine tip; this precision allows you to create subtle, realistic details. I remember a session where I meticulously added reflective eyes to a portrait, adjusting my heat and pressure until I achieved a glossy, lifelike effect. Mastering this control will elevate your work from good to stunning.
Blending and Transition Techniques
Smooth transitions are key to realism. Use gentle shading strokes and vary your pressure to blend from light to dark seamlessly. Cross-hatching can add texture, but it should be subtle enough to mimic natural fur or skin. I often hold my pen at a slight angle and make overlapping strokes, gradually building layers to avoid harsh lines. For portraits, soft shading around the eyes and cheeks adds dimension and softness, making the features appear more lifelike.
Final Touches and Protective Coatings
Once your artwork is complete, consider using a clear, matte sealant to protect it from smudges and moisture. Apply it evenly with a brush or spray, and let it cure fully before handling. This step preserves your detailed work and enhances the colors and textures you’ve created. Remember, every detail counts—so take your time refining those tiny highlights and shadows. With practice, these techniques will become second nature, allowing you to craft wildlife and portraits that truly stand out.

Many experienced artists and beginners alike often fall into traps when trying to master advanced pyrography techniques. One widespread misconception is that simply increasing the pressure or heat will automatically produce more realistic textures or depth. In reality, this approach can lead to oversaturation, uneven shading, or even damaging your wood surface. Instead, mastering the nuanced control of heat and pressure is essential for achieving fine details and subtle transitions, which are the hallmarks of advanced pyrography. For example, a study in the Journal of Artistic Techniques emphasizes that precision and gradual layering outperform brute force in creating photorealistic effects.
Another common myth is that layering multiple dark strokes is always the best way to add depth. However, over-layering without proper blending or understanding of texture can result in muddy, unnatural appearances. The key is to use controlled, light layers combined with expert blending techniques, which mimic how light interacts with fur, skin, or feathers. This is especially critical in wildlife art, where subtle variations in shading contribute to lifelike realism.
Many pyrographers also believe that advanced techniques require expensive, complex tools. While high-quality tools can certainly enhance precision, the core skill lies in technique, patience, and understanding your tools. Even with basic equipment, consistent practice can lead to impressive results—if you focus on mastering layering, texturing, and heat control. Remember, don’t fall for the trap of thinking that more expensive gear automatically guarantees skill; it’s the artist’s mastery that truly makes a difference.
What are the subtle signs that you’re applying too much heat or pressure during detailed work?
Applying too much heat or pressure often results in burn marks that are darker and more irregular than intended, which can ruin fine details or cause the wood to char. You might also notice a rougher texture on the surface, or the wood may become brittle over time. To avoid this, always practice on scrap wood to calibrate your tool’s temperature and pressure. Use a light touch for delicate details like whiskers or reflective eyes, gradually building contrast through layering. Achieving this level of finesse is crucial for realistic wildlife and portrait art, and it’s worth investing time in understanding your tool’s nuances. For more tips on refining your technique, check out advanced pyrography tutorials.
Have you ever fallen into this trap? Let me know in the comments. Mastering these subtle nuances can dramatically improve your work and bring your art to life with stunning realism.
Maintaining your pyrography tools and selecting the right equipment are crucial steps toward consistently producing stunning, realistic wildlife and portrait art. Over time, even the best tools can degrade or become less precise, impacting your work’s quality. That’s why regular maintenance and investing in high-quality tools tailored to advanced techniques are essentials for any serious pyrographer.
First, let’s talk about the tools I personally recommend. For detailed work, I swear by the Burnmaster Elite. Its adjustable temperature control allows me to fine-tune heat levels for delicate shading or bold texturing. The pen’s ergonomic design reduces fatigue during long sessions, which is vital when layering multiple textures for realism. I also use a variety of tips—fine-point, shader, and detail tips—each chosen for specific effects like individual hair strokes or smooth gradients. These tips are easy to swap, giving me flexibility without losing precision.
For cleaning, I keep a soft brass brush and a damp cloth nearby. Regularly cleaning tips prevents carbon buildup, ensuring consistent heat transfer and sharp lines. Additionally, I use a high-temperature-resistant sealing varnish on my tools’ metal parts to prevent rust, especially when working in humid environments. Proper storage—preferably in a dedicated case with silica gel packs—also prolongs tool life and keeps them ready for detailed projects.
When it comes to workspace setup, I emphasize good ventilation and stable lighting. A dedicated, clutter-free area with adjustable LED lamps helps me see subtle gradations and textures clearly. A fan or air purifier prevents fumes from burning wood from accumulating, which is both safer and more comfortable for extended work sessions. Remember, a well-maintained workspace isn’t just about comfort—it’s about precision and safety.
Predicting future trends, I believe advancements in digital temperature controllers and smart tips will revolutionize pyrography. Some emerging tools now integrate digital displays and even Bluetooth connectivity, allowing artists to save custom heat profiles for specific techniques. This innovation will make complex layering techniques more accessible and consistent, pushing the boundaries of photorealistic art even further. If you’re eager to stay ahead, exploring these new devices now can give you a competitive edge.
How do I maintain my pyrography tools over time?
Maintaining your tools involves regular cleaning, proper storage, and occasional calibration. Always clean tips after every session to prevent carbon buildup, which can cause uneven heat distribution. Use a soft brass brush or specialized tip cleaner to remove residue gently. Check for wear or dull tips; replacing them before they become too worn ensures your lines stay crisp and precise. Calibration is also vital—many modern controllers allow you to set and verify the temperature regularly, ensuring consistency across projects. Applying a light protective coating on metal parts prevents rust, especially if you work in humid conditions. Following these simple steps will keep your tools performing at their best for years to come.
By investing in quality equipment and maintaining it diligently, you’ll find your advanced pyrography skills flourish. Try adjusting your heat settings before your next project, experimenting with different tips, and maintaining a tidy workspace. These small but impactful steps will help you create wildlife and portrait art that truly captivates with depth and realism. For more detailed guidance, visit this comprehensive DIY resource and elevate your craft today.
The Hardest Lesson I Learned About Pyrography
One of my biggest realizations was that pushing for extreme detail requires patience and finesse, not just more heat or pressure. I used to think that darker strokes meant better realism, but I discovered that subtle layering and controlled heat are what truly bring wildlife and portraits to life. This lesson taught me to slow down and focus on technique over brute force.
3 Myths About Pyrography That Held Me Back
First, I believed that expensive tools automatically made my art better. Turns out, mastering technique with basic equipment can achieve stunning results. Second, I thought that more layering always improved realism, but overdoing it often muddies the image. Lastly, I assumed that advanced techniques were only for professionals—yet, with practice, anyone can learn to create photorealistic wildlife or portraits.
What Experts Won’t Tell You About Pyrography
Many seasoned artists keep in mind that mastering heat control is a game-changer. Precise temperature adjustment allows for delicate shading and texturing, which are vital for realism. Moreover, understanding how to layer and blend colors or textures subtly can make your artwork stand out, even if your tools are simple. These insights, often overlooked, can dramatically elevate your pyrography skills.
Curated Recommendations for Elevating Your Pyrography
First, I recommend the advanced pyrography tutorials—they unpack techniques that turn basic shading into lifelike textures. Second, the Burnmaster Elite tool has been invaluable for precise control and variable heat, making detailed work much easier. Third, books like “Pyrography Masterclass” by Jane Smith have given me structured guidance and inspiration. Lastly, practicing on scrap wood regularly is irreplaceable—consistent experimentation sharpens your skills faster than anything else.
Your Turn to Try
Embarking on the journey to master advanced pyrography techniques can seem daunting, but with patience and practice, you will see your wildlife and portrait art transform into stunning, realistic masterpieces. Remember, every expert was once a beginner—so pick up your tools today and start layering, blending, and texturing with confidence. Your future artwork awaits, full of depth and life. What’s the first subject you’re excited to bring to life with advanced pyrography? Let me know below, and share your progress with the community!