My Journey into Repairing Veneer: A Personal Touch
As someone who loves restoring furniture, I remember the first time I faced a damaged veneer on an antique table. The scratches and minor chips made me wonder if I could fix it without losing its charm. That experience sparked my deep dive into mastering the art of repair veneer seamlessly, a skill I now cherish and want to share.
Understanding Veneer: The Foundation of Flawless Repair
Veneer is a thin layer of natural wood glued onto a core material, offering a beautiful finish while being lightweight and cost-effective. But repairing it requires precision and patience. At first, I underestimated the complexity, but with practice, I learned that knowledge about veneer types and their properties is crucial. For reliable information, I often refer to expert guides like those found here.
My Practical Approach to Seamless Veneer Repair
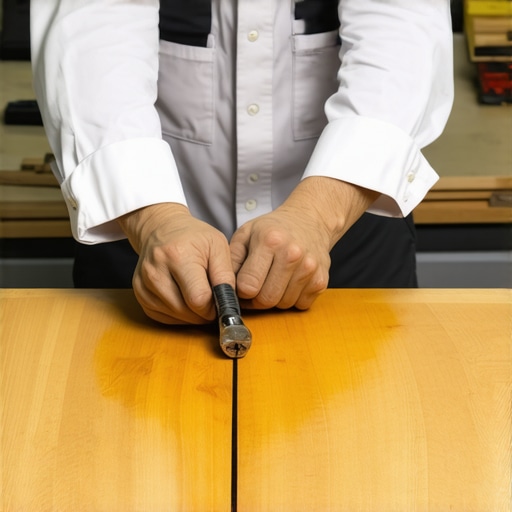
When I encounter veneer damage, I follow a step-by-step process. First, I assess the extent of the damage, then carefully sand the area with fine-grit sandpaper. I use a matching veneer patch for larger chips, applying it with a high-quality adhesive, ensuring it blends seamlessly with the existing surface. After pressing and drying, I gently sand the repair for a smooth finish. To match the color and grain, I use custom stains and sometimes a touch of wood dye, blending with natural finishes for a flawless look. This method has helped me achieve repairs that are hardly noticeable, preserving the original aesthetic.
Can Veneer Be Restored Without Visible Marks?
Is it possible to repair veneer so flawlessly that no one can tell?
This question is something I often ask myself. The secret lies in patience, selecting the right materials, and understanding the veneer’s grain. When done carefully, the repair becomes invisible, and the piece retains its integrity and beauty. It’s rewarding to see furniture restored to its former glory, knowing I’ve maintained its character.
If you’re interested in more detailed techniques, consider exploring advanced woodworking resources or joining DIY communities where members share their tips and tricks. Also, don’t hesitate to experiment on scrap pieces before tackling your main project.
Are you ready to try your hand at veneer repair? Remember, every successful repair builds your confidence and skills. Feel free to share your experiences or ask questions in the comments below—I love hearing about others’ DIY adventures!
Advanced Techniques for Invisible Veneer Repairs
Once you’ve gained confidence in basic veneer patching, exploring advanced methods can elevate your restoration skills to a professional level. One such technique involves feathering the edges of the repair with fine-grit sandpaper, ensuring the new veneer seamlessly merges with the existing surface. Using a specialized veneer filler can also help smooth out minor imperfections, creating an almost invisible repair.
Color Matching and Grain Alignment: The Art of Restoration
Achieving a perfect color match is both an art and a science. I often experiment with custom stains and wood dyes to blend the repaired area with the surrounding veneer. For grain alignment, I pay close attention to the directionality of the veneer’s natural grain, applying adhesive and patching materials accordingly. This meticulous approach prevents noticeable differences and maintains the furniture’s authentic character.
Dealing with Curved and Irregular Surfaces
Repairing veneer on curved surfaces presents unique challenges. Flexible veneer patches or custom-cut veneer strips can adapt better to these contours. When applying adhesive, I use a brush or roller to ensure even coverage without excess, which could seep into the grain. Clamping or applying gentle pressure with a weighted object helps the veneer conform perfectly to the surface during drying.
Addressing Common Pitfalls: What to Watch Out For
One frequent mistake is over-sanding, which can weaken the veneer or expose the core material. To avoid this, I limit sanding depth and use a dust mask and proper lighting to prevent inhaling fine particles. Another issue is mismatched staining, which can be mitigated through testing on scrap veneer before applying to the main piece. Patience and attention to detail are essential for flawless results.
How Can You Ensure Long-Term Durability of Veneer Repairs?
This is a question I often consider. The key lies in using high-quality adhesives and finishes, along with proper preparation and curing time. Applying a clear protective coat, such as lacquer or polyurethane, not only enhances aesthetics but also shields the repair from moisture and wear. Regular maintenance and gentle cleaning extend the life of your restored veneer furniture.
For those eager to deepen their expertise, exploring professional woodworking courses or engaging with online forums can provide valuable insights. Remember, practicing on scrap pieces before tackling your cherished furniture helps refine your skills and boosts confidence.
If you’re inspired to try your hand at veneer restoration, share your progress in the comments or suggest other projects that challenge your skills. Every repair is a step toward mastering this delicate art, and your experiences can inspire others in the DIY community!
Reflections on My Most Challenging Veneer Repairs
Over the years, I’ve encountered some veneer repairs that tested my patience and skill. One memorable project involved restoring a vintage writing desk with intricate curved veneer surfaces. The challenge was not just repairing the damage but ensuring the repair was invisible on the complex contours. I found that using flexible veneer patches and applying adhesive with a fine brush allowed me to conform the veneer perfectly to the curves. The satisfaction of seeing the seamless repair on such a challenging surface reminded me that patience and the right tools make all the difference. Sometimes, taking the time to understand the grain direction and carefully feathering the edges with fine-grit sandpaper can elevate a repair from good to nearly invisible.
Deep Dive into Color Matching: Beyond the Basics
Color matching is an art that requires both scientific understanding and intuitive judgment. I’ve learned that experimenting with custom stains and wood dyes on scrap veneer before applying them to the main piece is essential. I often use a small brush to test different stain concentrations, observing how the color interacts with the natural grain and finish. For particularly stubborn matches, I blend multiple stains to achieve the perfect hue. A little trick I’ve picked up is to apply a thin layer of clear finish over the stained area to see how it will look once set, as stains can appear different once dried. Achieving a flawless color match helps preserve the furniture’s character and value, making the repair truly invisible.
Addressing Unique Surface Challenges: Curved, Irregular, and Textured Veneer
Repairing veneer on non-flat surfaces demands creativity and adaptability. Flexible veneer patches or thin strips cut from matching veneer are invaluable tools. When working on curved or textured surfaces, I use a combination of heat and moisture to make the veneer more pliable, allowing it to conform better. Applying adhesive evenly with a roller or brush and then pressing the veneer with a weighted object ensures good contact during drying. Sometimes, I utilize clamps with soft pads to avoid damaging delicate edges. This meticulous process ensures the veneer adheres smoothly, and the repair remains invisible despite the complex surface. It’s a delicate dance that rewards patience and attention to detail, especially when the finished piece looks untouched, retaining its original beauty and integrity.
My Tips for Long-Term Durability and Preservation
Long-term success in veneer repair hinges on proper sealing and finishing. I always recommend applying a high-quality clear coat, such as polyurethane or lacquer, after the repair is complete. This protective layer guards against moisture, scratches, and everyday wear. Regular maintenance, like gentle cleaning with a soft cloth and avoiding harsh chemicals, prolongs the life of the repair. Additionally, periodic touch-ups with matching stain or finish can help maintain the visual uniformity over time. Remember, the goal is not just a quick fix but a durable, lasting restoration that preserves the furniture’s character for years to come. Exploring advanced techniques, such as proper finishing methods, can elevate your skills and ensure your repairs stand the test of time.
Invitation for the DIY Community
If you’re passionate about restoring furniture or tackling veneer repairs, I encourage you to share your experiences and techniques. Every project teaches us something new, and exchanging insights can inspire others to elevate their craftsmanship. Whether you’re experimenting with new materials, facing a tricky surface, or perfecting your color matching skills, your journey can motivate fellow DIY enthusiasts. Feel free to leave comments, ask questions, or share your success stories—our community grows stronger through shared knowledge and passion for the craft.
Overcoming the Challenges of Curved and Textured Surfaces in Veneer Restoration
One of the most rewarding yet demanding aspects of veneer repair is working on curved or textured surfaces. Unlike flat panels, these surfaces require a tailored approach that combines flexibility, precision, and a deep understanding of material behavior. I’ve found that using custom-cut flexible veneer strips allows me to conform seamlessly to intricate contours, preserving the furniture’s original aesthetic. When working on such surfaces, I also employ heat and moisture to enhance the pliability of veneer, making it easier to shape without cracking or warping. Applying adhesive with a fine brush ensures even coverage, preventing air bubbles or uneven bonding. Using soft clamps or weighted pads helps achieve a smooth, flush finish. This meticulous process demands patience but results in repairs that are virtually invisible, even on the most complex surfaces, elevating your craftsmanship to a professional level.

For a visual guide on working with curved veneer, consider examining detailed tutorials or expert demonstrations that showcase these techniques in action.
Advanced Color Matching Strategies for Perfect Seamlessness
Achieving an impeccable color match in veneer repair transcends basic staining. It involves a nuanced understanding of how different stains, dyes, and finishes interact with the natural grain and aging of the wood. I often experiment with a combination of custom stains and wood dyes, applying small test patches on scrap veneer to dial in the exact hue before proceeding. A trick I’ve learned from seasoned restorers is to apply a thin layer of clear finish over the stained area, which reveals the true color once dried, allowing for fine adjustments. For stubborn mismatches, blending multiple stains or using a touch of artist’s oil paints can help fine-tune the tone, ensuring the repaired area blends seamlessly with the surrounding veneer. This process requires patience and an artistic eye but yields results that are indistinguishable from the original, preserving both the appearance and value of your furniture.
Exploring expert guides on color matching can significantly improve your restoration outcomes, especially for valuable or antique pieces.
Ensuring Long-Term Durability Through Proper Finishing and Maintenance
Durability is the hallmark of a successful veneer repair. To achieve this, I emphasize the importance of using high-quality adhesives and finishing products. After completing the repair, I apply a protective clear coat—such as polyurethane or lacquer—to shield the surface from moisture, scratches, and daily wear. Regular maintenance, including gentle cleaning with a soft cloth and avoiding harsh chemicals, extends the lifespan of the restoration. For added protection, I recommend periodic touch-ups with matching stain or finish, which helps maintain a uniform appearance over time. Additionally, exploring advanced finishing techniques like proper finishing methods ensures your repairs are resilient and aesthetically enduring. Taking these steps transforms a temporary fix into a lasting restoration that preserves your furniture’s character and integrity for years to come.
Consider consulting detailed guides or expert workshops to deepen your understanding of advanced finishing techniques.
Inviting the DIY Community to Share and Grow
Mastering veneer repair is an ongoing journey, and sharing your experiences can inspire and educate others. I encourage you to document your projects, experiment with new materials, and engage with online forums or local workshops. Each repair, whether simple or complex, offers valuable lessons that can refine your skills and broaden your creative horizons. If you’re eager to elevate your craftsmanship, explore additional resources such as beginner-friendly DIY projects to build foundational skills, or delve into specialized techniques through professional courses. Remember, every successful repair not only enhances your confidence but also contributes to a vibrant community of passionate DIY enthusiasts eager to share their insights and innovations. So, don’t hesitate—your next masterpiece awaits, and your shared journey can inspire countless others to pursue excellence in furniture restoration.
Things I Wish I Knew Earlier (or You Might Find Surprising)
Patience Is Your Best Ally
Early in my veneer repair journey, I underestimated the importance of patience. Rushing through the process often led to visible imperfections. Over time, I learned that taking my time, especially during color matching and feathering edges, yields flawless results that are virtually invisible.
The Power of Practice on Scraps
I discovered that practicing techniques on scrap veneer before working on cherished furniture saves headaches and helps refine skills. It’s a small step that dramatically boosts confidence and accuracy.
Understanding Grain Direction
One hidden truth is how critical grain alignment is. Ignoring grain flow can result in repairs that stand out. Paying close attention to grain direction during patching and staining makes all the difference in maintaining the furniture’s integrity.
High-Quality Materials Make a Difference
Using top-tier adhesives, stains, and finishes might cost more upfront but ensures durability and a seamless appearance. Investing in quality pays off in long-term satisfaction and furniture longevity.
Curved Surfaces Require Flexibility
Repairing veneer on curved or irregular surfaces demands flexible patches and gentle shaping techniques. I’ve found that heating and moistening veneer strips before application helps them conform perfectly, preserving the original contours.
Resources I’ve Come to Trust Over Time
- DIY Kutak’s Guide to Veneer Repair — This comprehensive resource offers detailed, step-by-step instructions that have been invaluable in my projects. It’s written by experts who understand the nuances of veneer repair.
- Wood Magazine — Their articles and tutorials provide trusted insights into woodworking and veneer techniques, helping me stay updated on best practices.
- Fine Woodworking — This publication combines expert advice with practical tips, elevating my craftsmanship and understanding of finishing techniques.
- YouTube channels dedicated to furniture restoration — Visual demonstrations have helped me grasp complex techniques like feathering and grain matching more intuitively.
Parting Thoughts from My Perspective
Mastering veneer repair is a rewarding journey that combines patience, precision, and a willingness to learn. The key takeaway is that even challenging repairs can become seamless with the right techniques and quality materials. I encourage anyone interested to experiment on scrap pieces first, invest in good tools, and explore trusted resources like this guide. Remember, every successful repair enhances your confidence and skills, turning you into a true craftsman. If this resonates with you, I’d love to hear your thoughts or see your projects. Share your experiences in the comments or pass this article along to someone who might find it helpful. Happy restoring!”},
Reading about the detailed process of veneering repair really resonated with me, especially when it comes to colour matching. I recently tried restoring a vintage coffee table with similar issues, and I found that experimenting with different stains on scrap veneer beforehand was essential. My challenge has often been achieving a seamless blend, particularly with uneven grain. Your tip about applying a thin layer of clear finish to see the true colour before finalising the stain is a game-changer. Also, working on curved surfaces has always seemed daunting, but I appreciate the advice on heat and moisture for better shaping. Has anyone here experimented with using artist oils or other alternative dyes for coveted colour matches? I’d love to hear about different approaches that have worked for others and any tips for maintaining longevity after the repair is complete.
Your journey into mastering veneer repair really resonates with me, especially the emphasis on patience and understanding the grain. I recently worked on restoring an antique cabinet with some peeling veneer and found that the key was carefully feathering the edges with fine-grit sandpaper, as you mentioned. I also experimented with a mix of custom stains and even a touch of artist’s oils to get a closer match, which proved effective but required a delicate hand to avoid uneven colouring. One thing I’ve learned is that using heat and moisture not only softens veneer for shaping curved surfaces but also helps in gently conforming veneer strips without cracking. Has anyone tried using veneer stabilisers or fillers for long-term reinforcement? I’d be curious to hear how effective those are in preventing future issues. Overall, meticulous preparation and patience seem to be the main ingredients in achieving invisible repairs—any other tips for improving grain matching on complex surfaces? Keen to learn about others’ experiences.