My Journey into the Art of Throwing Large, Intricate Vessels
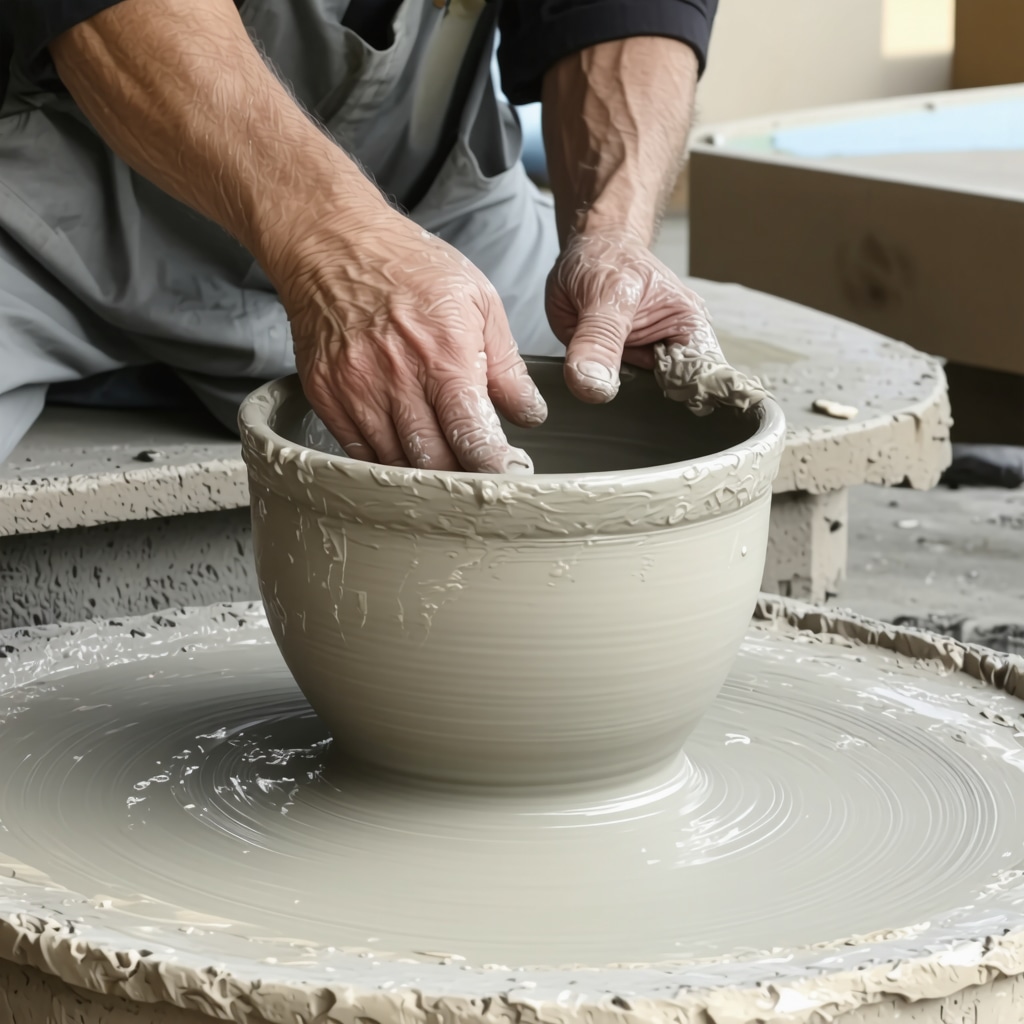
When I first started working with the pottery wheel, I was fascinated by the challenge of creating large, complex vessels. I vividly remember the first time I attempted to throw a sizable, multi-layered vase; it was both exhilarating and humbling. The process pushed my skills and patience, but the sense of achievement was unparalleled. Over time, I learned that mastering the art of throwing large and complex forms requires a blend of technical skill, creative vision, and a deep understanding of clay behavior.
Unveiling the Secrets of the Pottery Wheel for Big & Intricate Forms
One of the most critical aspects I discovered is the importance of proper centering and consistent pressure. As I experimented, I found that maintaining an even speed and applying gentle, controlled pressure allowed me to build up the walls gradually. To achieve large, complex vessels, I often used a combination of coiling and wheel-throwing techniques, seamlessly blending them to create unique shapes. I also learned to work with different clay bodies, as some are more forgiving when shaping large forms. For detailed guides and expert tips, I recommend checking out resources like step-by-step DIY guides.
How to Overcome Common Challenges in Large-Scale Pottery
Throwing large vessels often comes with issues like wall collapse, uneven thickness, or cracking. I faced these hurdles early on, and my breakthrough came from adjusting my clay preparation—ensuring it was properly wedged and free of air bubbles. Additionally, I found that using a combination of internal and external supports during the wheel-throwing process significantly improved stability. Patience is key; sometimes, I would let the piece dry slightly before refining or trimming to prevent distortion. For further insights, I often consult authoritative sources like advanced craft techniques.
What are the best ways to plan and design large, complex pottery forms before throwing?
In my experience, sketching your design beforehand and breaking down the form into manageable sections makes the process smoother. I also use coil building to add intricate details or to extend the height of my vessels before refining on the wheel. Experimenting with different clay thicknesses and wall densities helps me achieve the desired strength and aesthetic. Remember, each piece is a personal story—embracing imperfections often leads to more authentic art. If you’re eager to explore more creative ideas, I encourage you to visit creative DIY crafts.
Are you ready to elevate your pottery skills? Share your experiences or ask questions in the comments below—I love hearing about your creative journeys. Whether you’re just starting or are an advanced ceramicist, there’s always room to grow and innovate with your pottery wheel techniques!
Innovative Approaches to Planning and Designing Your Large-Scale Pottery
One of the most effective strategies I’ve found for creating complex, large pottery pieces is meticulous planning. Sketching detailed designs allows you to visualize the final form and anticipate potential structural challenges. Breaking down the vessel into sections—such as a base, body, and neck—helps manage the workflow and ensures proportionate scaling. Incorporating coil building techniques before wheel-throwing not only adds intricate details but also allows for more control over the vessel’s height and complexity. Experimenting with different clay thicknesses during the planning phase is crucial; thicker walls lend strength, while thinner sections contribute elegance. Remember, embracing imperfections and unique asymmetries can lend character and authenticity to your work. For comprehensive guidance on foundational and advanced pottery techniques, explore step-by-step DIY guides.
Overcoming Common Challenges in Large-Scale Pottery
Creating sizable vessels often involves hurdles like wall collapse, cracking, or uneven thickness. My experience has shown that thorough clay preparation is paramount; ensuring the clay is well wedged and free of air bubbles prevents structural issues. Using internal supports, such as wooden or metal ribs, during the initial stages can maintain shape and stability. Additionally, adjusting the moisture content—keeping the clay slightly drier during the shaping process—reduces the risk of distortion. Patience is essential; sometimes, allowing the piece to dry slightly before refining or trimming helps maintain integrity. For more expert techniques on managing large projects, consult sources like advanced craft techniques.
How Can Understanding Clay Behavior Elevate Your Pottery Creations?
Deepening your knowledge of clay properties—such as plasticity, shrinkage, and drying behavior—can significantly enhance your ability to craft intricate vessels. Different clay bodies respond uniquely to shaping and drying; some are more forgiving for large, delicate structures, while others require meticulous handling. For instance, high-plasticity clay allows for more complex forms without cracking, but it also demands precise wedging and moisture control. Understanding these nuances enables you to troubleshoot effectively during the creation process, reducing waste and increasing success rates. If you’re eager to dive deeper into the science of clay, resources like smart DIY projects offer insights into material behavior and innovative techniques.
Would you like to explore how to incorporate mixed media or surface decoration into your large vessels? Sharing your ideas and challenges in the comments can inspire new approaches and collaborations. For more inspiration and expert tips, visit creative DIY crafts.
Deepening the Craft: Embracing Complexity in Large Pottery
Over years of dedicated practice, I’ve come to appreciate that creating large, intricate vessels isn’t just about technical skill—it’s a dance with the material, an ongoing dialogue between intention and behavior of the clay. One of the most subtle challenges I faced was managing the internal stresses that develop during the drying process. The more I understood about the internal tension within large sculptures, the better I became at designing forms that accommodate or even utilize these stresses, resulting in more resilient and dynamic pieces. For a deeper dive into material science and how it influences large-scale ceramics, exploring authoritative resources like advanced craft techniques has been invaluable.
Refining Your Approach: Advanced Planning and Structural Integrity
When I begin a complex piece, I often sketch multiple iterations, embracing imperfections as part of the creative process. I’ve learned that incorporating internal supports—such as armatures or temporary framework—can significantly prevent deformation during the throwing process. Moreover, experimenting with clay bodies that have different plasticities allows me to customize the work to specific forms. For example, using a high-moisture clay for the initial shaping and then switching to a drier mix for trimming ensures better control and prevents cracks. This layered approach to planning and execution transforms the process into a series of manageable stages, each building on the last. If you’re interested in exploring more about structural support methods, I recommend visiting creative DIY crafts.
Conquering Cracks and Warping: My Personal Strategies
One persistent obstacle in large pottery is warping during drying. My solution has been to implement slow, controlled drying schedules, often covering the piece with plastic to regulate moisture loss gradually. I also find that applying a thin slip or scoring the surface before assembly can help reduce internal stresses that lead to cracking. During firing, I always use a slow ramp-up to prevent thermal shock, especially with larger pieces. These steps, though time-consuming, have saved many projects from defects, reinforcing my belief that patience and meticulous preparation are the cornerstones of successful large-scale ceramics. For more insights into kiln techniques and firing schedules, I often consult resources at home improvement tips.
How can a deeper understanding of clay’s behavior influence your creative choices?
Understanding how different clay bodies respond to shaping, drying, and firing can profoundly impact your artistic process. For instance, a clay with high plasticity offers more flexibility in shaping complex forms, but it also requires more precise moisture control to prevent deformation. Conversely, a more rigid clay can hold structural details better but might be prone to cracking if not handled carefully. By experimenting with various clays and observing their behaviors, I’ve learned to select the appropriate material for each project, which opens up new creative possibilities. If you’re eager to delve into the science behind clay, I recommend exploring smart DIY projects that combine material science with innovative techniques.
Would you like to integrate surface decoration or mixed media into your large vessels? Sharing your ideas and challenges can foster a vibrant community of learning and experimentation. Feel free to explore more creative inspiration at creative DIY crafts and continue refining your craft with patience and passion.
Unlocking the Secrets of Clay Behavior to Elevate Large Vessel Craftsmanship
Delving into the intricacies of clay science has transformed my approach to creating formidable, large-scale ceramics. A profound understanding of how different clay bodies respond to shaping, drying, and firing has empowered me to anticipate and mitigate common pitfalls such as warping, cracking, and deformation. For instance, high-plasticity clays offer remarkable malleability, allowing for complex, delicate forms, but require precise moisture management—an insight I gained through extensive experimentation and observation.
By experimenting with various clay compositions, I’ve learned to tailor my material choices to specific project needs, resulting in more resilient and aesthetically compelling pieces. Incorporating additives like grog or sand enhances structural stability, especially in towering vessels, reducing internal stresses during drying. Moreover, controlling the drying environment—using gradual humidity shifts and protective coverings—has been essential in preventing internal tensions that lead to cracks. As an example, consulting authoritative sources such as advanced craft techniques has deepened my grasp of material science, guiding my process refinement.
What are the most effective ways to modify and optimize clay formulations for size and complexity?
Adjusting clay formulations involves balancing plasticity, shrinkage, and drying behavior—factors critical for large, intricate vessels. Incorporating grog or coarse sand can improve the clay’s structural integrity, allowing for larger constructs without compromising flexibility. I often experiment with blending different clay bodies, such as combining a high-plasticity clay with a grog-enhanced mix, to achieve the desired strength while maintaining workability. This meticulous formulation process enables me to push the boundaries of scale and detail, creating vessels that are both functional and artistically expressive.
Would you like to explore how advanced clay modification techniques can revolutionize your large-scale projects? Sharing your experiences or questions can inspire a community of dedicated ceramic artists. Dive deeper into innovative strategies by visiting smart DIY solutions.
Harnessing Internal Supports and Structural Supports for Scale and Detail
Achieving stability in large vessels often demands the use of internal supports—armatures, temporary frameworks, or slip-in molds—that maintain shape during the critical drying phase. My personal success with incorporating lightweight internal armatures has prevented deformation, especially in tall, slender forms. When combined with strategic wall thickness variations, these supports facilitate intricate detailing without risking collapse or warping. The key lies in designing supports that can be removed or integrated seamlessly into the final piece, ensuring aesthetic cohesion and structural soundness.
Advanced techniques like using plaster slips or organic supports that burn away during firing have further enhanced my ability to craft complex, large vessels. For a comprehensive understanding of these methods, I recommend exploring advanced craft techniques, which include detailed insights into internal support strategies.
How can I predict and manage internal stresses during the drying and firing processes to prevent defects?
Predicting internal stresses involves a combination of experience, material science, and adaptive techniques. I monitor moisture levels meticulously, employing slow, staged drying schedules to ensure uniform moisture removal. Covering the piece with plastic or damp cloths helps slow the drying process, reducing the risk of cracking due to uneven shrinkage. During firing, I implement slow ramp-up schedules—often extending the initial heating phase—to allow thermal expansion and contraction to occur gradually, minimizing internal stress accumulation.
Incorporating internal supports that accommodate slight movements can further alleviate stress buildup. For advanced guidance on managing these critical stages, consulting sources such as home improvement tips can provide valuable insights into controlled drying and firing techniques.
Deepening Artistic Integrity Through Material Mastery and Structural Innovation
My journey has revealed that mastery over clay’s physical and chemical behavior unlocks new realms of creative expression. By embracing the material’s natural tendencies—such as shrinkage patterns and stress points—I design vessels that celebrate imperfections and asymmetries, transforming potential flaws into aesthetic features. This philosophy aligns with the principles outlined by advanced craft techniques, emphasizing the importance of understanding material science for artistic mastery.
For those committed to elevating their craft, continuous experimentation with formulations, supports, and firing schedules is essential. I invite you to share your insights or seek advice on complex projects—your journey inspires others and fosters a vibrant community of craftsmanship.
Things I Wish I Knew Earlier (or You Might Find Surprising)
1. The Power of Patience
One lesson I learned the hard way was how crucial patience is when working with large pottery forms. Rushing the drying or firing process often leads to cracks or warping. Slowing down and allowing each stage to develop naturally transformed my work from fragile to resilient.
2. Clay Behavior Can Be Your Best Ally
Understanding how different clay bodies respond to shaping and drying opened new creative doors. For example, high-plasticity clay allows for more intricate details but requires careful moisture management. Embracing these behaviors made my large vessels more successful and expressive.
3. Supports Are Not Cheating
Using internal supports or armatures during the throwing process isn’t a shortcut—it’s a technique that ensures structural integrity. I once ignored this and ended up with collapsed forms, but now supports are my trusted friends in complex projects.
4. Planning Saves Time and Frustration
Sketching and breaking down complex vessels into sections before starting on the wheel helped me maintain proportion and avoid surprises. It’s like mapping out a journey rather than wandering aimlessly.
5. The Material Science Side Can Be Artistic
Learning about clay shrinkage, stress points, and firing schedules allows me to design more daring and resilient pieces. It’s a blend of science and art that elevates craftsmanship to a new level.
6. Slow and Steady Wins the Race
From gradual drying to controlled firing ramps, taking my time has prevented many defects. Patience truly is a virtue in large-scale ceramics.
Resources I’ve Come to Trust Over Time
- Mastering Large-Scale Ceramics by Susan Peterson: An insightful book that delves deep into techniques and troubleshooting for big vessels, offering practical advice that’s helped me immensely.
- The Clay Behavior Guide by Peter Powning: This resource expanded my understanding of how different clay bodies react under various conditions, making my process more informed and deliberate.
- Firing Schedules at The Ceramic Shop: Their comprehensive firing schedule guidelines have saved me from thermal shock and cracking, especially with large pieces.
Parting Thoughts from My Perspective
Exploring the art of throwing large, intricate vessels has been a journey of patience, learning, and creativity. The more I understand about clay behavior, supports, and planning, the more confident I become in pushing boundaries. If this resonates with you, I encourage you to dive deeper into the science and craft—every mistake is a step toward mastery. Share your experiences or ask questions below—let’s grow together in this wonderful craft of ceramics!
,
I really resonated with the emphasis on patience and support during the creation of large, intricate vessels. I’ve found that using internal supports, especially when working with high-plasticity clay, makes a huge difference in maintaining shape and preventing cracks during drying. One trick I’ve experimented with is incorporating spring-loaded supports that can be removed once the clay is leather-hard—this allows for detailed carving or surface finishing without risking deformation. Have others had success with specific internal support techniques? I’d love to hear how you manage internal stresses, especially for very tall or complex forms. Also, I agree that planning and sketching ahead really streamlines the process and helps visualize potential issues early. For those starting out, what’s your biggest challenge when scaling up your work? I’m keen to learn more about how others have mastered these demanding projects.
Reading through this detailed post really made me reflect on my own experiences with large-scale pottery. I vividly remember the first time I attempted a multi-layered vessel, where internal supports became essential to prevent collapsing walls. I found that lightweight internal armatures, made from clay or supported with slip, not only maintained shape but also allowed me to work on surface details freely. Patience during drying is something I constantly remind myself—especially for taller or more complex forms—so slow, staged drying with plastic coverings has become my go-to strategy.
One challenge I continue to face is managing internal stresses during firing, which sometimes results in unexpected cracks. How do others here gauge the right timing for trimming or refining large vessels to avoid distortion? Have you experimented with specific clay bodies or additives to increase their resilience? I’d love to hear about techniques that have worked well for you in balancing structural integrity with aesthetic detail. Sharing those tips could really help others aiming to scale up their projects.
This post really resonated with me, especially the emphasis on meticulous planning and patience. I’ve been working on larger vessels myself and found that sketching out detailed designs beforehand truly saves time and reduces surprises during wheel-throwing. I also agree that incorporating coil building techniques prior to throwing gives more control over height and intricate details. One thing I’ve learned is that choosing the right clay body makes a significant difference—some clays respond better to large scales and complex forms, especially when supplemented with grog or sand to improve structural stability. I’m curious, how do others here manage internal stresses during drying to prevent cracks, particularly with very tall or delicate pieces? Do you prefer gradual drying setups or specific supports? I believe sharing these little nuances helps us all progress in this craft. Thanks for such an inspiring post—making me want to push my own limits with large-scale projects!
This post really hits home for me, especially the focus on meticulous planning and patience. I’ve been pushing myself to work on larger, more complex vessels, and finding that breaking down the design into manageable sections really makes a difference. I agree that experimenting with different clay bodies, like adding grog, can offer better stability and ease of shaping big forms. I’ve faced similar challenges with cracking and warping, and slow, staged drying—using plastic covers and internal supports—has been a game-changer in preventing defects. What’s your approach to adjusting moisture levels during the shaping process? I often find that fine-tuning moisture is key to maintaining structural integrity without sacrificing flexibility. Would love to hear how others manage drying schedules for their large projects, especially when working with delicate surfaces or intricate details. This discussion motivates me to continue refining my techniques and embracing the complexities of large-scale ceramics.
I really appreciated this in-depth discussion on large vessel techniques. I’ve found that consistent and slow drying is absolutely crucial; I usually cover my work with plastic and slowly peel back the layers over a week or more depending on size. It’s interesting how you mentioned internal supports—I’ve had great success using foam or plaster supports that are removable after drying. One challenge I often face is controlling the internal stresses during drying and firing, especially with very tall or delicate pieces. Have you experimented with specific clay blends or additives like grog to enhance stability? Also, I’ve been thinking about how to better incorporate surface decoration into these large forms without compromising structural integrity. What’s everyone’s approach to balancing aesthetic detail with structural strength? Would love to hear more about your strategies, especially for complex designs.